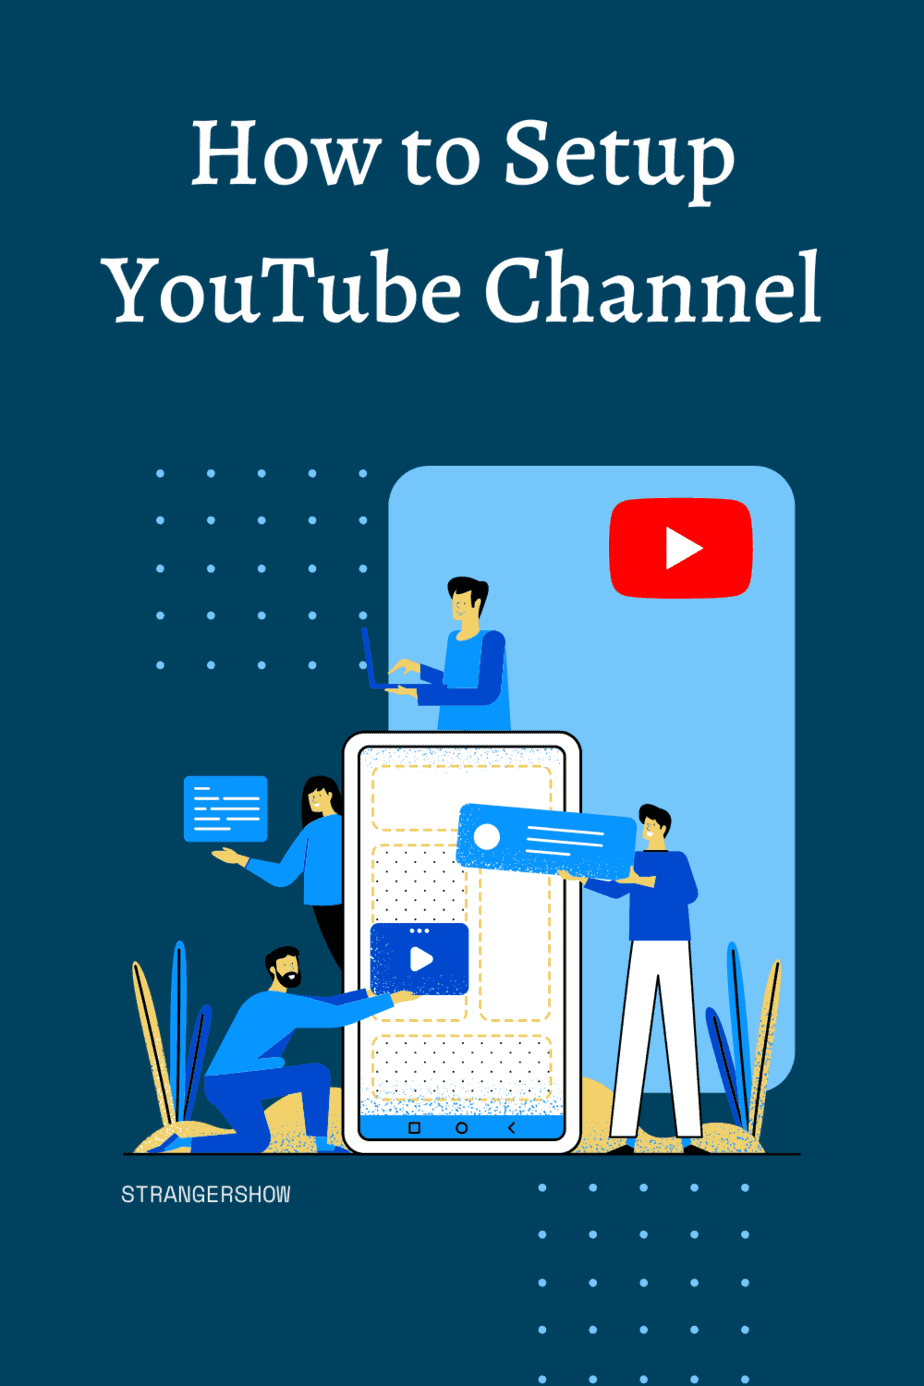
In the previous post, we have seen how to start a YouTube channel, and so now we’ll see how to set up a YouTube channel.
Moreover, if you are reading this post, you are in the community of YouTube money-making. Whatever business you’re doing, the initial step you have to do is “to organize the atmosphere of work.” The same formula applies to YouTube also.
Setting up your YouTube channel is the most needed process for both YouTube SEO and audiences. Creating the channel doesn’t mean you are in the YouTube money-making market.
So, in this post, I’ll explain the step-by-step process of setting up the YouTube channel. If you’re a beginner-level YouTuber, you must concentrate a little more on these steps, which I’m going to communicate.
Suppose you have already done these settings below; check once again whether the setup is correct.
Create and Set up YouTube Channel
I hope you have already created the YouTube channel; if not, kindly review the quick guide below. Otherwise, skip the creation section and move on to the setup part.
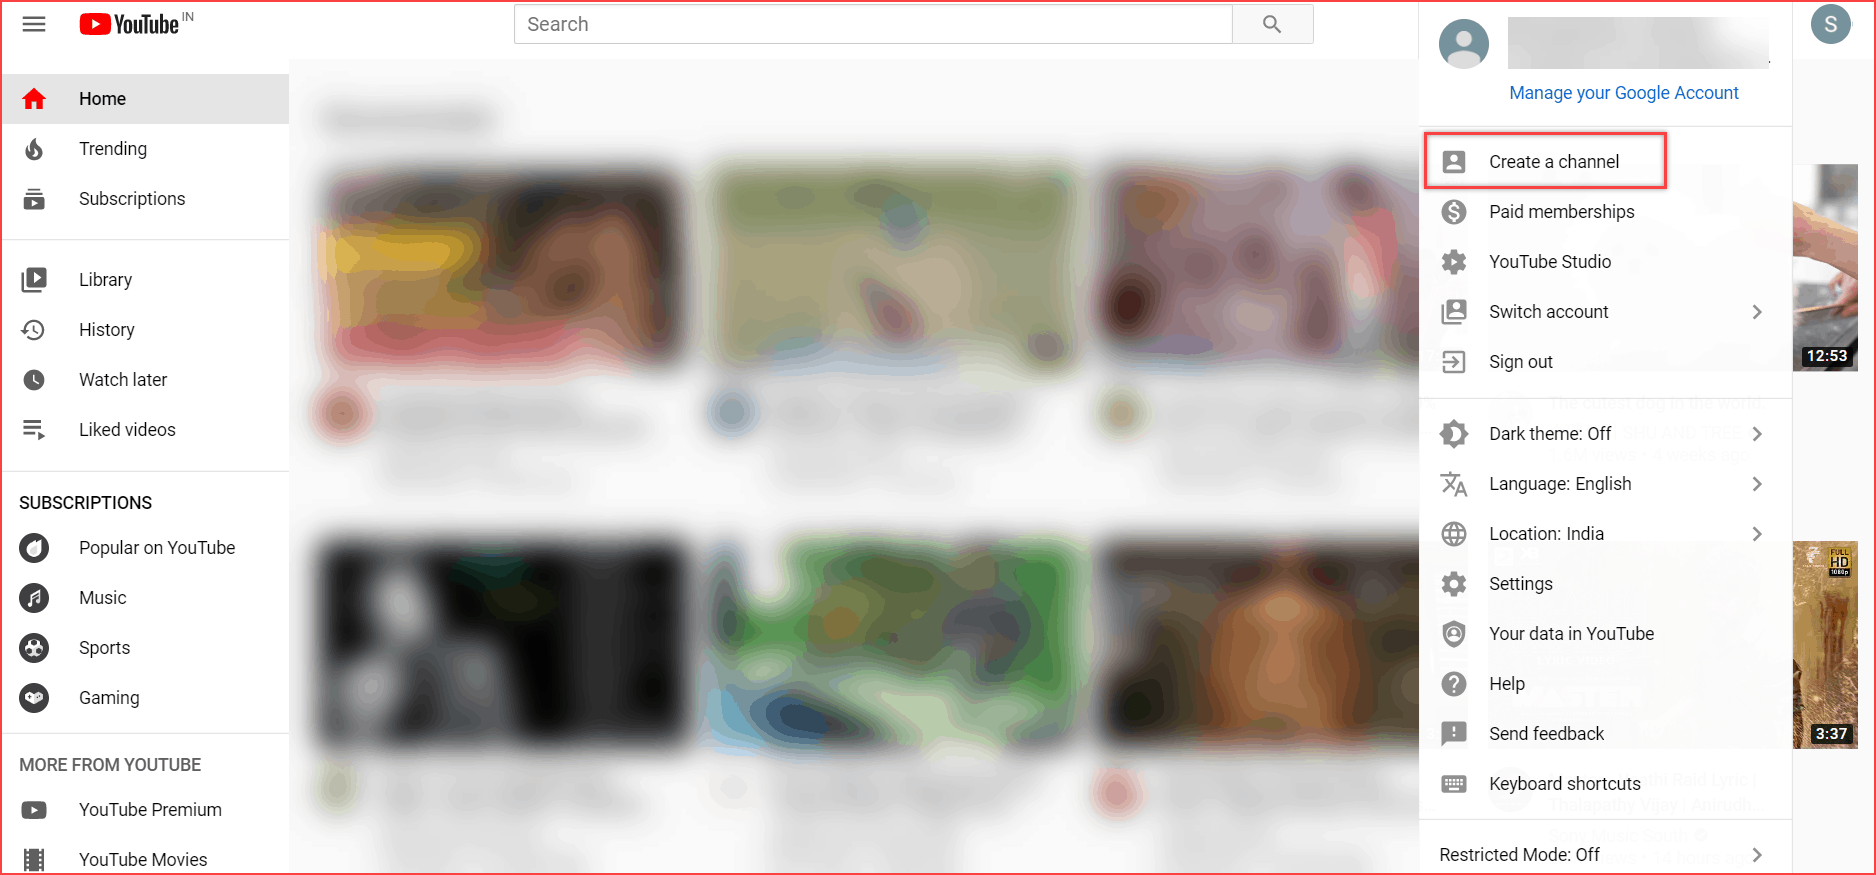
Firstly, you need to have a Gmail or Google+ account; if you don’t, kindly create a Gmail account and go to YouTube. Moreover, try to use this account only for channel purposes. Hence, you can easily monitor your channel performance in the future.
- Go to YouTube.com > Create a channel.
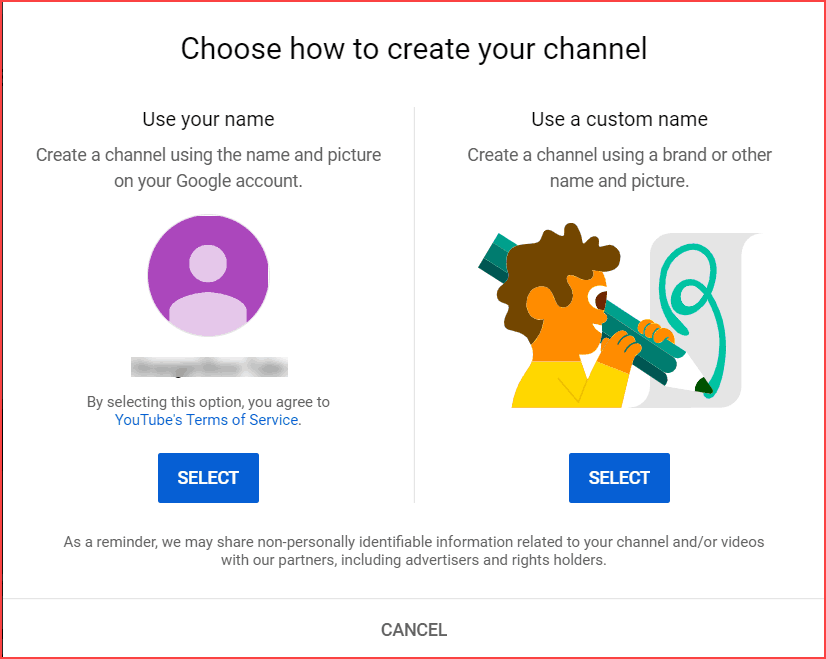
Now, you will see a dialog (refer to the image below); you can use your “Gmail account name and pictures” as your channel name or a custom channel name. Here I’m going to use the custom name.
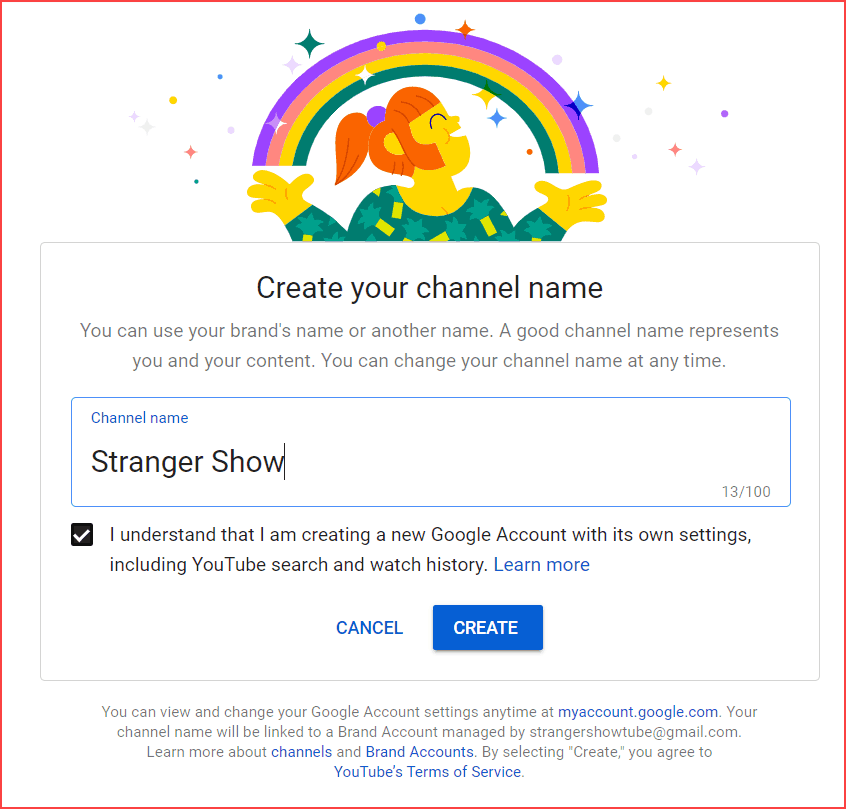
Now, enter your “Channel name” and click the create button.
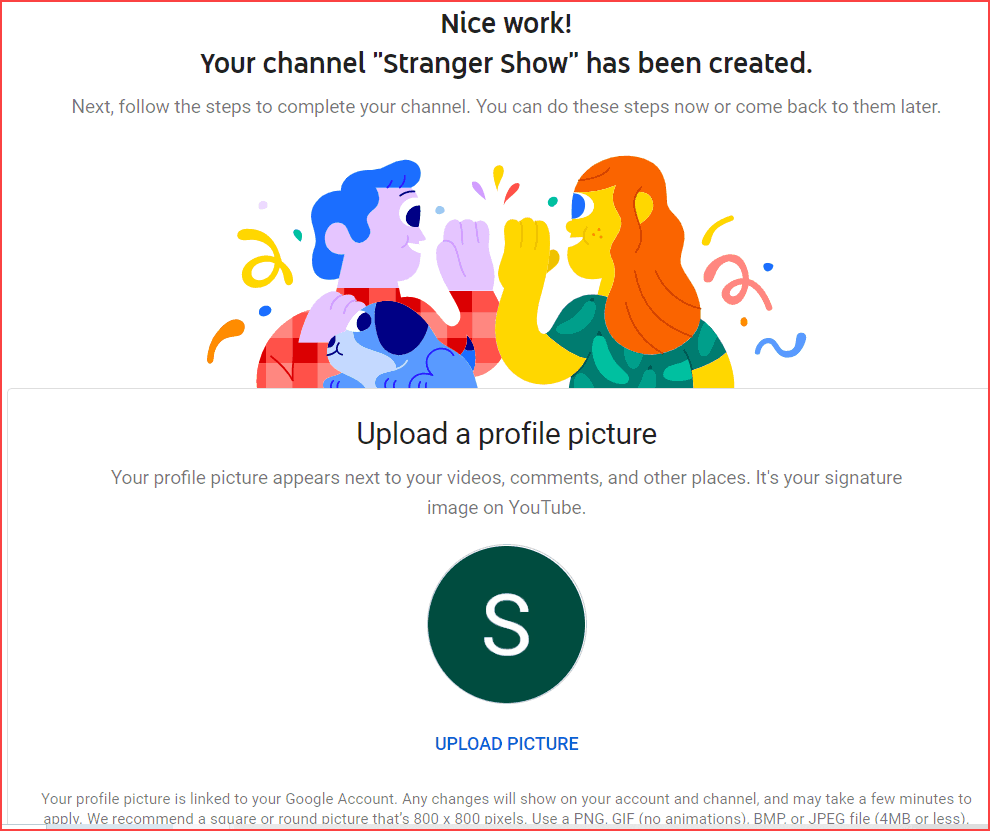
Once your channel has been created, it’s time for a quick setup of a channel, like uploading a profile picture and adding a channel description, official website links, and social links.
Profile Picture
Upload your channel profile picture. Make sure it must be unique and don’t change it frequently. Few people upload their brand logo as their channel picture. It’s a good try.
If you want to create a logo for the channel, try the Logaster software to make an attractive channel profile picture.
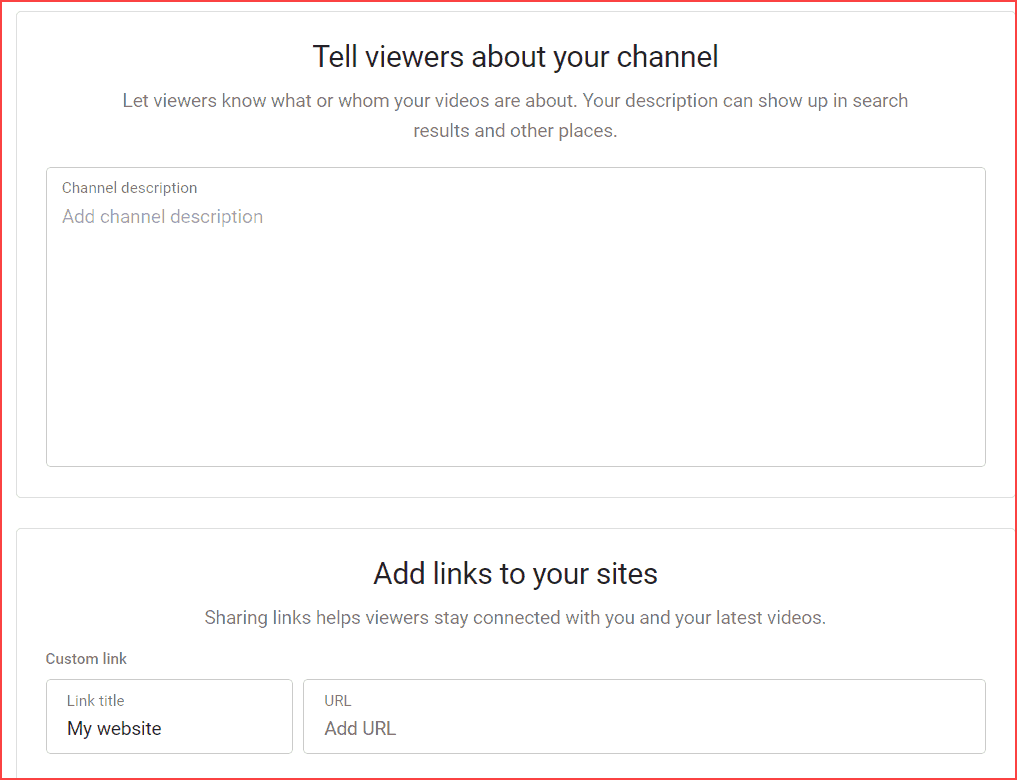
Channel Description
Add a short description of your channel and the link to your official website.
To be frank, when a new audience comes to the channel, they initially check the channel About page (where you write the channel description). If they were attracted by it, then the audience is your subscriber.
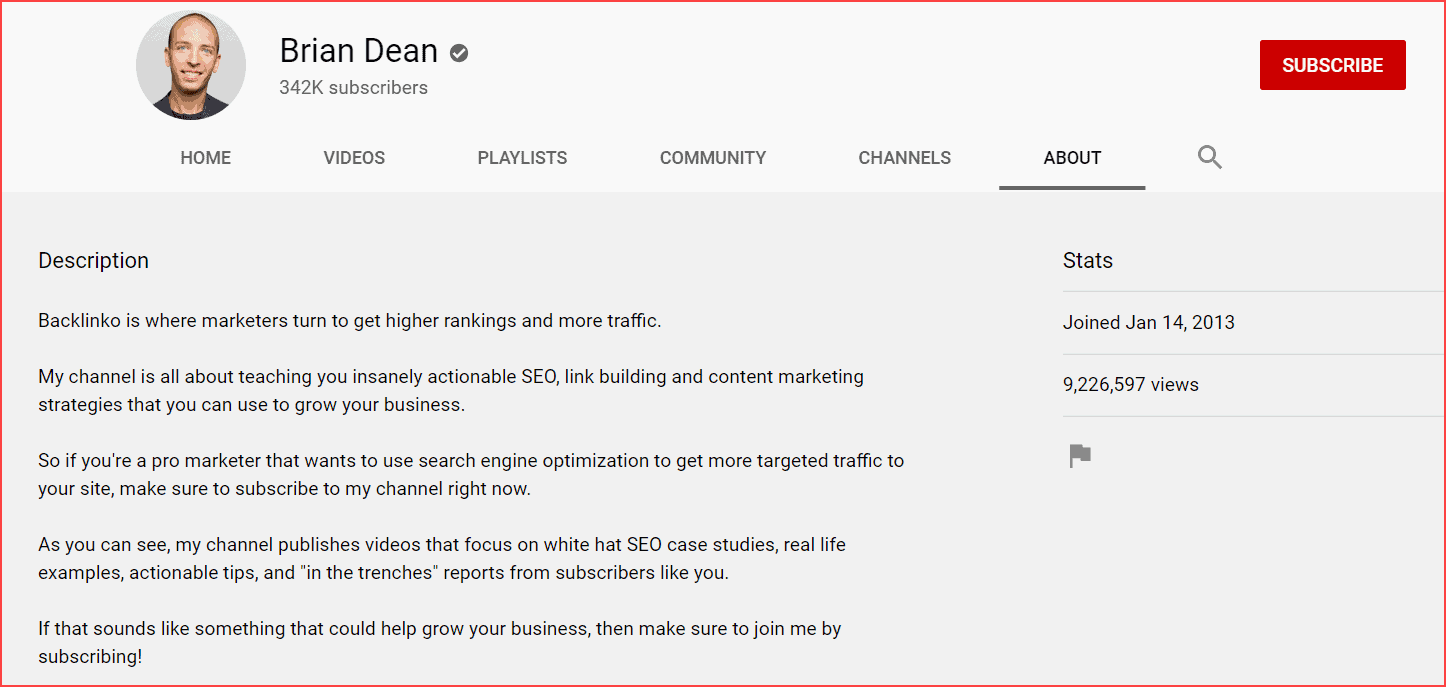
In a nutshell, adding a channel description leads to adding more value to your channel.
When new subscriber comes to your channel, they’ll see your “About” section to learn more about your channel. It might create a destructive impact if it’s empty or less informative. Hence, kindly add your channel description to avoid disappointing your viewers.
Note: I recommend you write at least 200 valid, attractive words with no grammatical errors.
Also, most failed to create the description without mistakes while setting up a YouTube channel. So, here Stranger Show brings you the solution-free tool called Grammarly. Grammarly is an English grammar writing assistant tool. It helps to create valuable words in your description.
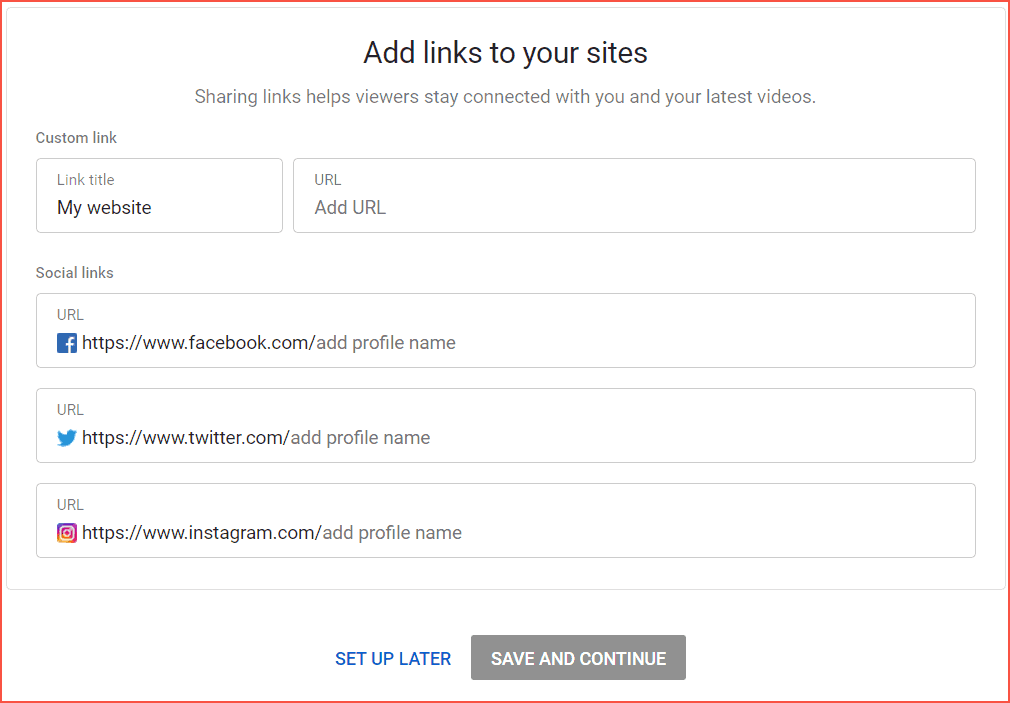
Link Social Sites
I hope you have personal or business social profile accounts. Add those social profiles here. Once done, click the “save and continue button.” In the meantime, you can edit these settings at any time.
After that, instantly, you will redirect to the customize channel page, and here click the “CUSTOMIZE CHANNEL” button.

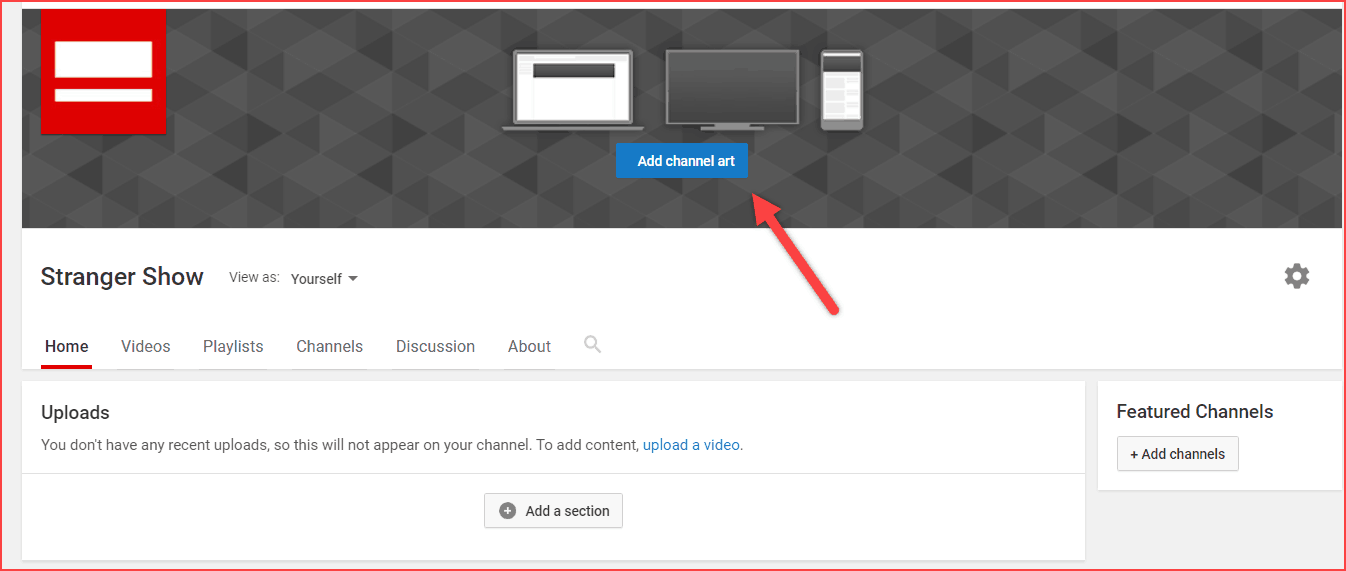
Add Channel Art
Channel art is nothing but the cover picture of your channel, which is used to attract and define your channel in a picturization mode to the audience. The most important thing is it needs to reflect your brand.
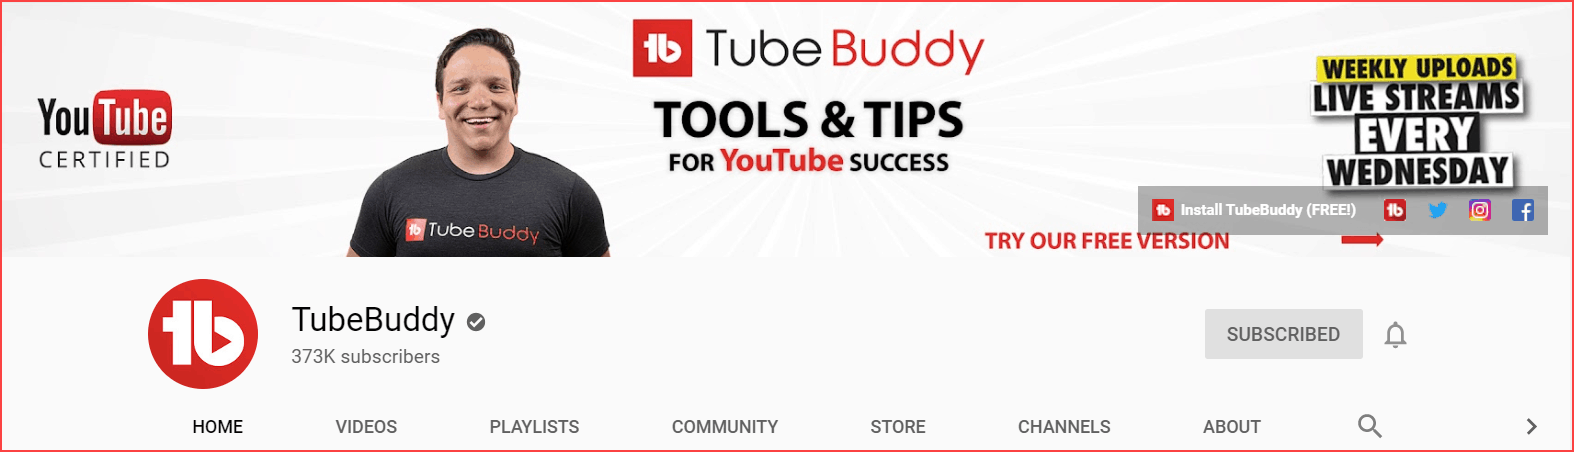
For example, look out for the above TubeBuddy channel art.
But, most of the newbie YouTubers make a mistake here: adding unrelated and familiar pictures as channel art.
What is the use of adding unrelated images in your channel art? Is that make any sense? No, it only makes you less information about your channel to the viewers. So, kindly upload the image related to the channel niche.
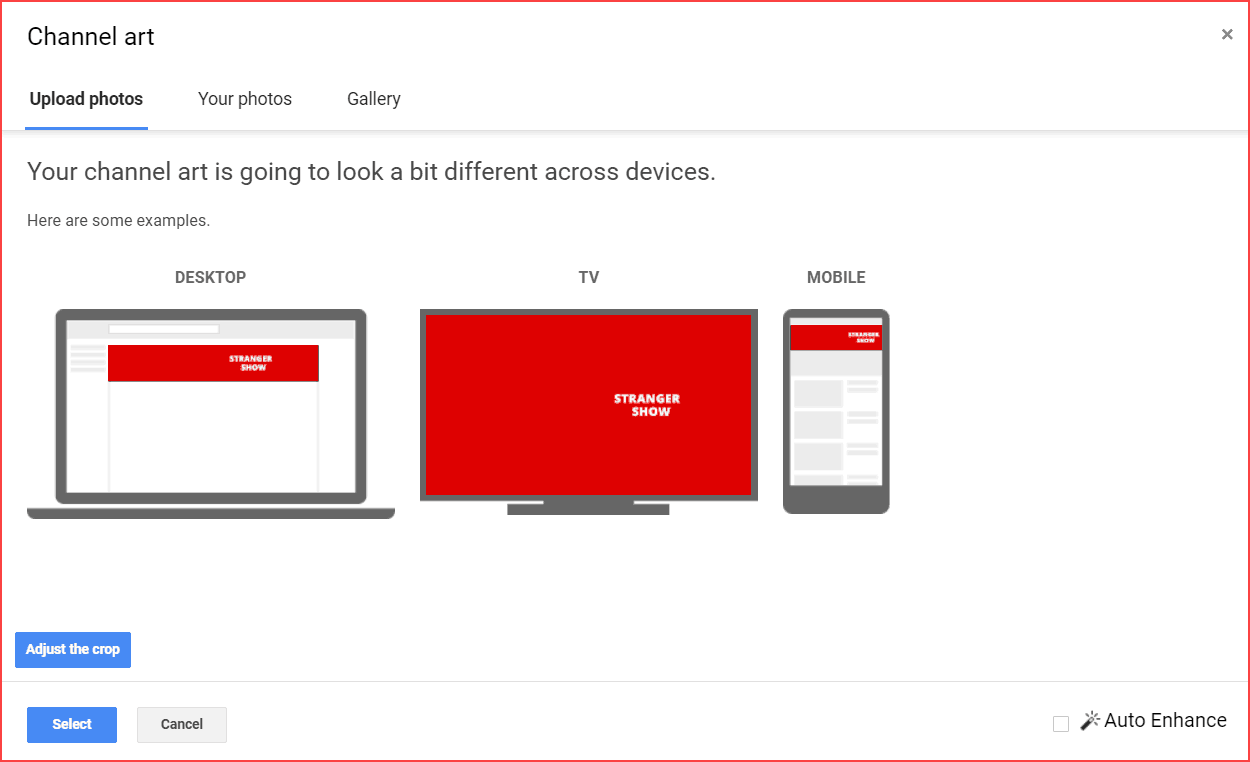
Once you upload your images, it will show up the pictures on different devices. Adjust the photos if you want to crop, then click the “Select” button.
Note: To create beautiful channel art, use the free editing software tool called Canva. It is available in both Desktop and Mobile app versions.
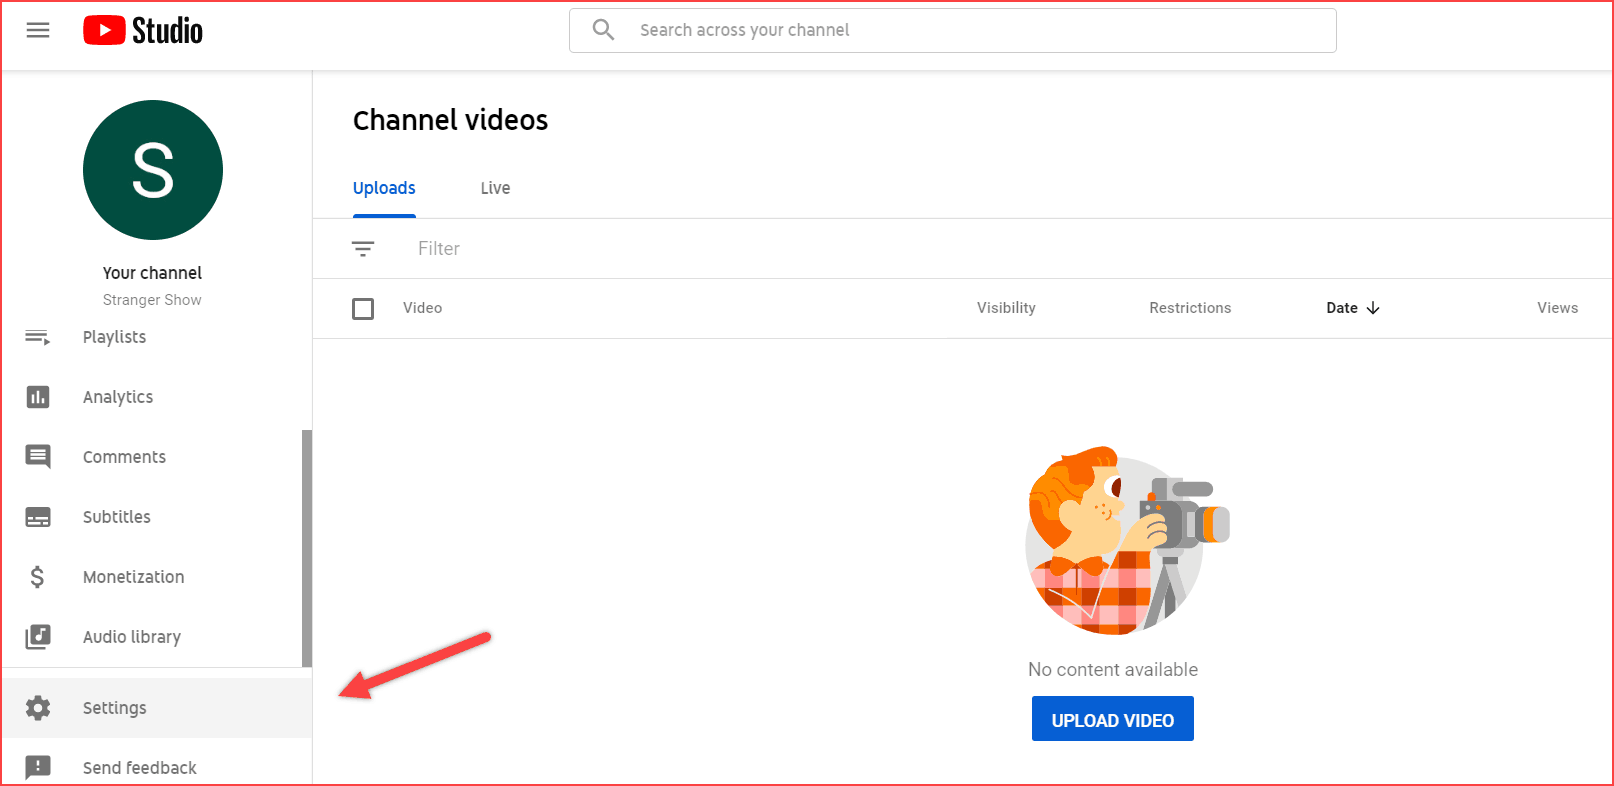
Main Settings
Now, it’s time to do the main settings. Kindly go to YouTube Studio > click “Settings” on the left sidebar.
Click on Settings, and here you will get the small dialog of Settings. Firstly, choose your currency details.
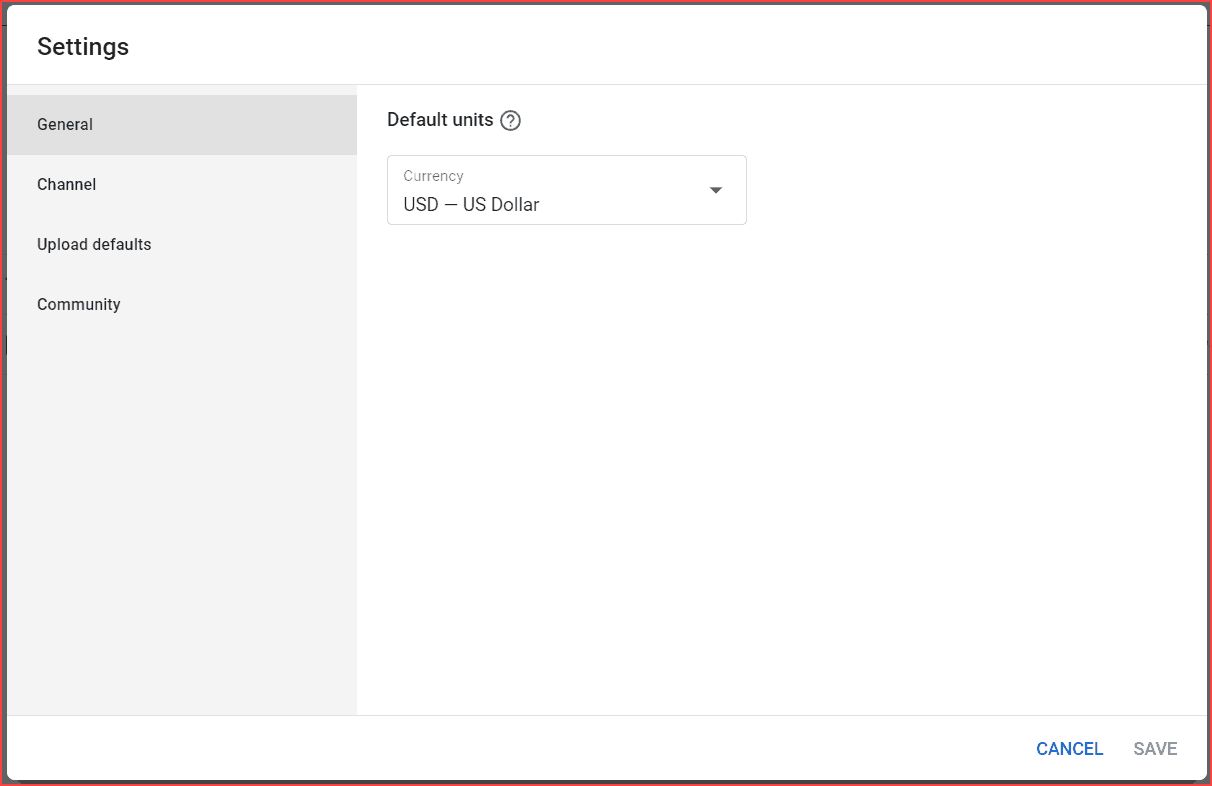
Next, in the channel section tab, you will allow choosing your country and channel keywords.
Choose the country where you’re living.
Adding keywords related to your channel niche is very helpful for the SEO process. Moreover, this is one of the important sections you must take care of.
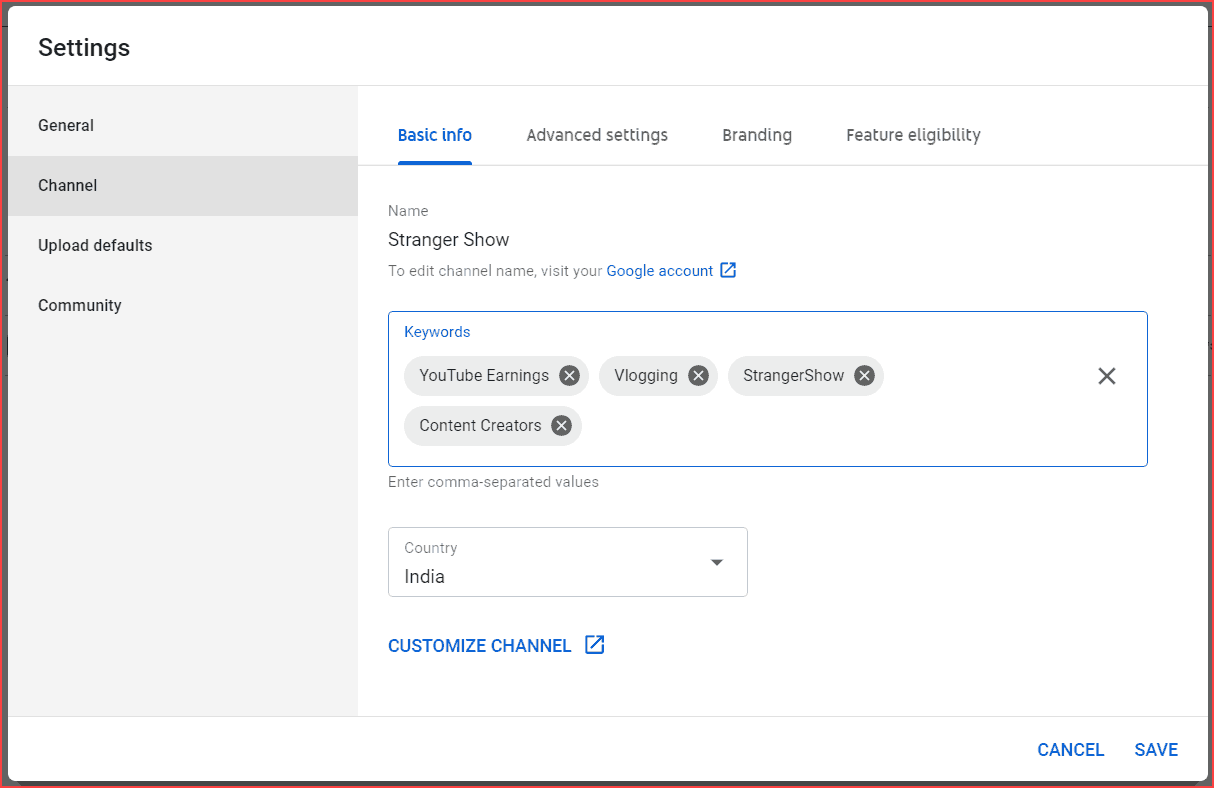
For example, if your channel topic is related to “food preparing tips,” you must use high search volume, low competition food-related keywords. Also, adding more keywords doesn’t mean you will get more views. The Gamechanger is the proper keyword.
You may ask how to get high search volume and low-competition keywords.
The answer is with the help of a YouTube-certified keyword finder tool called TubeBuddy. Also, this tool has many more features for beginner-level YouTube creators.
Read below how to find competitors’ used keywords by this tool.

Advanced Settings
Next, move to the Advanced settings tab.
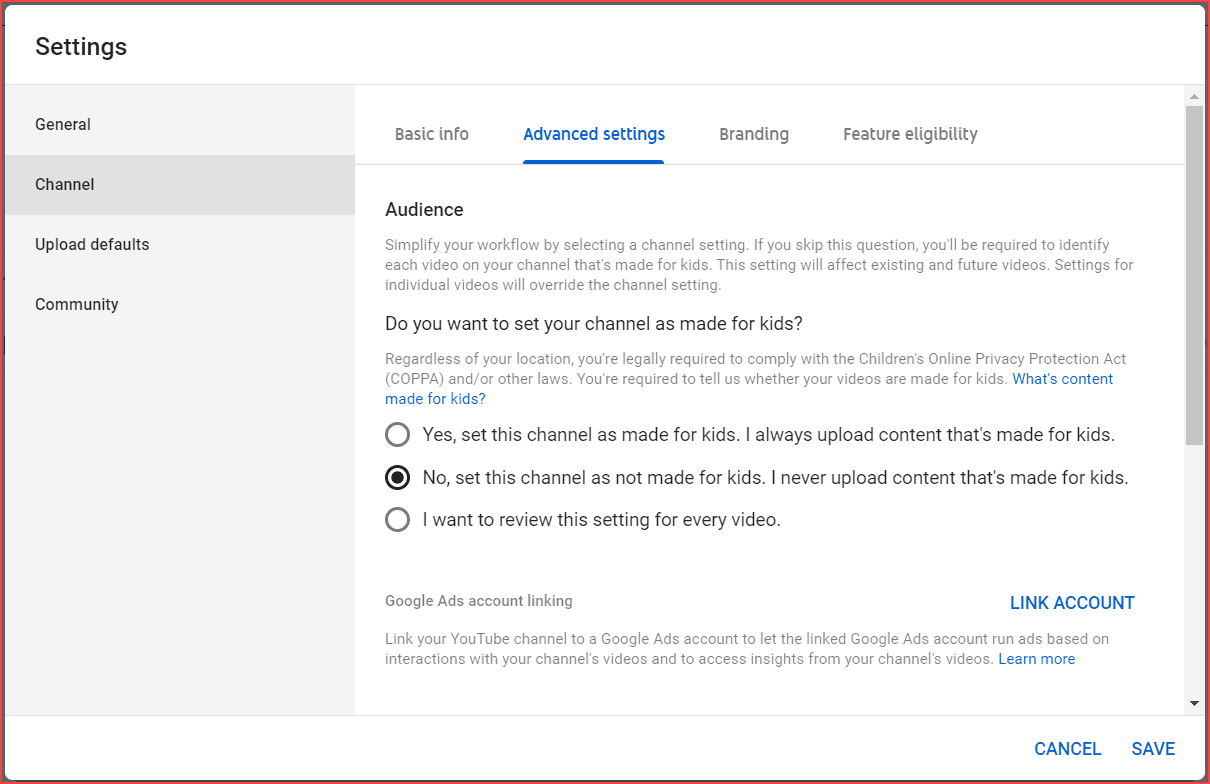
Is that your channel targeting audiences are kids? YouTube added this new setup for channels in 2020 to comply with COPPA (Children’s Online Privacy Protection Act). For children’s safety purposes, YouTube must ask whether your channel’s target audience is kids.
If the contents are for kids, choose the first checkbox option. Here I write a detailed article about the consequences of making videos for kids’ content. Read the below article to know more about it.
Then, scroll down and check the “Display the number of people subscribed to my channel” option to display your subscriber count publicly.
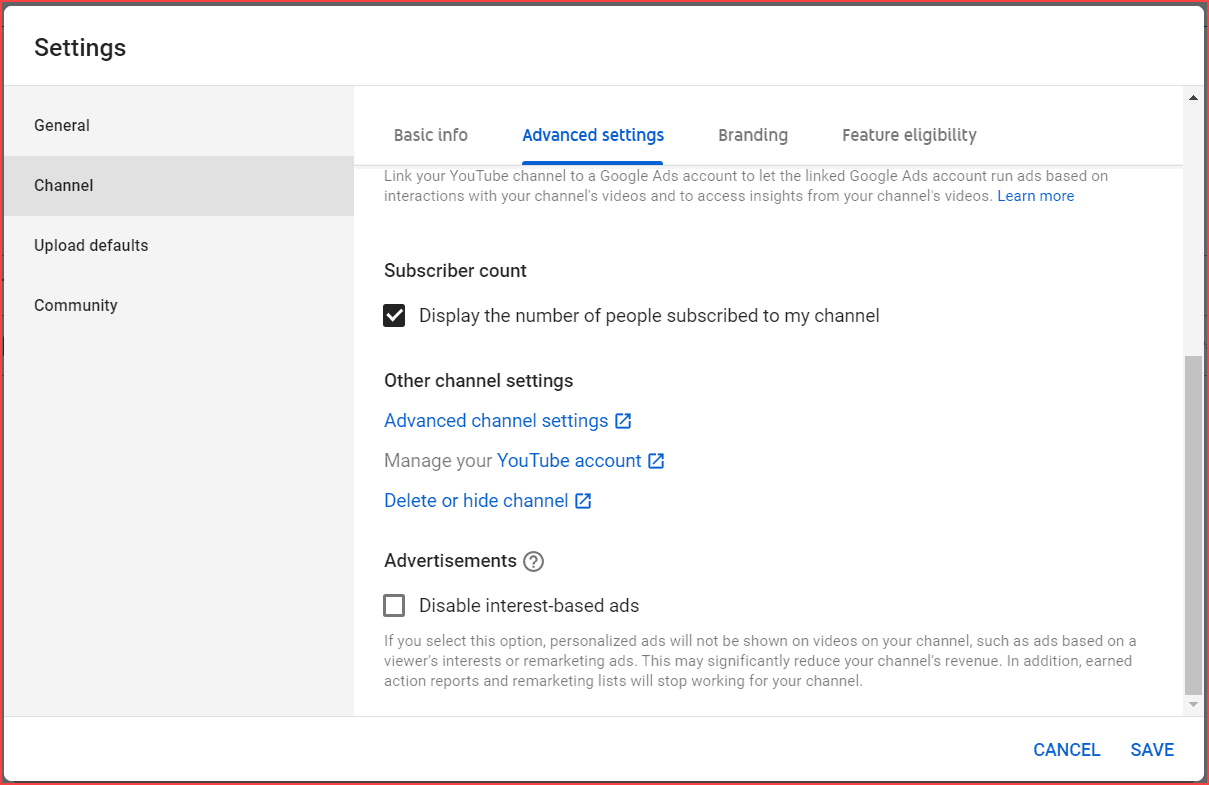
Also, kindly un-check the “Disable internet-based ads.” The reason is,
“Disable Interest-based ads” remove the ads totally related to viewers’ interests. If you check the “Disable Interest-based ads”, your channel revenue will get reduced. Let me clear you with the below example.
Google AdSense will show ads on your videos based on the topic of your channel and the audience’s interest-related ads.
If your channel is about a food-related topic, and the audience interest topic is “reading books” means, the ads may show related to books. So, maybe there is a chance for clicking the ads by the audience, and you will get more revenue.
If you check the “Disable Interest-based ads” option, the viewer-interest-related ads will not show in your videos. Consequently, your ads have less chance of CTR (click-through rate). Therefore, don’t check this option if you want to make money on YouTube.
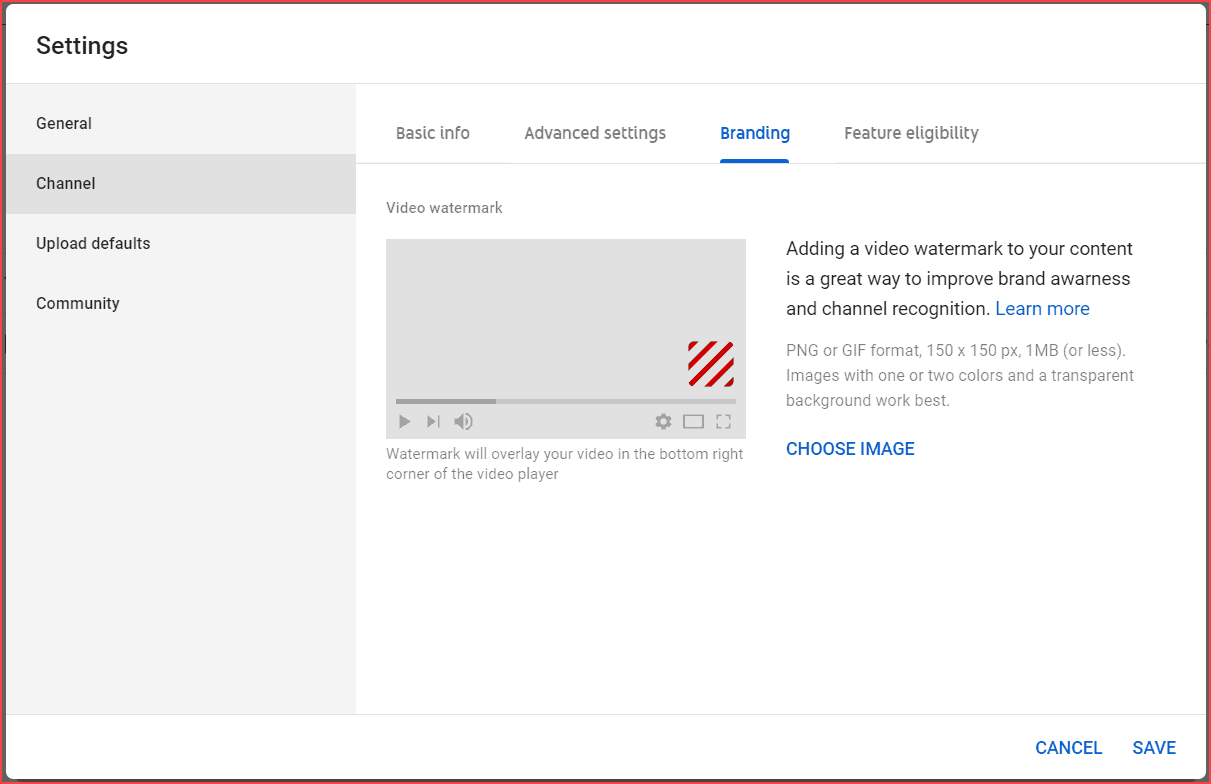
Adding watermark
A tricky way to get more subscribers is by adding a watermark subscribe button on videos. Go to the “Branding” tab. Add your watermark subscribe button and get more subscribers.
Also read,
Next, move on to the “Feature eligibility” tab to see the “Status and Features option.” Click that option, and you will be redirected to a different page.
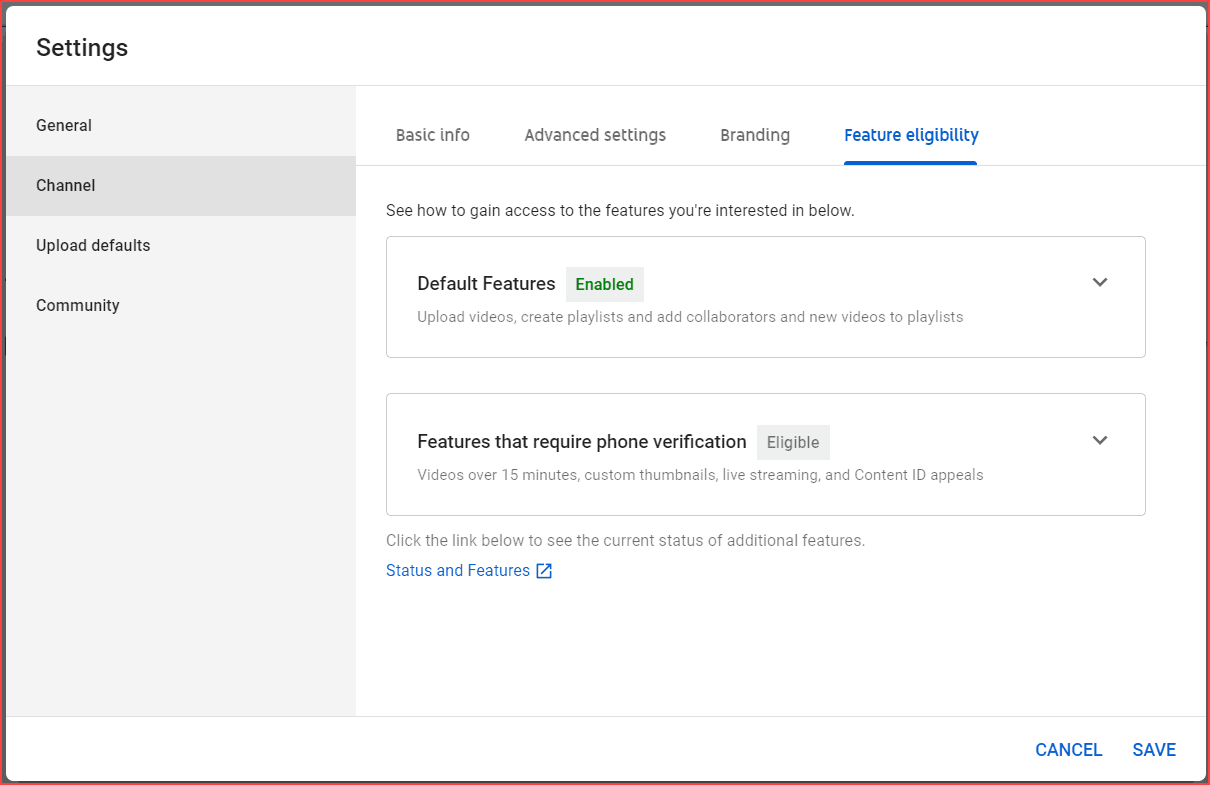
Status and Features
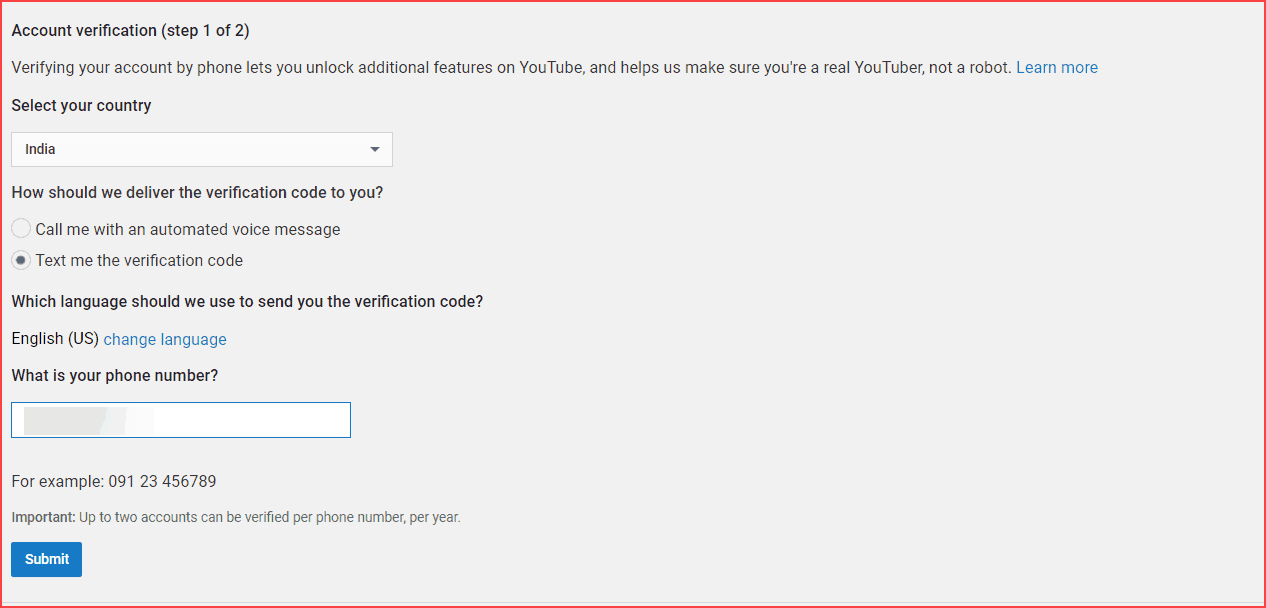
The most important task here you need to do is verify your channel. It takes straightforward steps to verify your account. You need to verify it with the “Phone number.” Click the “verify” button.

Then, add your mobile number to get the verification code and click the submit button.
Once your account has been verified, you will get a notification like this. Click the continue button to proceed further.

After verifying your account, here you will see many options in this section. This widget appearance helps YouTubers to handle their channel as user-friendly. Check your copyrights issue and community guidelines status often for any problems.
Probably, I’m not going to cover all the options of the image in this post. So, let me pick and explain the important one here for your channel growth.
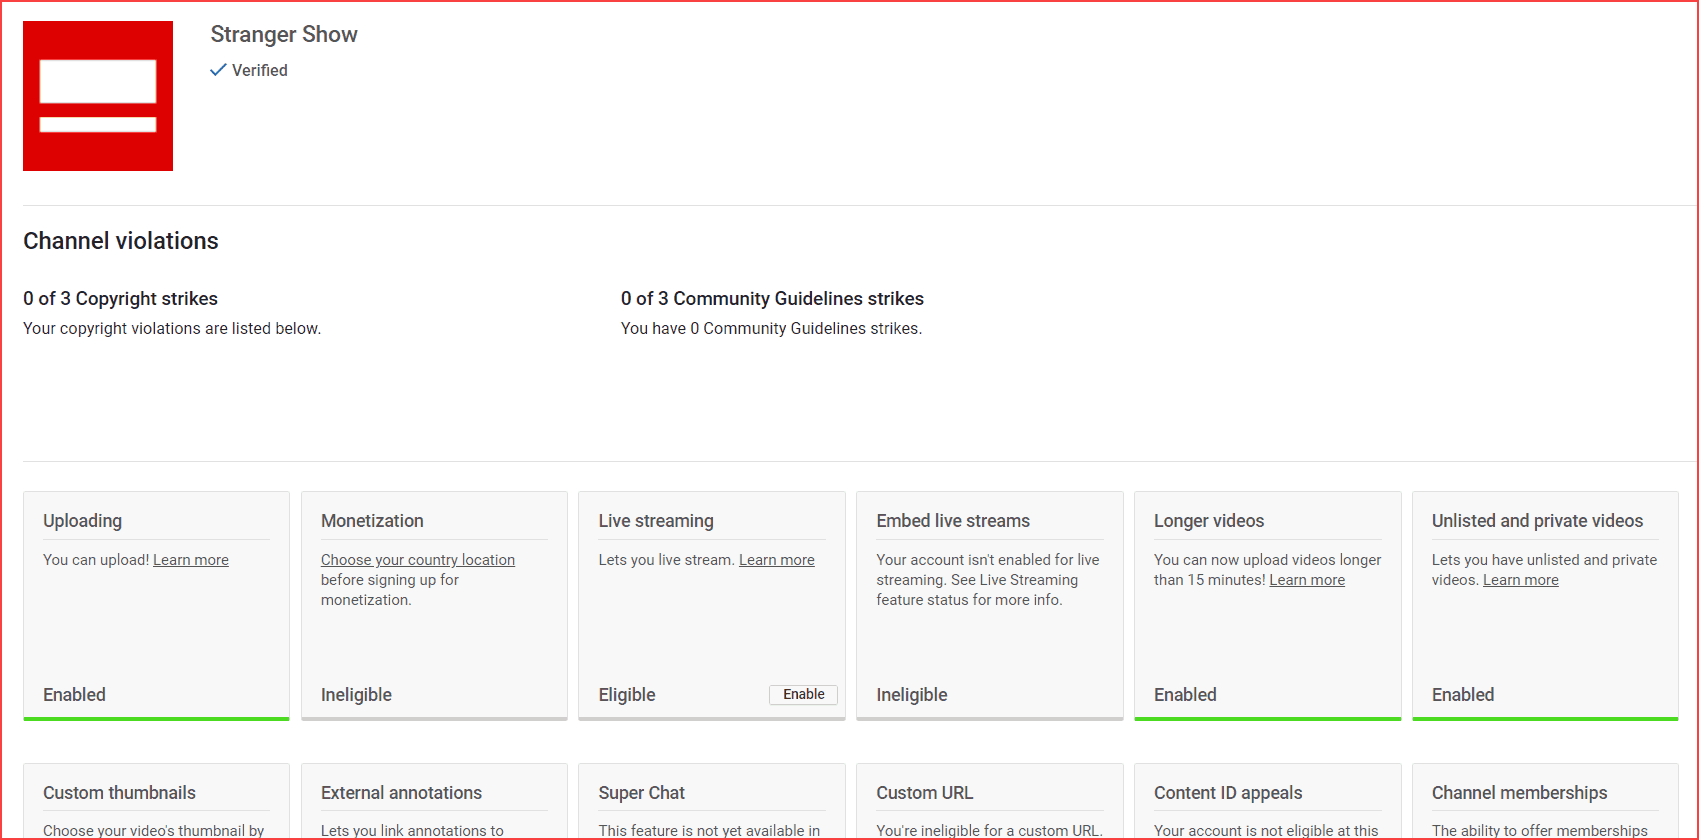
Custom URL
Enabling a custom URL is one of the easiest ways to reach your channel to more audiences.
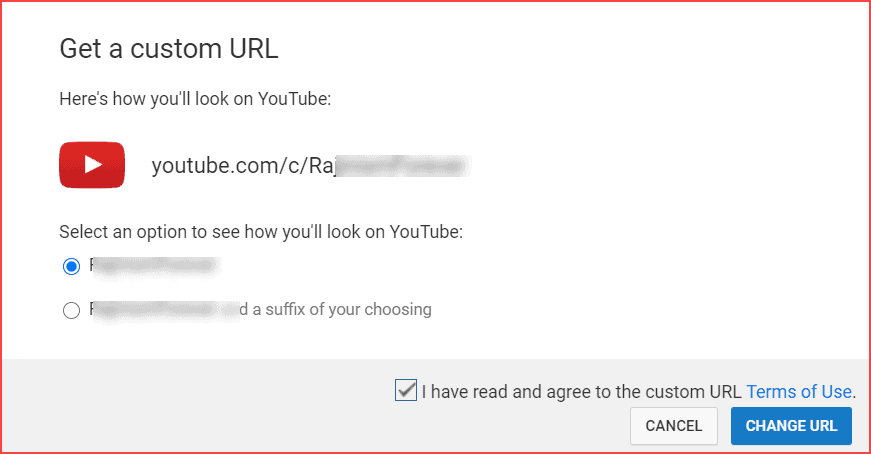
The custom URL will look like this “youtube.com/yourcustomname.”
For example, youtube.com/strangershow
But enabling Custom URL requires a bit of qualification,
- Firstly, the channel must be 30 days old.
- After that, the must-have channel icon and channel art.
- Finally, you need to have at least 100+ subscribers.
Note: Once you create a custom URL, you can’t be able to edit or change it later.
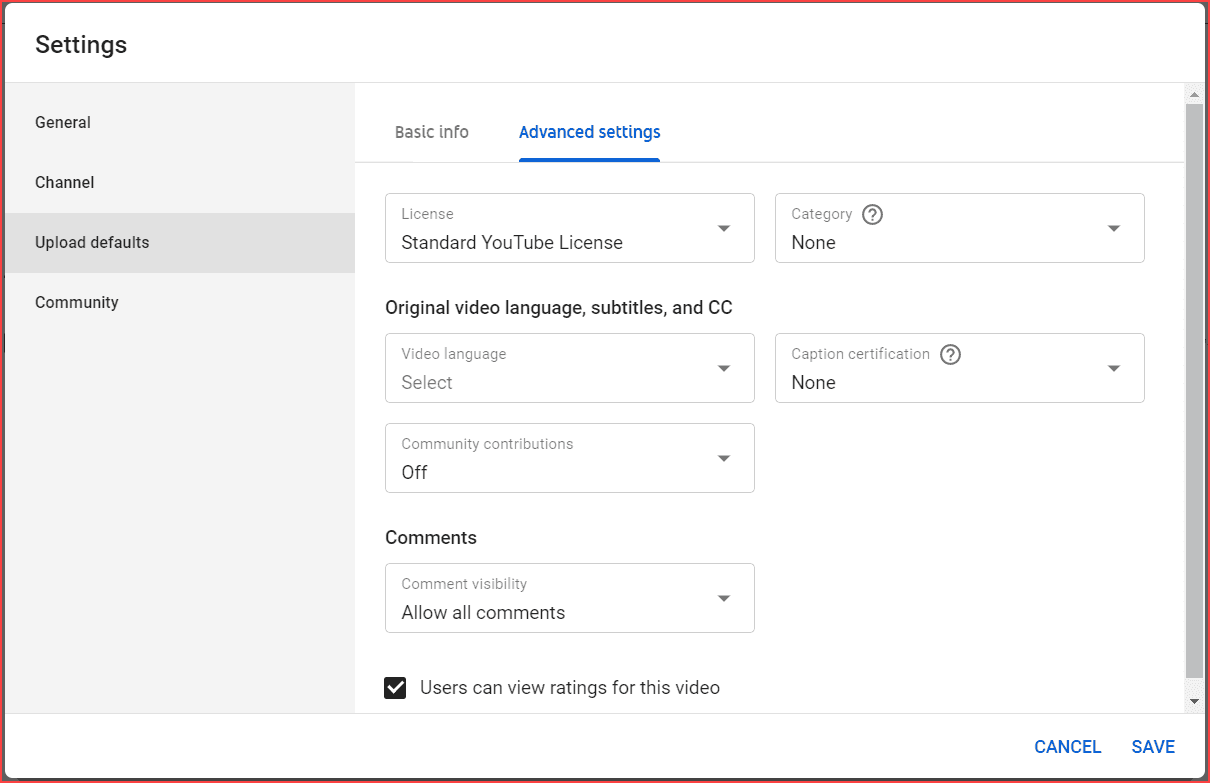
Next, move into the “Upload defaults” tab.

Set up a YouTube channel that gives you an easy solution when entering your basic default information details like Title, Description, Visibility, and Tags. For example, whenever you upload a video, these data will automatically fill in your video details even if you don’t.
Afterward, go to the “Advanced Settings” section, and choose your video language, caption certification, community contributions, comments visibility, category, and license.
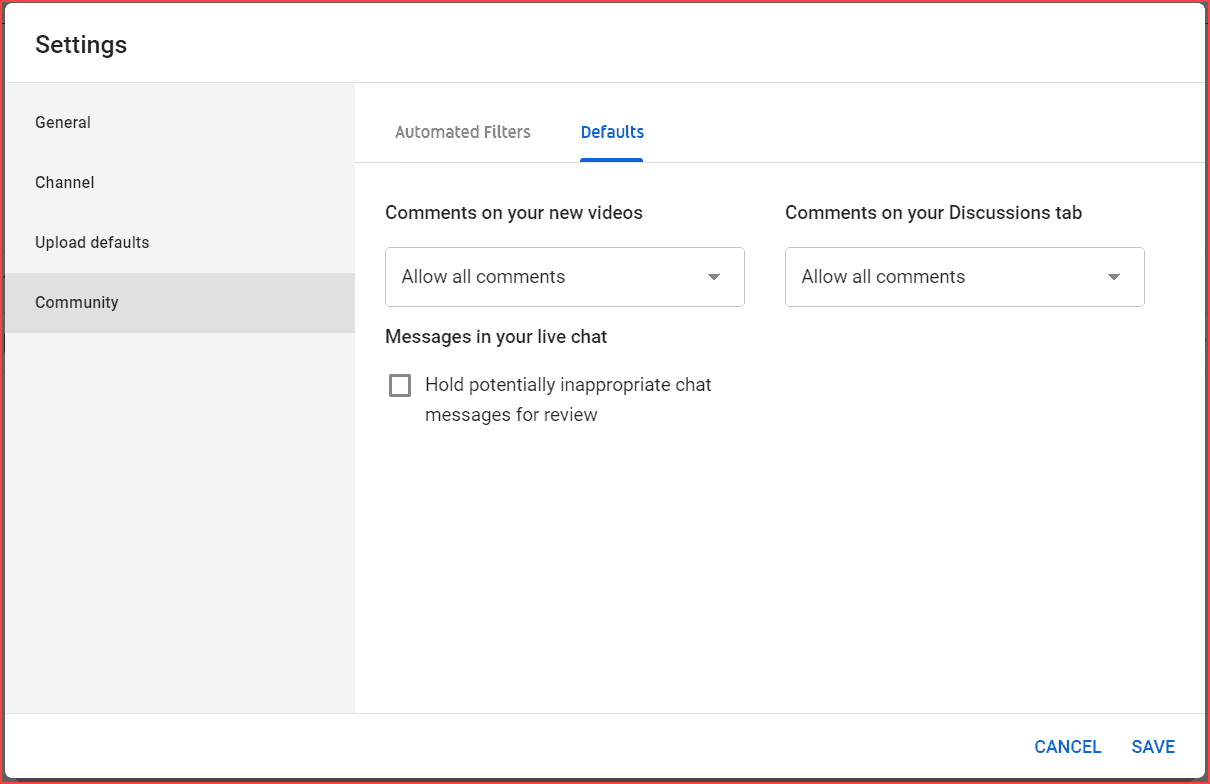
Now in the last tab called “Community,”; you can wish to add other channel users’ URLs for a different purpose under the “Automated Filters” tab.
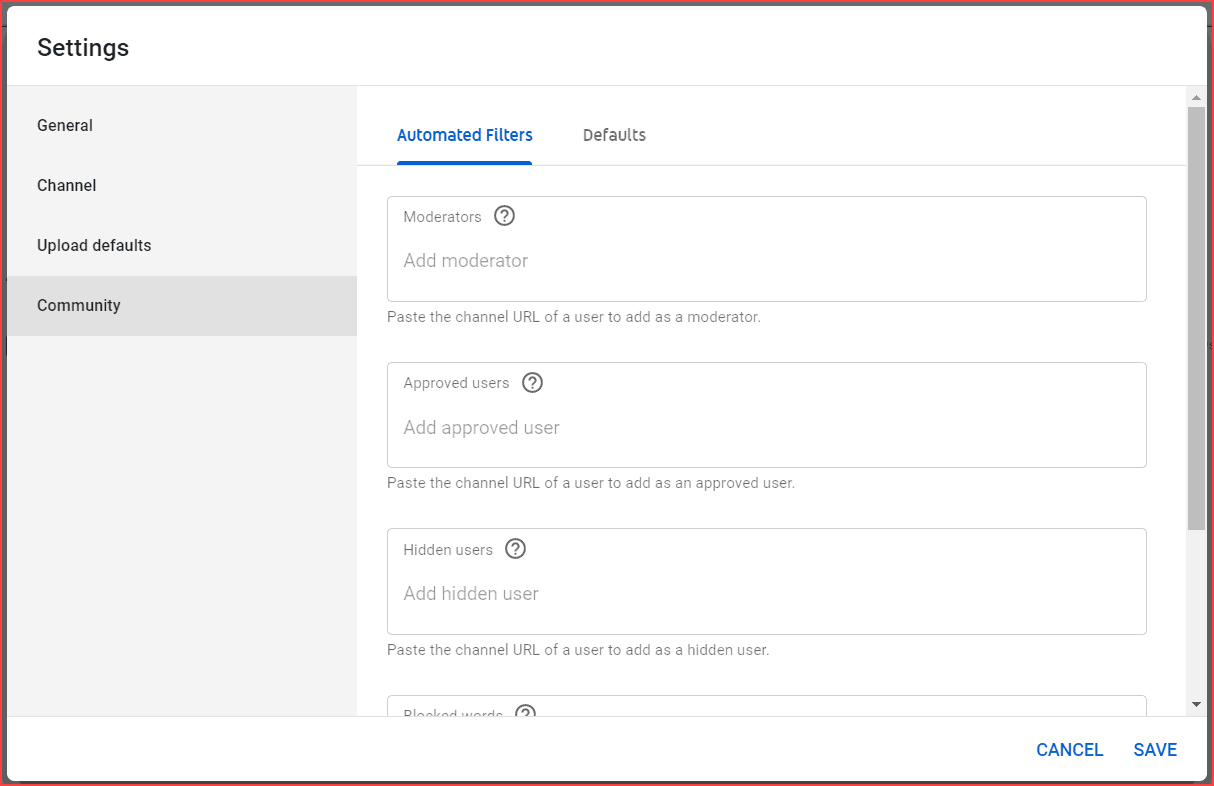
Let me shortly explain these things here one by one.
Moderators
You can assign anyone as a moderator to review your video comments. Your moderator also has the authority to remove the flag comments on your videos.
Any user with a YouTube channel can be a moderator, and also multiple moderators are allowed on the channel.
Approved users
Comments from approved users are automatically published. There is no restriction for these users from blocked words. If you have a trusted audience on your channel, add their URL in this section.
Hidden users
If you regularly annoy some users, you can add them to hidden users. Spam comments make your other audience demotivate to watch your videos. So, the hidden user’s comment won’t display in the videos and live chat.
Blocked Words
If you want to prevent any bad or abusive words during your live chat, add those words in “Blocked words.” YouTube blocked/reviewed those words in live chat and also in the comments section.
At last, In the Default Tab, it’s your choice to select how comments will be allowed on your videos.
Finally, click the “Save” button, reload the page, and check whether the YouTube channel is properly set up or not.
As of now, this is all about the YouTube channel setup. Here, let’s see the quick recap below,
How to set up the YouTube channel?
- Start a YouTube channel.
- Add a Profile Picture and Channel Art.
- Write the channel description.
- Link website and social sites.
- Add channel keywords (most important).
- Set – made for kids’ content YouTube channel or not.
- Add the watermark subscribe button.
- Verify the account.
- Upload the default title, description, and tags.
- Install TubeBuddy – YouTube certified tool to enhance channel growth.
Conclusion
Above all are the essential settings you must do on the first day of your channel creation. Furthermore, let me know in the comment section if you have any doubts or additional points to improve the YouTube SEO process through these settings.
If you’re bored with setting up a YouTube channel, contact me through Instagram, and I will probably help you from scratch.

Sharing is caring!