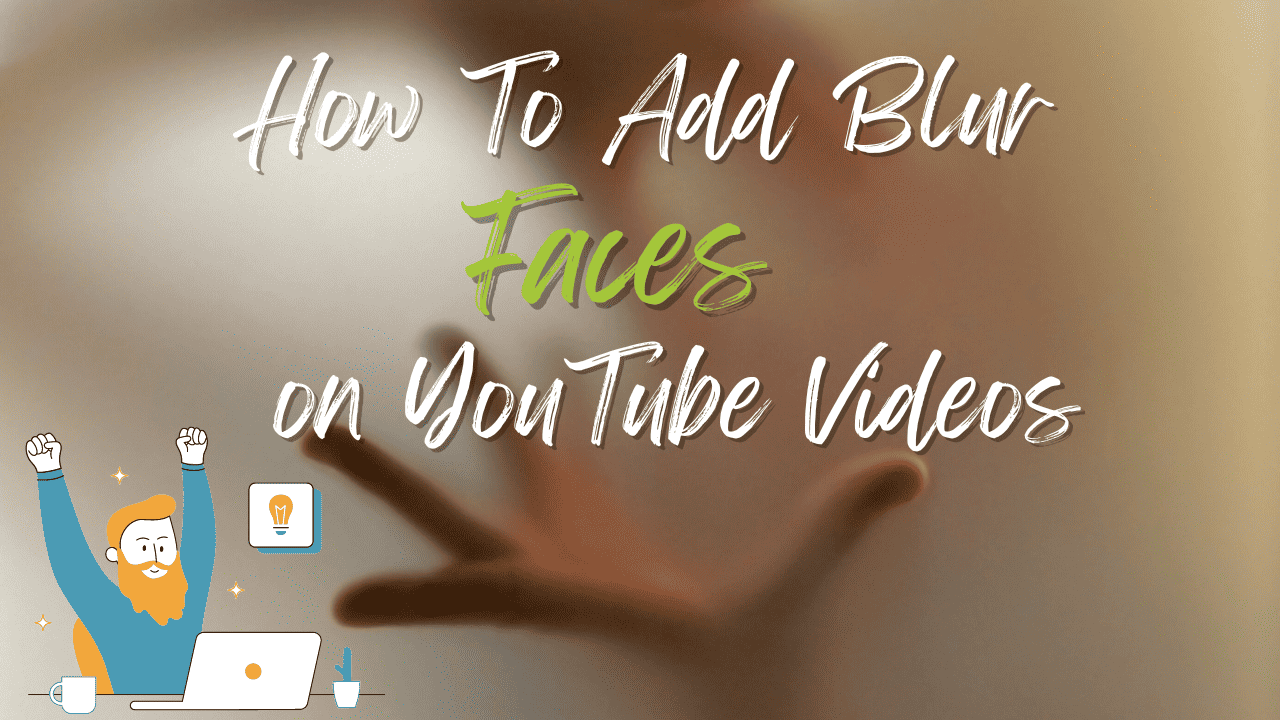
Hello Creators, In this blog article, we will see how to apply blur faces in a video on the YouTube studio itself.
Yes, you don’t need any apps or software to do this. Also, you can apply these blur features to an already uploaded video on YouTube without re-uploading it.
YouTube Interface provides a blurred video option for creators to ease their work.
Moreover, in the last article, we explained how to trim a video in the YouTube studio. If you missed it, kindly check that, too.
Let’s see how to blur the YouTube videos below with detailed pictures step-by-step.
How To Blur Faces in a YouTube Video
Step 1: Go to YouTube and sign in to your channel. Once you’re logged in, click here to move on to YouTube Studio.
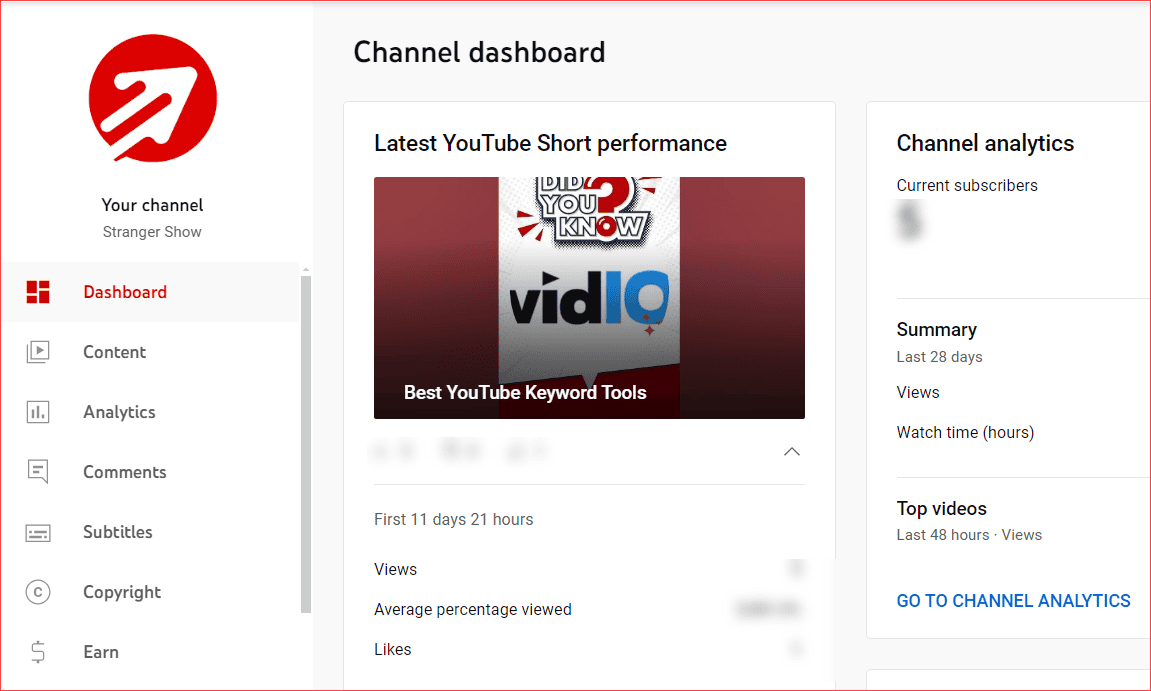
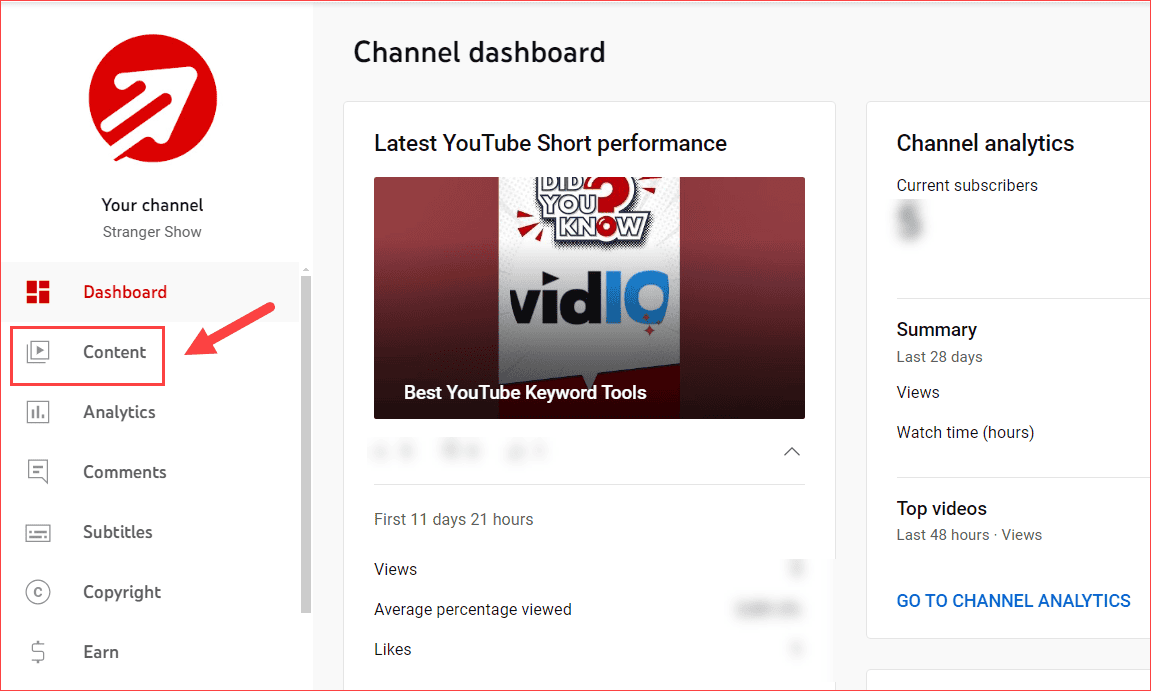
Step 2: Click the content tab on the YouTube Studio dashboard page on the left sidebar.
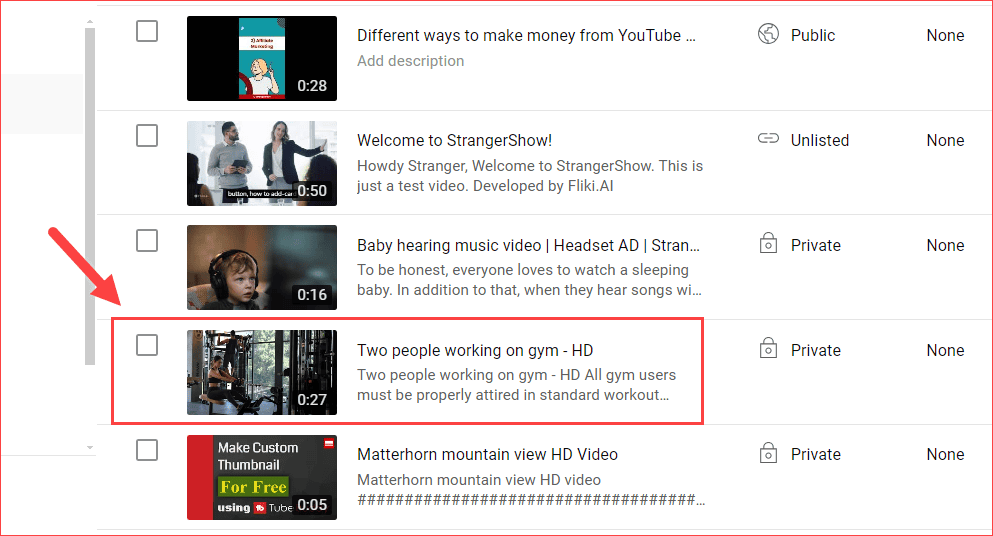
Step 3: The content page will display a list of videos. Click the video where you want to add blur.
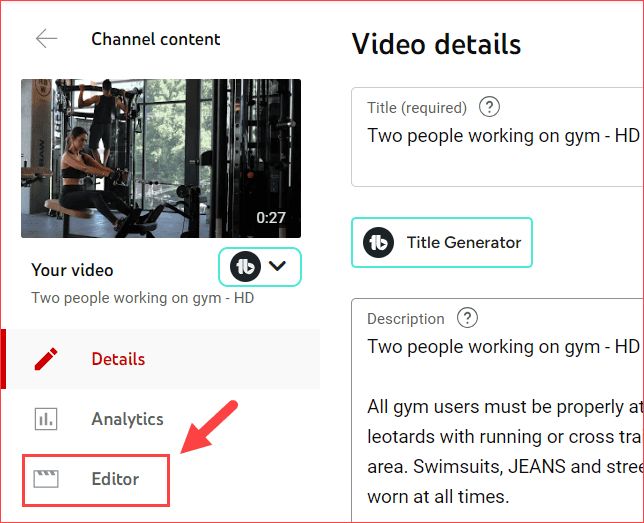
Step 4: Click the Editor tab on the Video Detailspage.
Step 5: Click the Blur option under the Video Editor page.
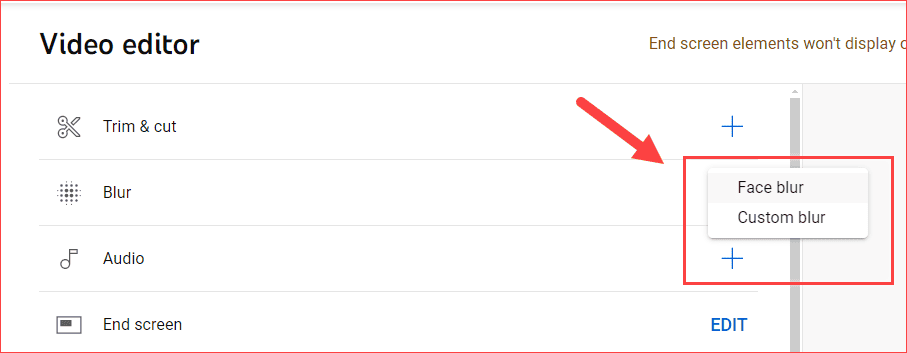
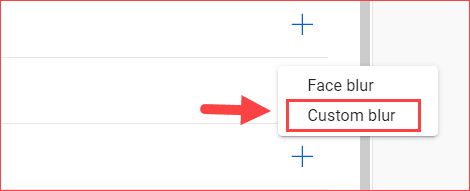
YouTube provides Face Blur and Custom Blur options. Below here is a demo of both.
Note: You can use YouTube Face blurring or custom blurring on all types of videos, such as private, public, and unlisted.
Face Blur in a YouTube Videos
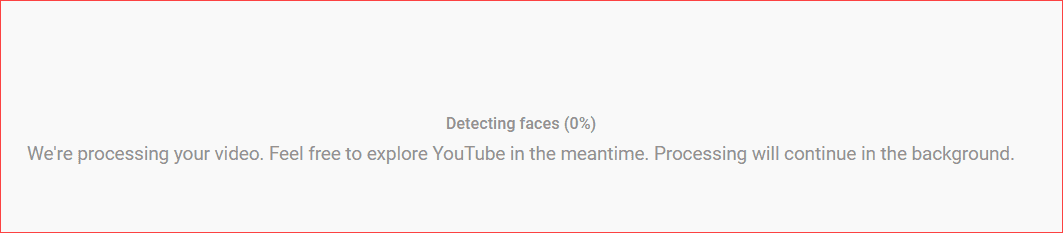
When you first click on the Face Blur option, the software takes a moment to identify the faces in your video, making the process simple and straightforward.
Once it is identified, it showcases the face it found, and you can select the face you want to blur here.
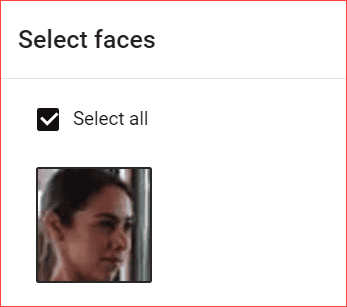
For example, the above image is the face in my video. Select the face. Afterward, it asks for the duration for which you want to blur the faces in the video.
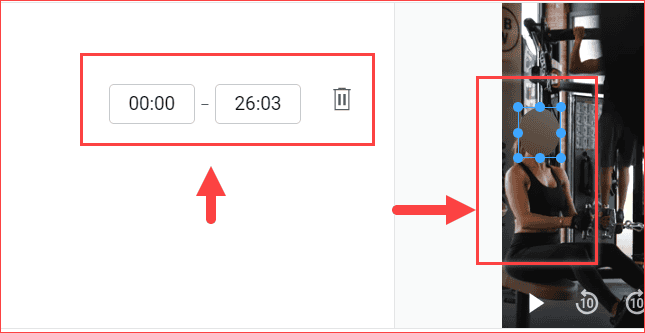
In the meantime, you can drag and drop to enlarge the blurred borders. Finally, once you’re okay with that, click the Save Button.
Your video might not reflect these changes for a few hours. Wait some time and check later to see your output.
Custom Blur
On the other hand, if you want to add blur in any texts, card numbers, or password fields other than faces in the video, use this Custom Blur option.
With just a click on the Custom Blur from the drop-down, a custom blur border effortlessly applies to your video, giving you the confidence to blur exactly what you need.
Here, you can drag and drop the border to place the blurriness. You can also shape the blurred borders, either Rectangle or Oval.
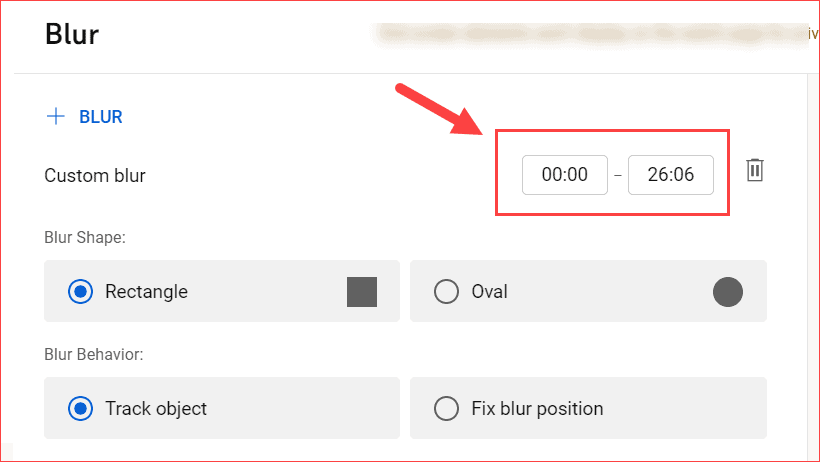
Also, if you want to blur the object throughout your video, use the blur behavior as a track object or use the fixed position.
Finally, once you are okay with your output, then click the save button.
Whether you choose Face blur or custom blur, rest assured, you can smoothly accomplish this task right within YouTube Studio. Best of all, there’s no need to delete or re-upload your videos.
Benefits
Let’s see some of the benefits of adding blur faces in a YouTube video:
- Can hide sensitive content in the video at any time.
- There is no need to delete the existing video for the wrong information.
- Can able to blur faces, objects, text, and other items easily.
Still, do you have any doubts about blurring the faces in a YouTube video? Feel free to comment here, and I will be happy to answer your questions.
See you in the following related articles.
Ta-da!