How do I edit my YouTube Videos efficiently and adequately as a vlogger or content creator?
When you’re a beginner and don’t know anything about editing videos, it looks like climbing the Himalayas mountain. But it’s not actually that hard.
Once you know the basics of editing, trimming, filtering, and exporting the final output video, you will wonder why I’m not doing this all these days.
In this article, this is what we will see.
In this detailed post, we will edit and export one full YouTube video from scratch with different video editing software.
How Do I Edit my YouTube Videos
Generally, there are different best video editing software available. Some of the top-notch are:
- Adobe Premier Pro
- Final Cut Pro
- DaVinci Resolve
- Camtasia
- Wondershare Filmora
I mostly play with Adobe Premier Pro and Camtasia, which cover all the other features that other software does.
So, we will see how to edit YouTube videos with this software in this beginner guide.
When making videos by recording the screen or monitor, use Camtasia.
If recording from a Camera, then use Adobe Premier Pro.

Also, you can use both depending on your video situation and requirements.
Editing Video Using Camtasia
Firstly, Camtasia is fully functional Screen Recording software. However, it has far better editing features than 3-star rating editing software.
As mentioned earlier, if you’re doing screen recording, then utilize Camtasia to edit the videos too.
Also, you can import any videos on Camtasia to edit them.
Note: This software comes under desktop application; you can download and utilize it on both Windows and Mac OS. Download Camtasia.
Click Import Media to upload the video, or use the Record button.
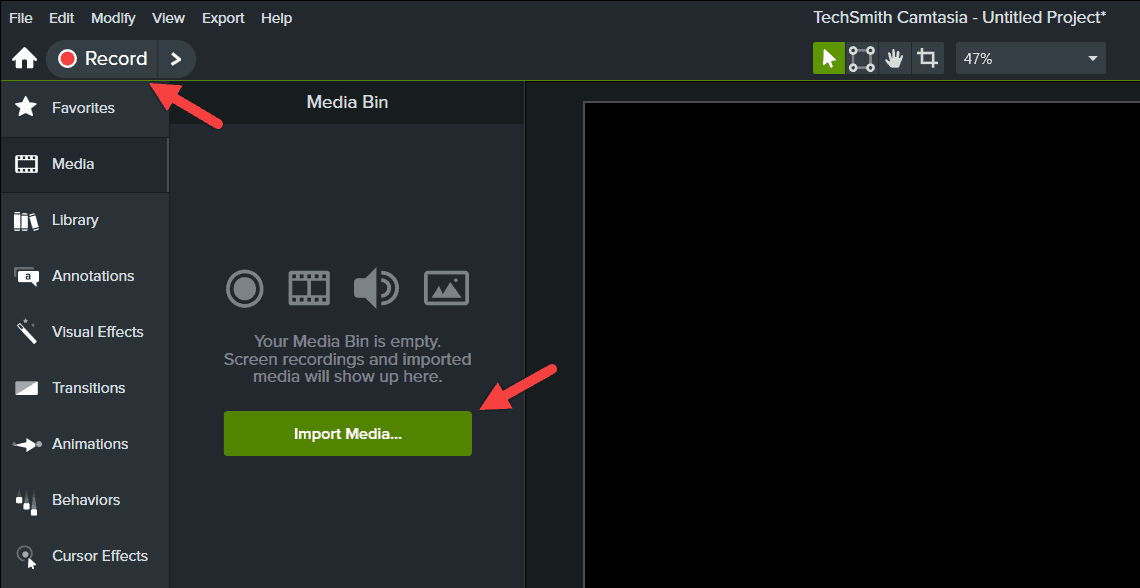
Once the video is uploaded, drag and drop them into the timeline.
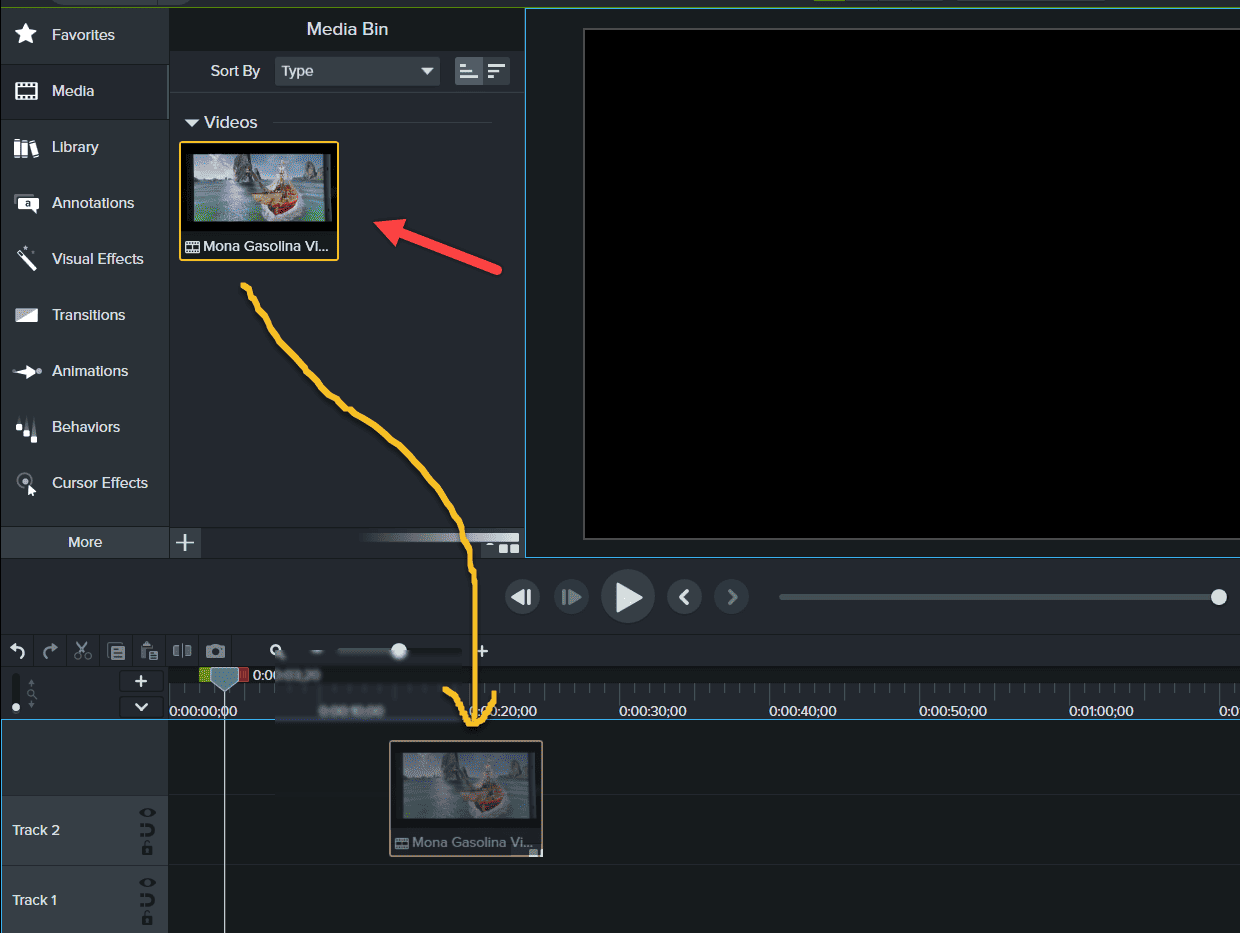
When it’s added to the timeline track, the entire video will display on the big screen of that display. Refer to the below image.
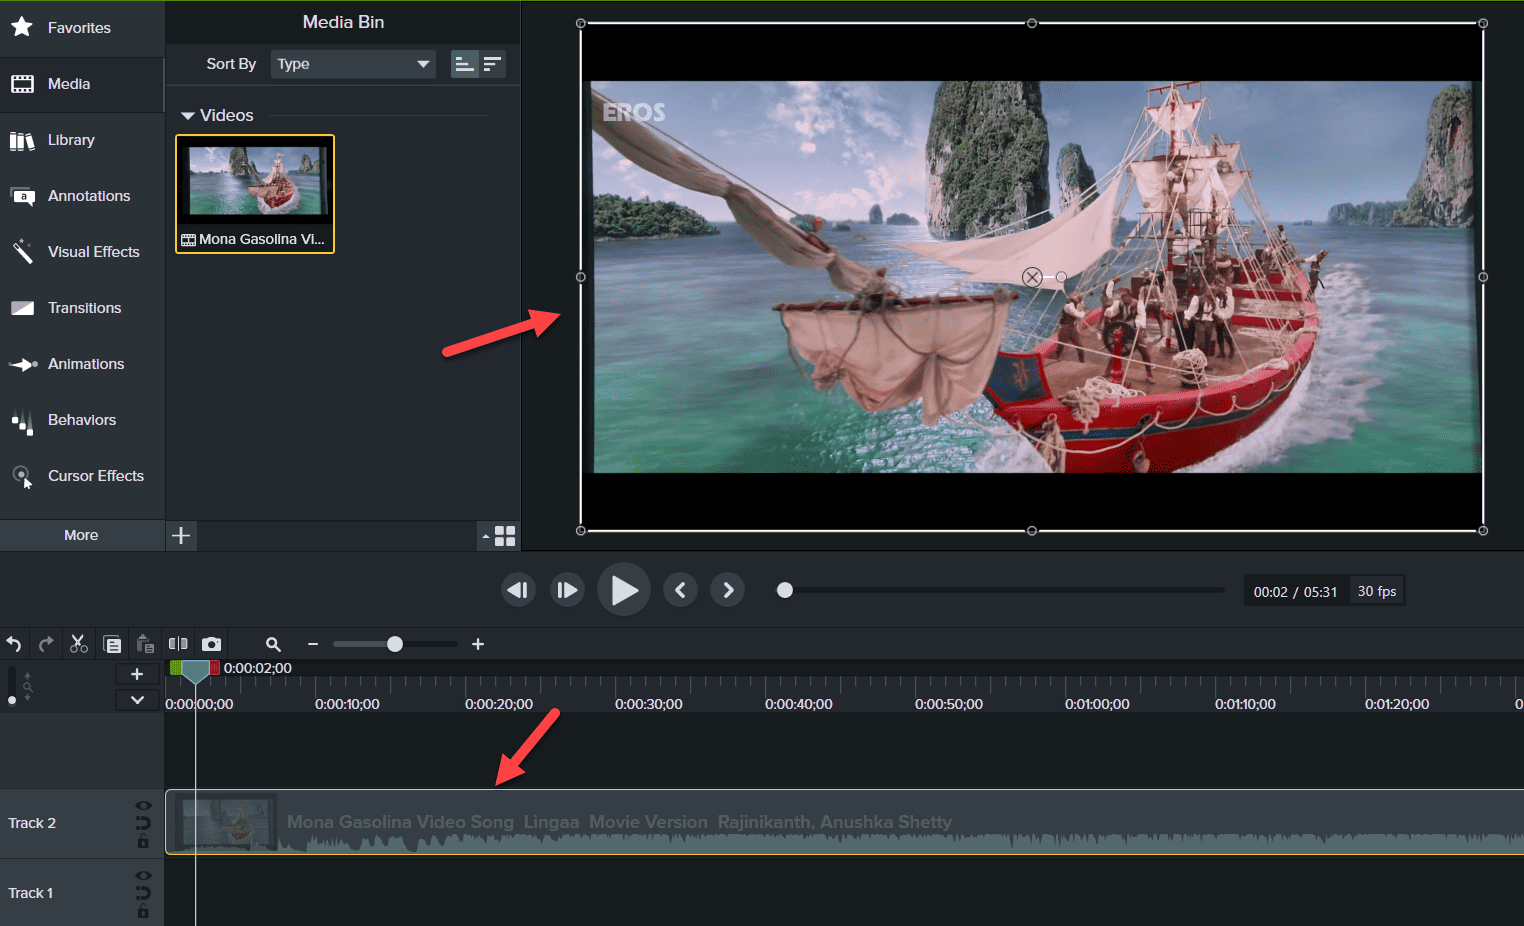
Under that display, you will notice the Play, Pause, Forward, and Backward buttons, which are helpful to operate. Also, while editing the videos, you will see the output results in this display.
Generally, it’s the output video before exporting on the editing software itself. It is common to all the video editing software.
Next, the vertical line indicates which frame we are in position. You can also drag it to move forward or backward at any point in the video.

Okay, let’s see how we trim the video’s specific part.
Cut & Delete
The commonly asked question by beginners who come to edit their first video is how do I cut the specific portion of the video and remove it?
The answer is simple: I will spoon-feed you, so don’t worry.
Click and drag the Redpoint on the vertical line where you want to trim or cut the portion.
Once you drag it, you will see the selected portion looks like this.
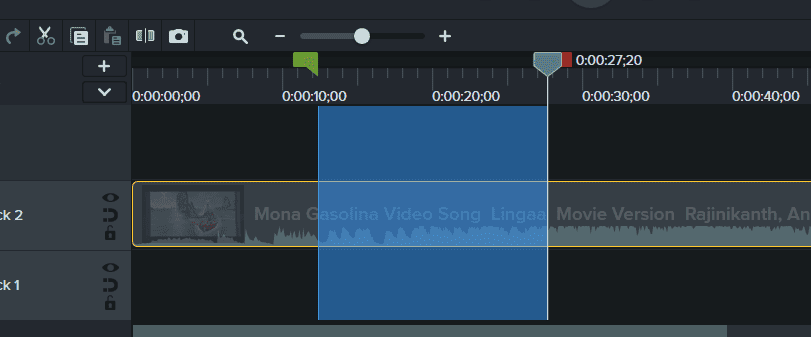
When you look at the above image, the Green point is nothing but the starting point of the frame, and the red point, along with the vertical line, is the ending point of the frame.
On the top of the timeline, click the Scissor button to cut and delete the portion.
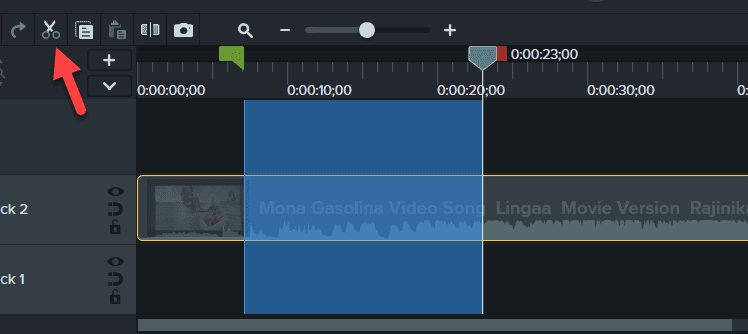
Moreover, if you want to join that portion anywhere in the video, like the middle or end, you can move the vertical line on that area and click the CTRL + V to paste it.
Otherwise, ignore it after the Scissor operation. Click CTRL + S to save the edited part.
Split Audio & Video
Separating audio from the video is the common editing step; depending on each software, it will change further.
On Camtasia, Right-click on the video frame and select “Separate Audio and Video.”
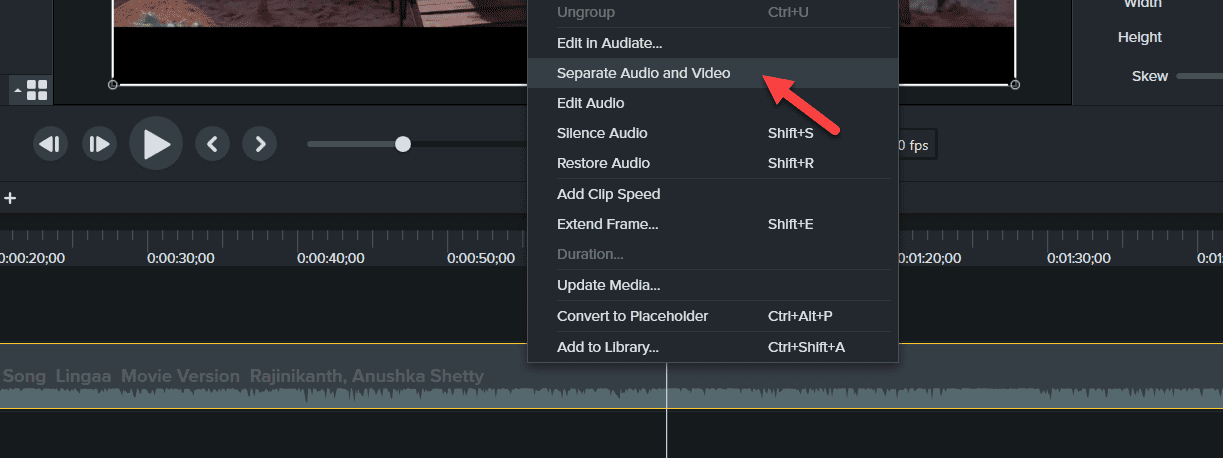
As you can see, one more track was added to the timeline: the audio track.
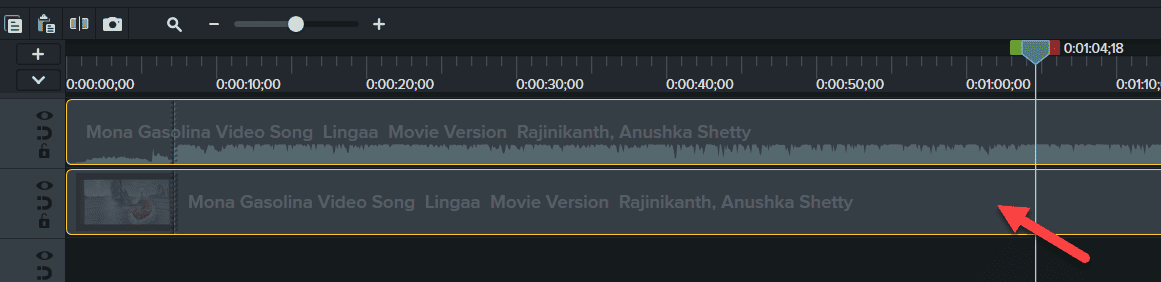
Select and right-click the audio to delete or adjust the audio properties if you want to trim and join.
Split Video
Splitting the video is another standard behavior in video editing. Commonly, beginner-level editors need clarification on the relationship between splitting the video and trimming the video.
More or less, both are doing similar work, but the use case is different depending on the situation.
Let’s see how to split the video (relatively easy).
Place the vertical cursor point on the portion of the video where you want to cut.
Click the Split button on the top of the timeline.
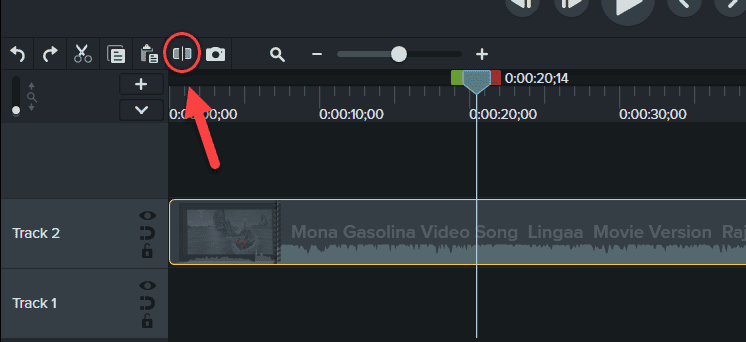
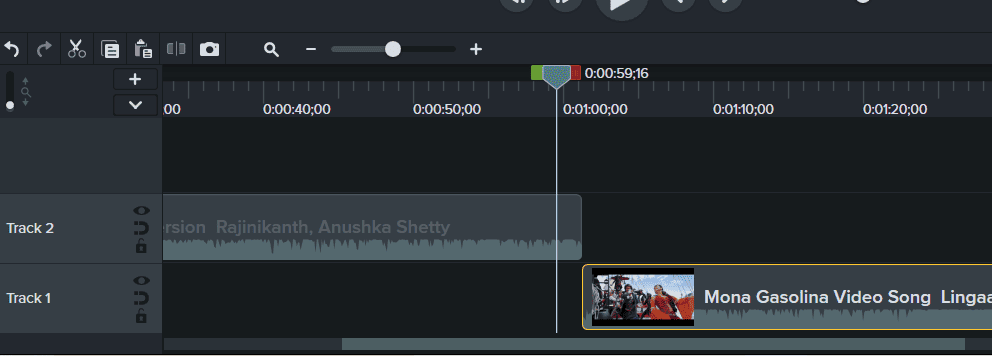
The video will be split into two parts, and you can drag and drop the second part to different tracks for easy understanding.
Adding Transition
Let’s say there are two different videos taken in different places. When you combine them, it makes a noticeable point to the user and loses video continuity when it moves from one point of place to another.
To avoid this inconvenience, we must use the transitions in video editing.
It is one of my favorite parts of editing videos, and I love to add transitions.
Let’s see how to add it.
I will add two different videos to the timeline. It all depends on your wish to add it in the same or other tracks.
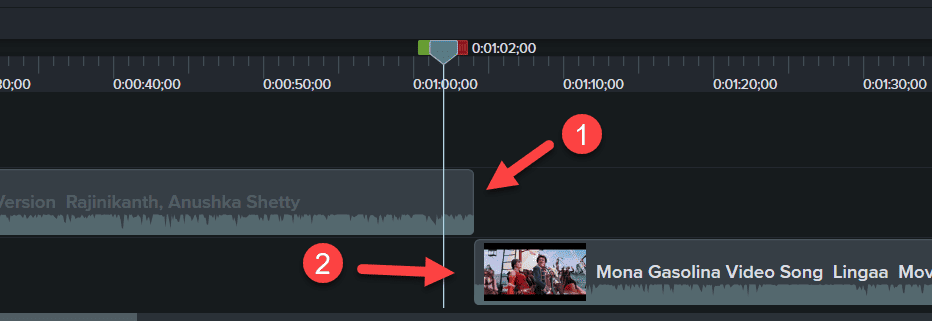
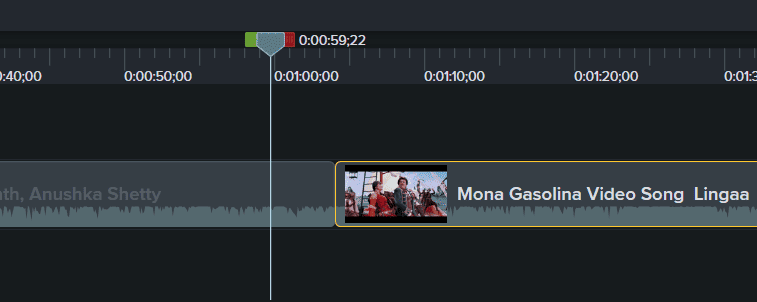
However, let me add the two videos in the same track. Just by doing drag and drop it on the respective track.
Go to the “Transitions” menu on the left side and select or search your favorite transition modes.
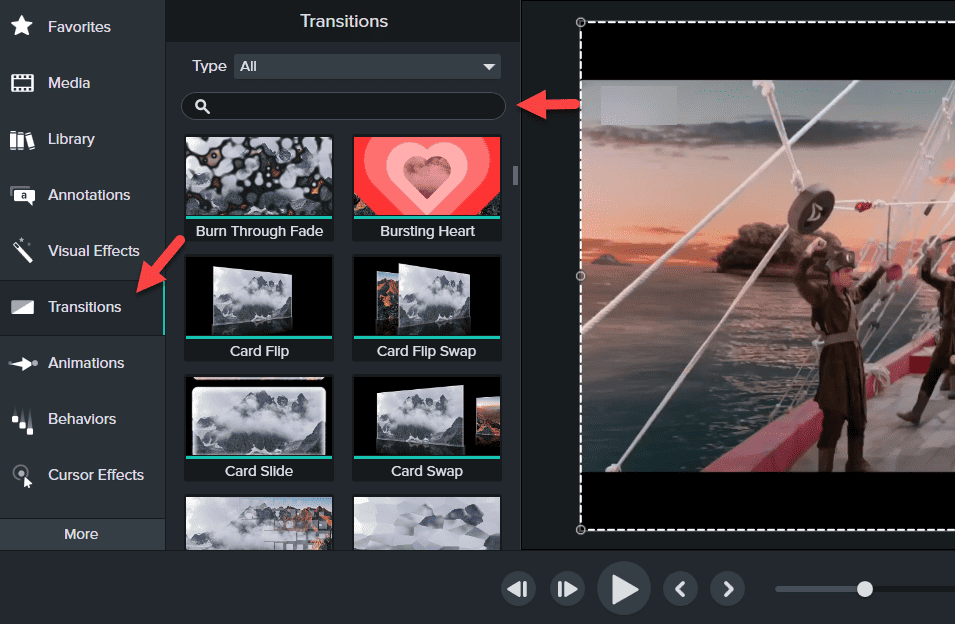
Camtasia provides suitable transition modes that help grab audiences’ attention when you edit YouTube videos.
Drag and drop the transition effect between the two videos’ joining points.
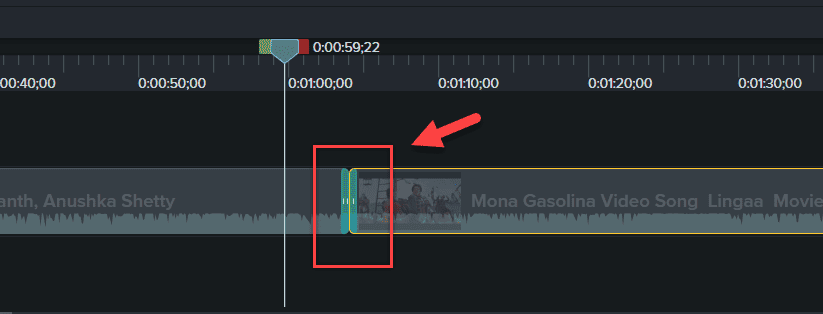
From the above image, you will see the green color concrete between the two videos; that’s our added transition.
Now, the video looks more engaging than before, and it will maintain continuity.

That’s our transition video output on the display.
Volume-Down Audio
You will realize the audio or music will slow down when the video ends, right? Let’s see how to do that here.
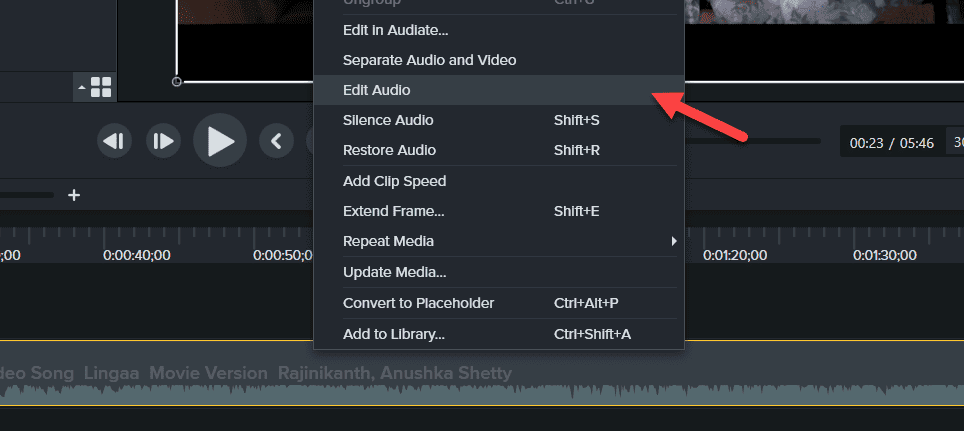
Right-click on the track and select “Edit Audio”.
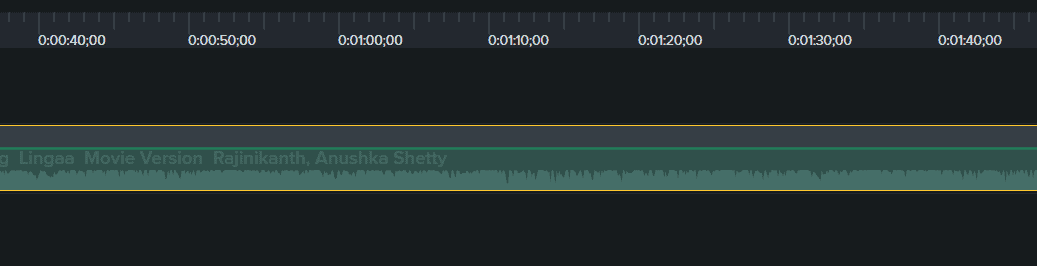
A Green horizontal line was added to your track area.
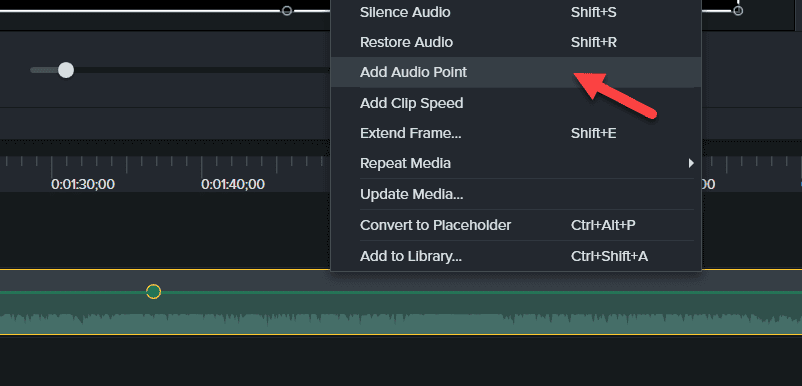
Again, right-click on the video track where you want to start adjusting the audio to reduce or increase and click “Add Audio Point.”
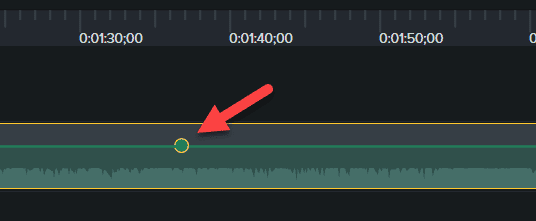
This will add the small dot button on that green line.
Now, after the first dotted-green line time frame, again, right-click and select one more “Add Audio Point.”
And it looks like this: two dotted-points.
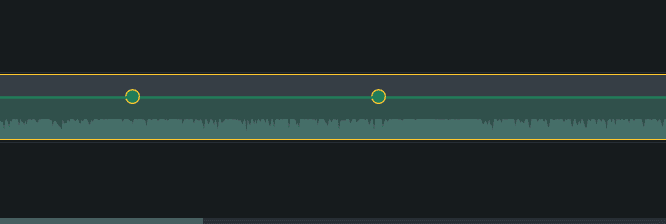
Here, drag the second point to lower or higher to reduce or increase the audio volume respectively.
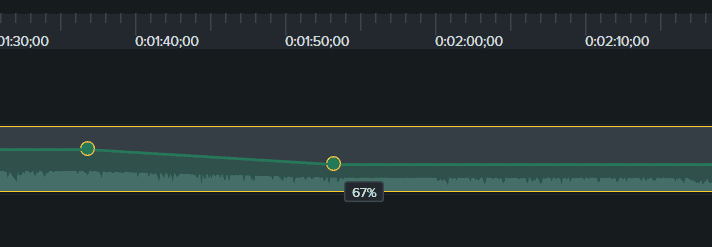
The downside you go, the volume goes down, and the upside represents the volume going up.
Moreover, the first green point indicates the starting point of where the video’s volume changes, and the second green point tells how smoothly we will handle the volume.
Cool and simple, right?
Export the Video
Exporting the video into Local File on Camtasia is easy. On the top-right corner, you will see the Export button; click that.
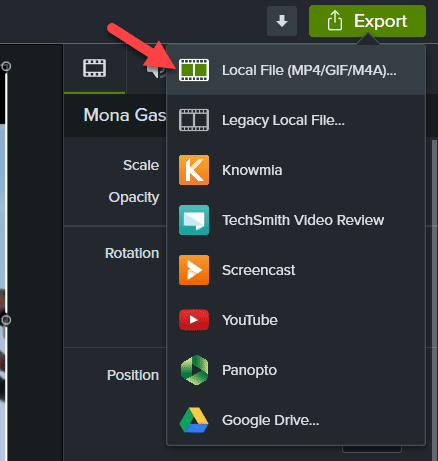
Select Local File with the MP4 option; otherwise, if you want to upload it on YouTube or Drive, do it directly.
Also, you can download only audio from here and customize the dimension and other resolution settings with basic steps.
Apart from the features mentioned above, there are a lot of editing features available for your YouTube videos, like;
- Zoom in or out of a particular video portion.
- Smoothing Cursor Effects & options.
- Background removal.
- Blurring the specific portion.
- Video Color adjustment.
- Annotations.
- Libraries to add video effects, audio kit, YouTube channel kit, etc.
A lot more features are available on Camtasia to edit one perfect YouTube video. If you want me to add any feature with detailed picturization steps like the above, let me know in the comment section.
I will try my best to add it.
With this chapter in mind, let’s edit the videos with Adobe Premier Pro.
Adobe Premier Pro Editing
When I started my editing journey ten years ago, I thought Premier Pro was complicated to use, and I needed to study hard to work on these.
Hence, I omitted to edit the videos on Premier Pro and used the best editing software alternatives.
Later, I got an opportunity to work with Premier Pro two years ago and wondered why I had missed this software all these days.
Because it’s simple, like other software, to use and edit better-quality output videos.
Okay, without further delay, let’s see how I edit my YouTube videos with the help of Adobe Premier Pro.
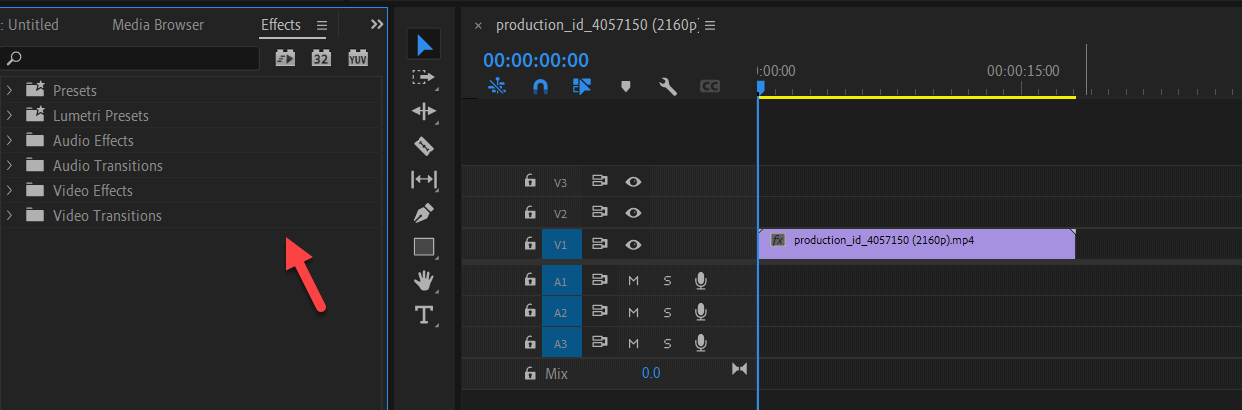
Open the Premier Pro on your desktop and import the media (video file) on the left side.
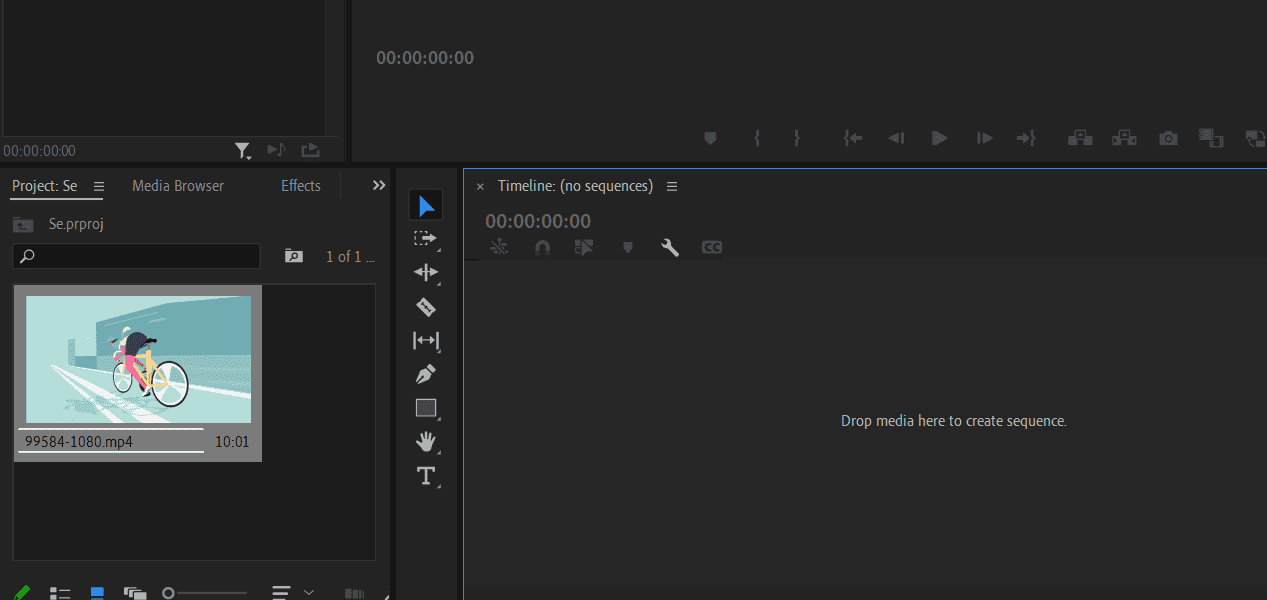
I was dragging and dropping the imported media file on the right-side area of the timeline.
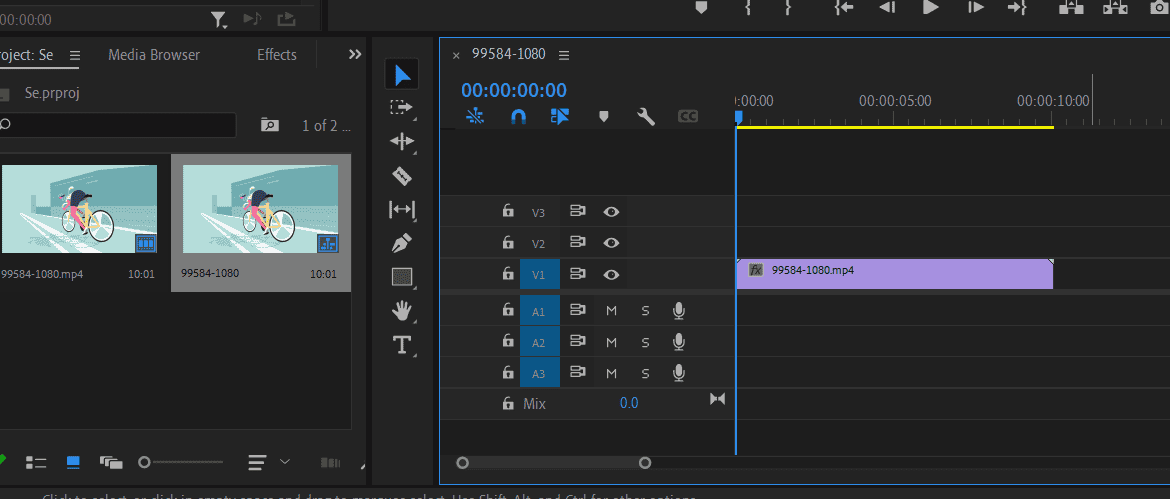
Generally, the Premier Pro editing panel consists of both Audio and Video mixes like A1, A2, A3 and V1, V2, V3.
I added the video that doesn’t contain any audio. Hence, it’s only on V1 track.
Like Camtasia software, the video play area appears on the top, and the track timelines are visible at the bottom.
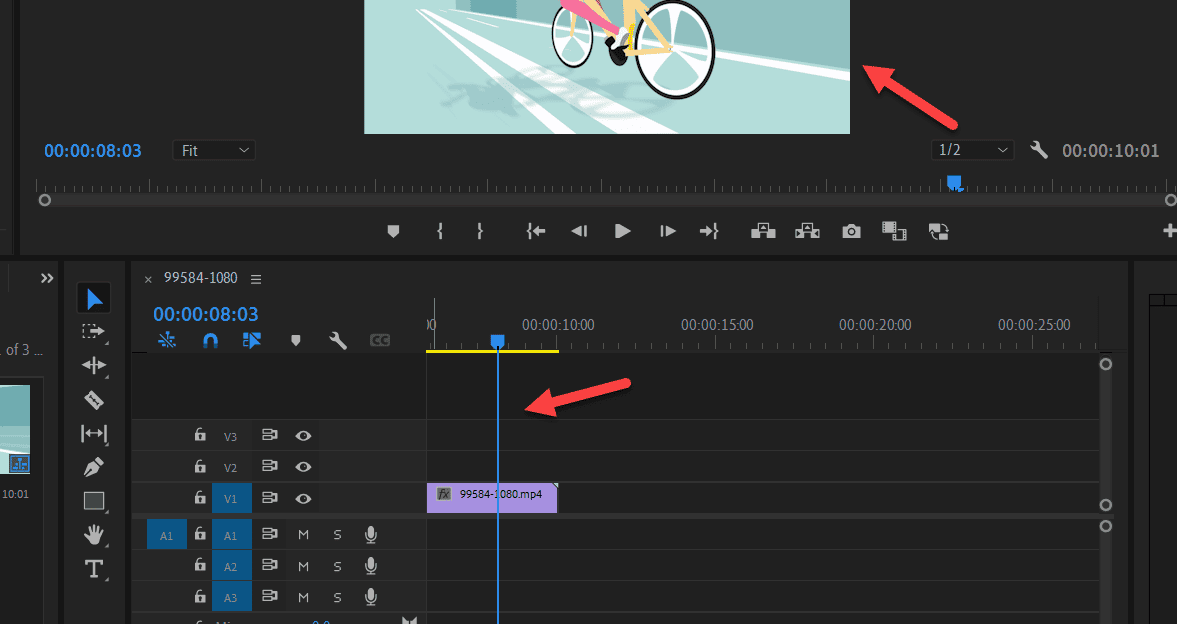
The vertical line helps to move forward or backward in a particular time frame, as we have seen above.
Audio Settings
Let’s see how I work on my audio setting to produce a better-quality video.
If you’re a beginner-level YouTuber, then you need to understand one thing,
- Audio is more important than video to grab the audience’s attention and increase traffic.
Firstly, import the audio and add it to the timeline.
For instance, I added it on the A2 track here.
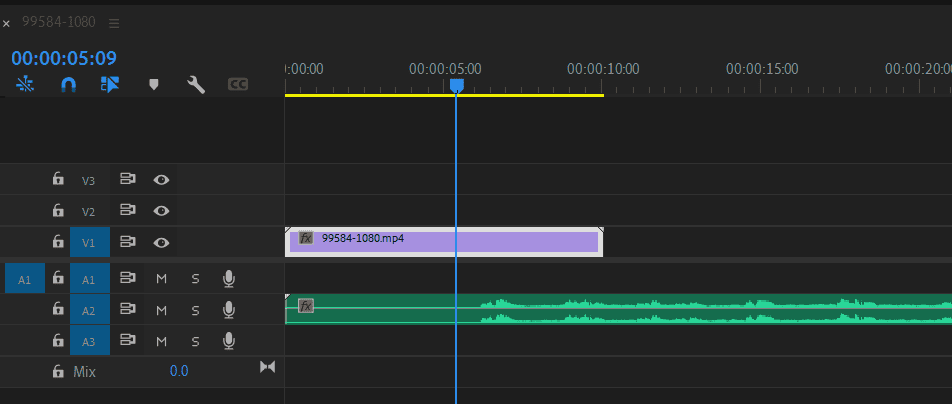
This audio contains more “Ess, Pss, Hsshh…” sound in my voice.
Generally, I use mid-range, budget-friendly microphones while recording, but this audio contains a lot of “S” sounds that irritate the audience when they watch my video with headsets.
That’s where Adobe Premier Pro helps to fix that issue with a few clicks.
Go to Windows and Select the Essential Sounds.
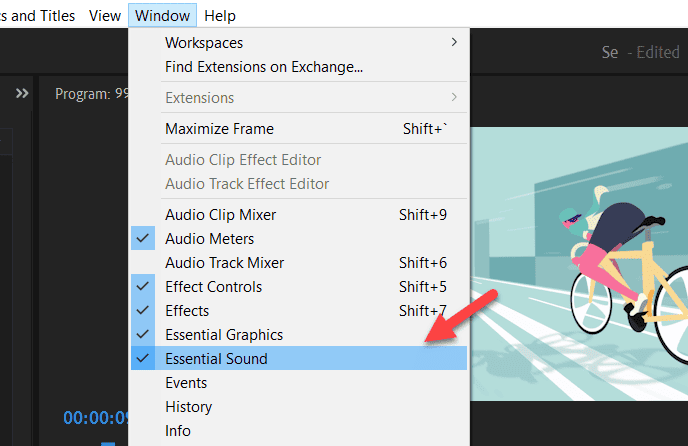
A new sound window will open on the right side of the project, and there, select the Dialogue option.
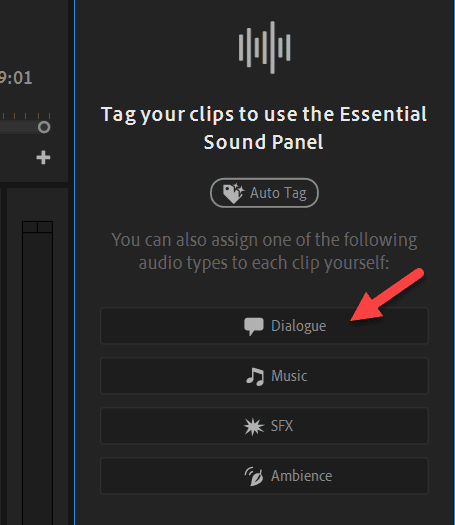
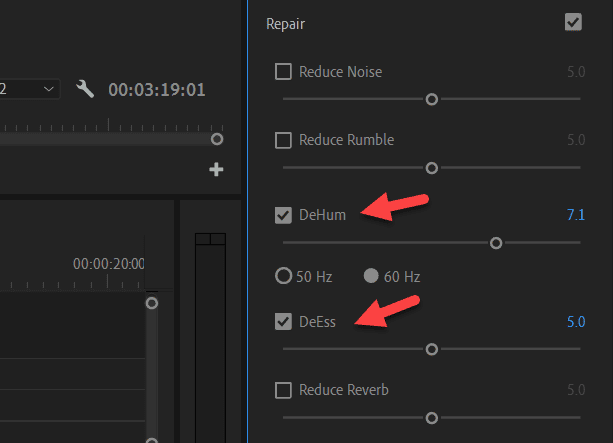
Under the Repair section, select the “DeHum” and “DeEss” options, which help remove the unwanted humming and “S” sounds from the audio clip automatically.
As a video creator, you don’t need to do anything apart from this.
Audio Enhancement
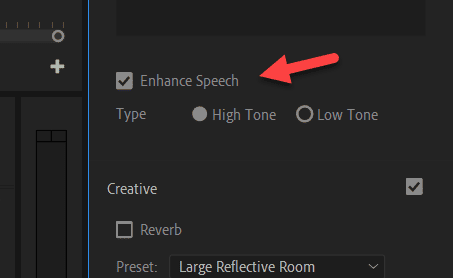
If you feel your audio quality is still not good with background noises, try the new “Enhance Speech” option.
In this example, my audio was recorded in the outside area and contains many vehicle sounds, wind noise, etc.
But after I enabled the enhanced speech, everything was gone, and only my voice was audible.
To enable this option, it’s the same under the Repair Menu inside Essential Sounds.
Green Mat Removal
Nowadays, green screen occupancy rates are high in almost all the videos.
As you told me five years ago, working with green screen projects is expensive and takes more production value. The words are correct.
But now, with the help of Adobe Premier Pro, it’s quite easy.
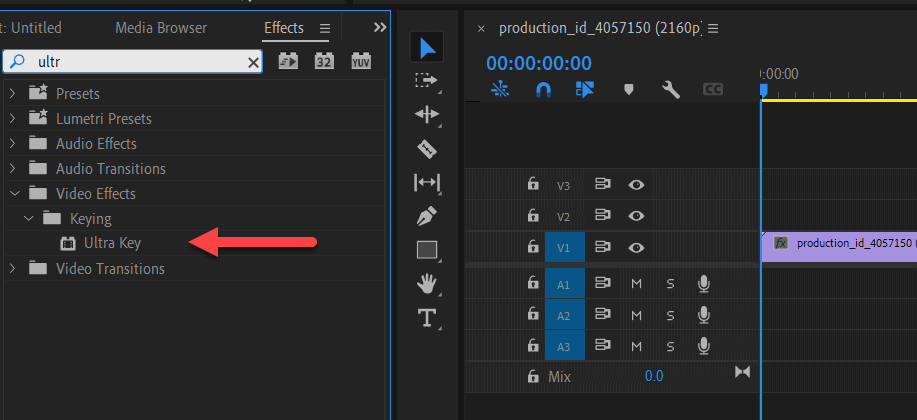
Once you upload the video with Green Screen, go to the Effects panel.
Search for “Ultra” and choose the “Ultra key”. All you need to do is drag and drop the ultra key on the video.
On the top of Effects Control, the Ultra Key option will pop up like this,
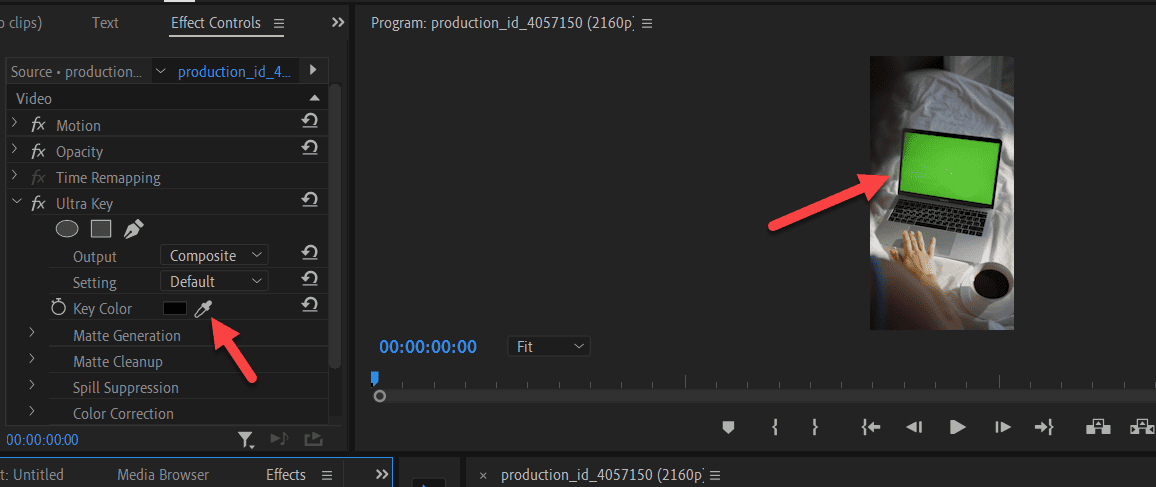
Select the “Key Color” brush button and click the Green color area on the video.
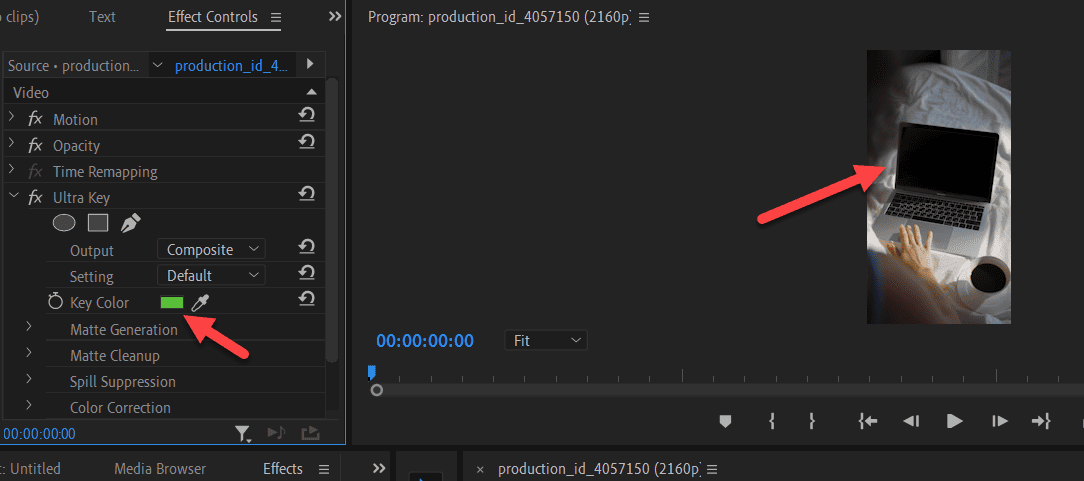
That’s all. The green color will vanish; you can add or append the replacement video for the green screen.
Auto Captions / Subtitles
Adding subtitles to YouTube videos covers a more extensive range of audiences globally.
Let me explain how quickly you can add subtitles without writing a single word in Premier Pro editing software.
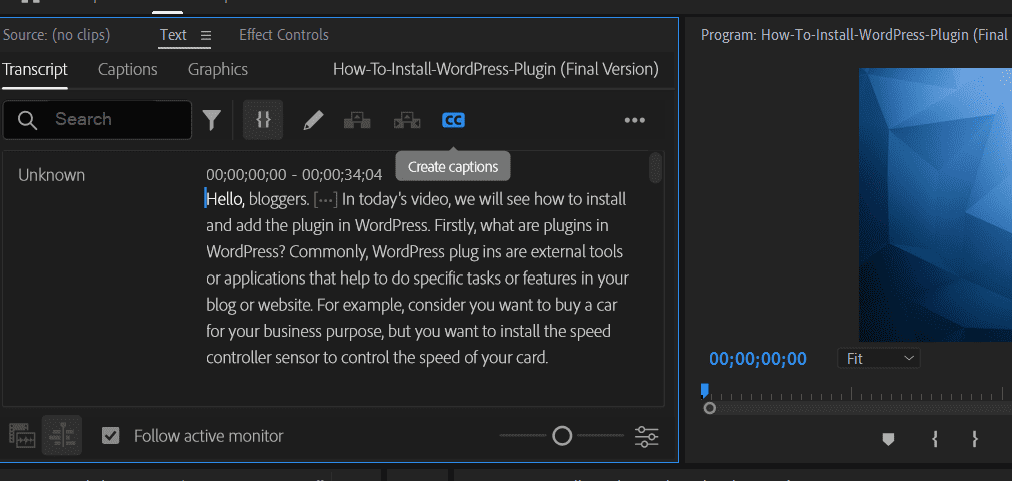
Select the Text option on the top left control panel. Then, click the Transcript and Transcribe button.

Premier Pro will start transcribing the video, which takes a little time, depending on your length.
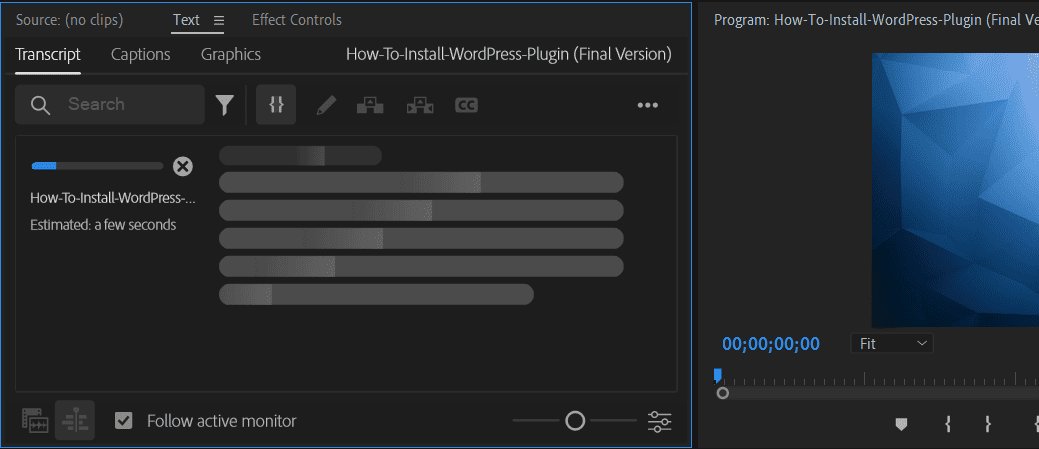
Once it is done, it will look like the below image,
Now, click the “CC” button to create the Caption for the Video. A pop-up dialog box will appear, and only change something if you know other standard captions.
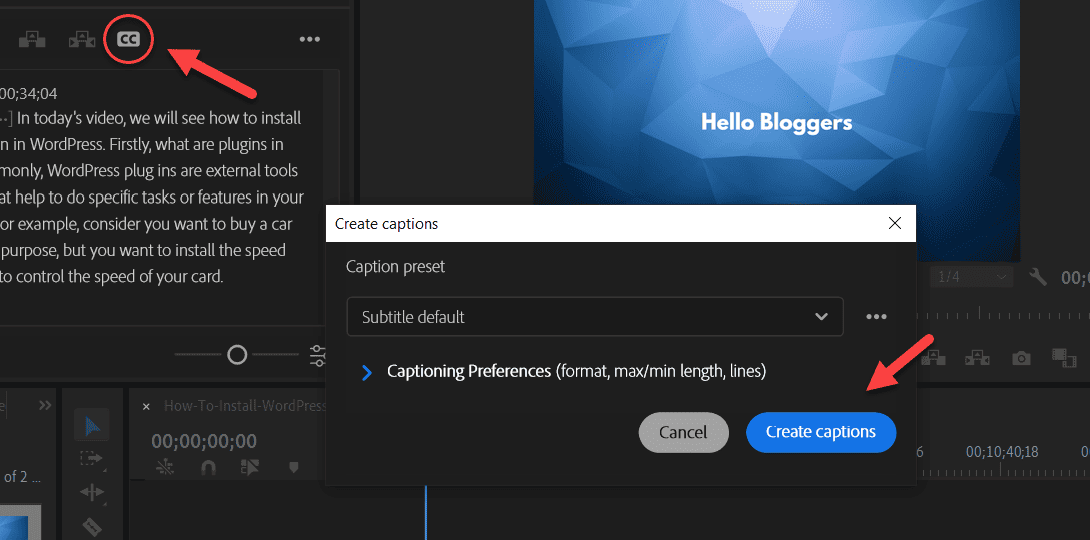
Click Create Captions.
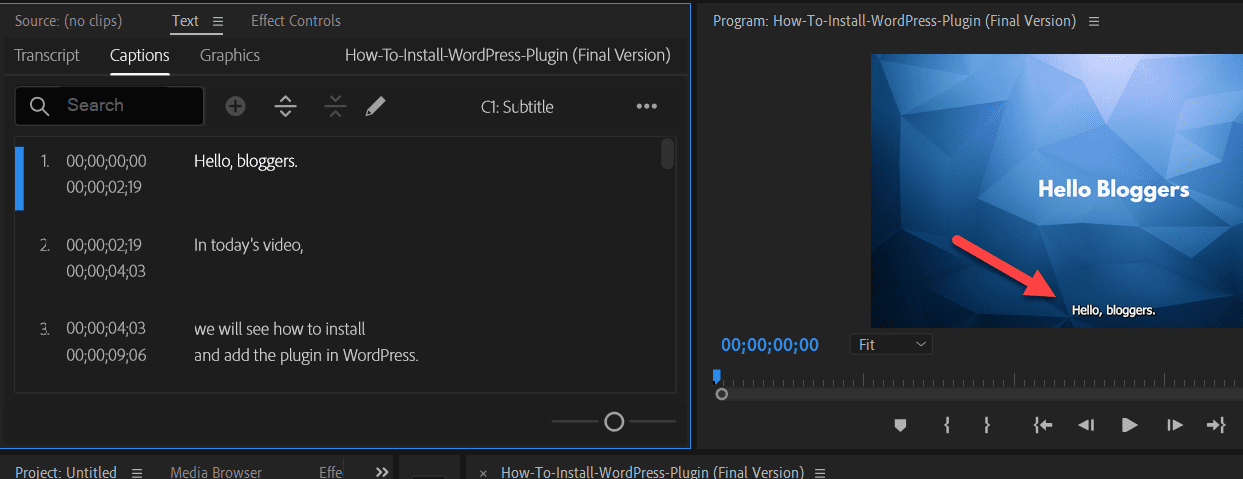
That’s all. The captions will be generated and added to the videos like this.
It may generate words with wrong spellings. Also, when you want to add some changes to the word corrections, there is an option to do.
You can select a particular portion and update that paragraph alone.
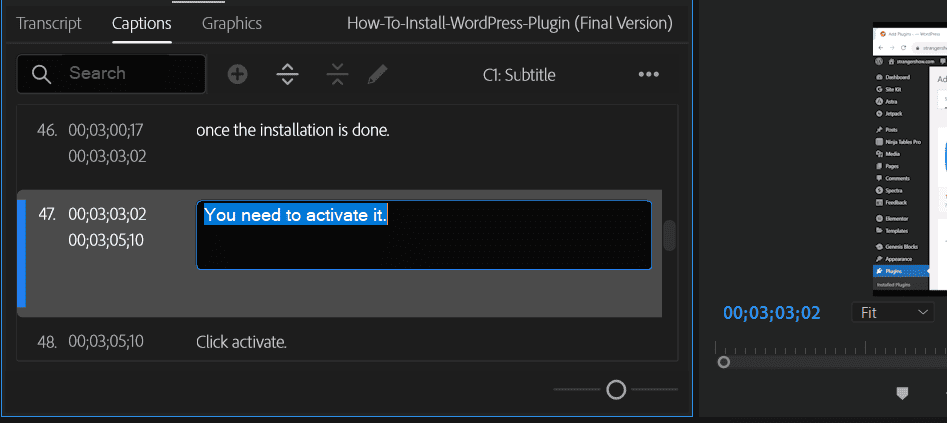
Save the changes.
Common Editing Features
Like Camtasia, Premier Pro contains many basic video editing features for YouTube content creators to make the video as soon as possible.
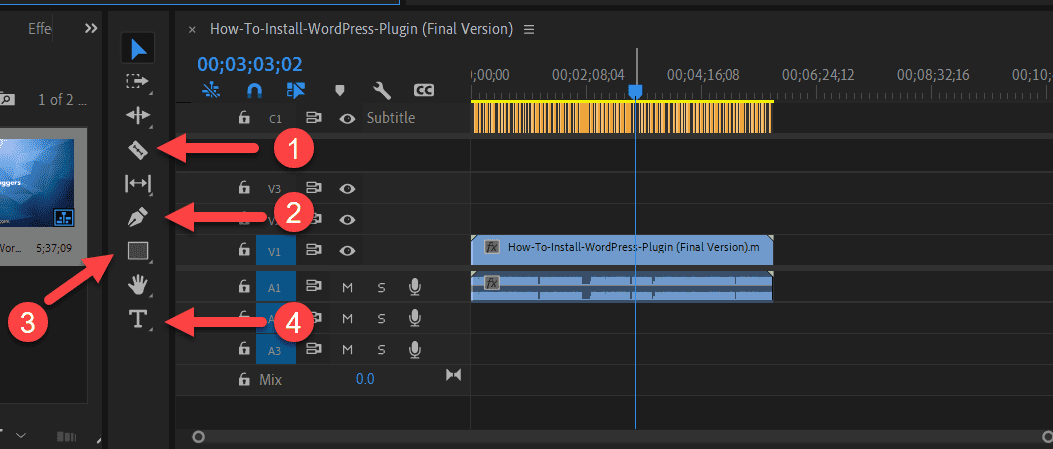
Let me mention some of them briefly.
- Razor Tool: The razor tool is the one I use regularly to cut, trim, and delete videos.
- Pen Tool: For marking the audio points and slowing down or up the volume through the Pen tool.
- Rectangle Tool: Generally, for the background option for any portion or text area. We can change the color of this rectangle box.
- Text: Add the text on the video with different animations or formats. (https://motionarray.com/learn/premiere-pro/add-text-titles-in-adobe-premiere-pro/)
Conclusion
Even an average YouTube video succeeds dramatically when the creator edits it properly. Feel free to ping me any doubts in the comment section.
Related Articles: