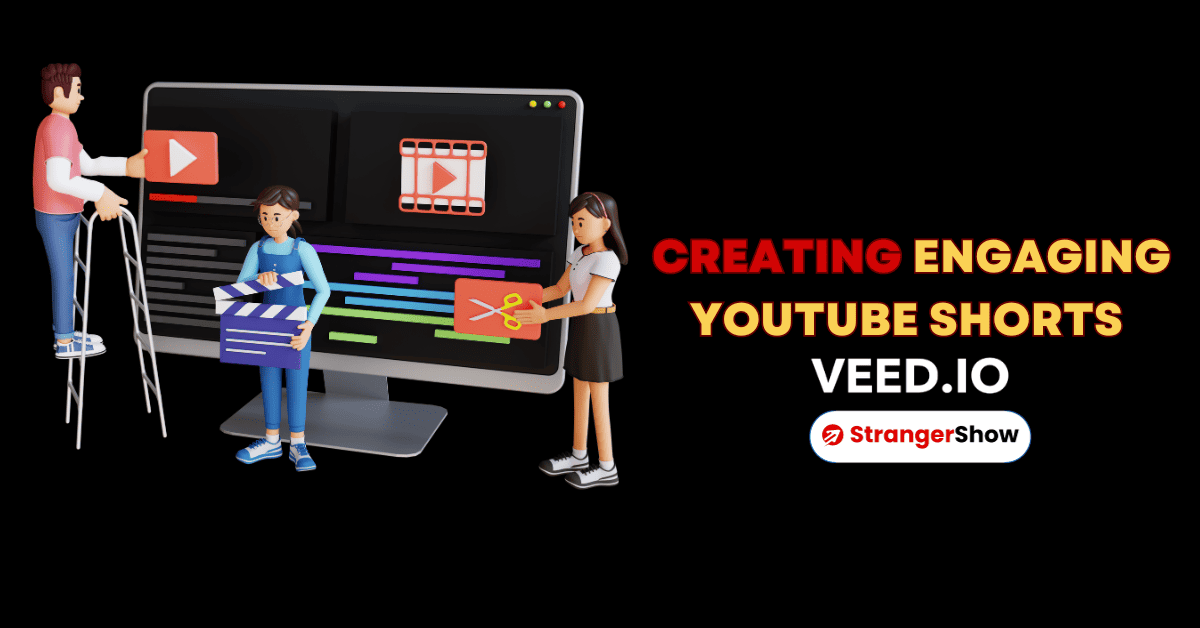
In this detailed article, we will see the creating engaging YouTube Shorts with the VEED Software.
Over the past few years, short-form videos have become a major trend in the digital content industry. Bite-sized videos have proven to be extremely popular, thanks to applications such as TikTok and Instagram Reels. Recognizing this trend, YouTube introduced YouTube Shorts, its take on the short-form video format, to tap into the growing market.
Generally, with its rapid rise in popularity, it’s no surprise that content creators are eager to jump on board. YouTube Shorts leverages the existing massive user base on YouTube, with over 2 billion logged-in monthly users. With such a vast audience, Shorts presents an incredible opportunity for creators to reach and engage with a global viewership.
However, it can be challenging to create engaging YouTube shorts without the right tools. This is where VEED comes into play. In this step-by-step guide, we’ll show you how to create YouTube shorts using VEED, a versatile online video editing tool.
Step 1: Getting Started With VEED
Firstly, to create YouTube Shorts with VEED, you’ll need to have an account. Here’s how to sign up:
- Visit the VEED website https://www.veed.io/.
- Click on the “Sign Up” button in the top right corner.
- You can sign up using your Google, Facebook, or Apple account or by providing your email and creating a password.
- Once you’re signed up and logged in, you’re ready to start creating your Shorts.
Step 2: Uploading Your Video
Before you can edit your YouTube Short, you need to upload your video footage to VEED. Here’s how to do it:
- After signing in to VEED, you’ll land on the dashboard.
- Click on the “Create Project” button. You can also record a video from your computer or laptop or use VEED’s Avatar Video.
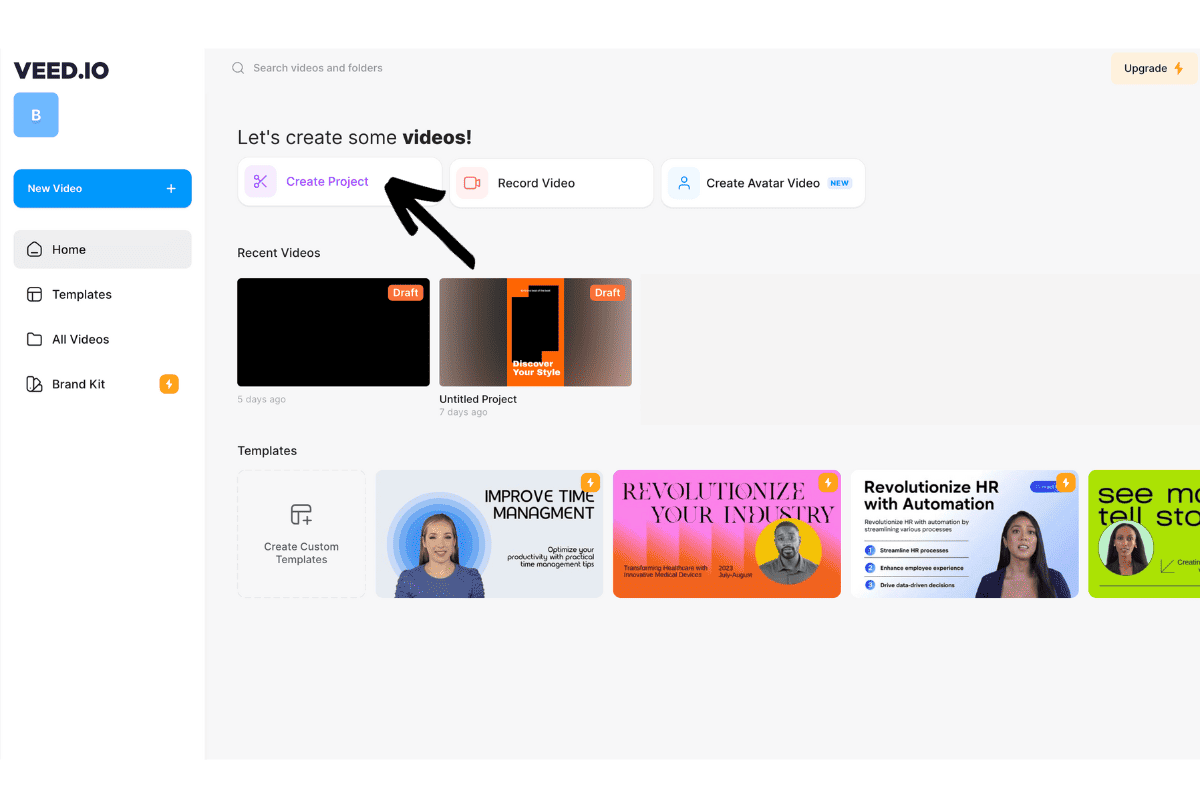
- Choose the video file you want to turn into a Short from your computer.
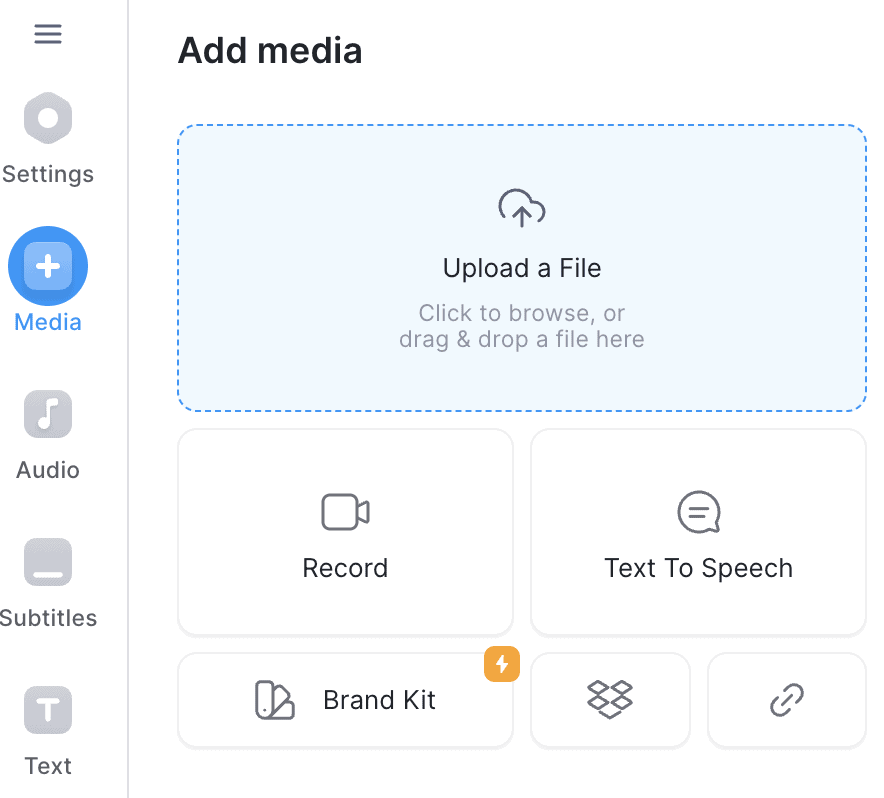
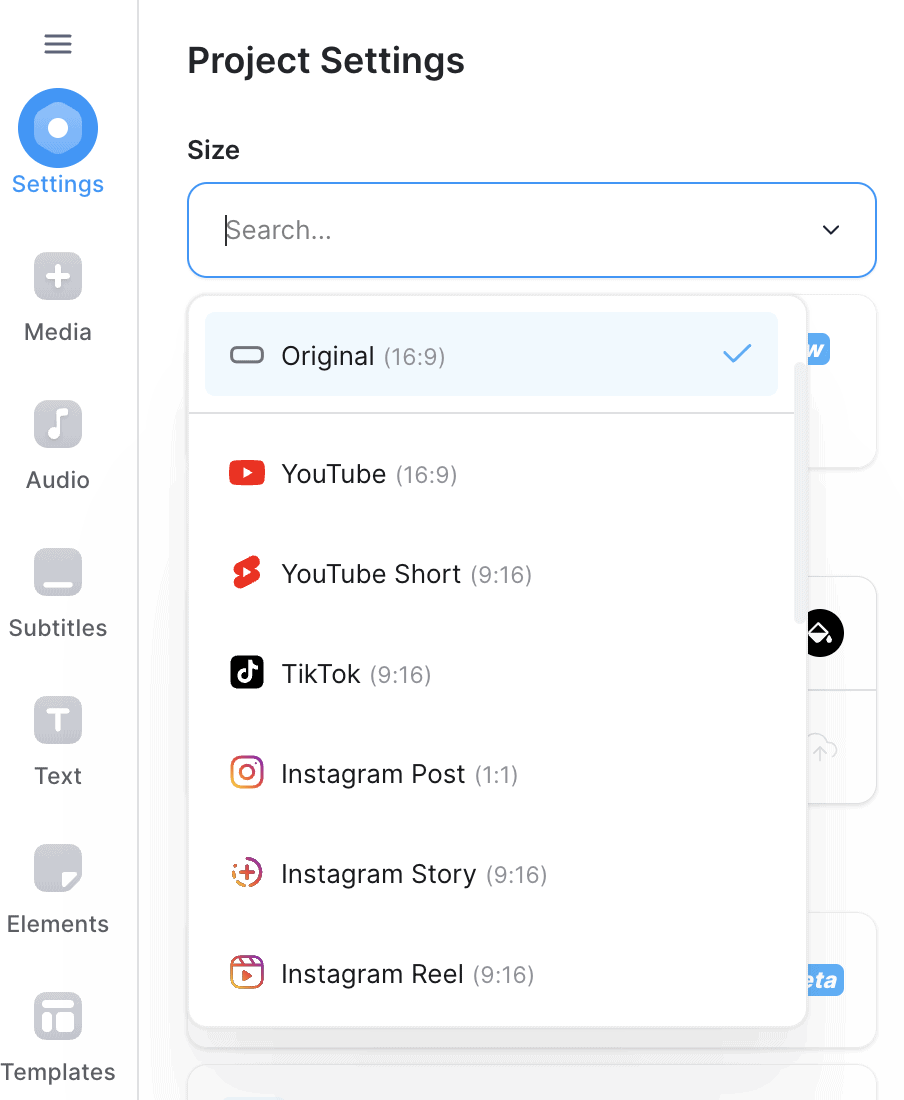
- You also have the option to instantly resize it to the default YouTube short aspect ratio, which is 9:16.
- Once the video is uploaded, it will appear in your VEED workspace.
Now that your video is uploaded, you can start editing and transforming it into an engaging YouTube Short.
Read more: How To Film a YouTube Video in 2023
Step 3: Trimming
- In your VEED workspace, you’ll see your uploaded video.
- Hover over the video’s timeline to reveal the trimming tool.
- Drag the tool’s endpoints to select the portion of the video you want to keep. Make sure to keep it at 60 seconds as that is the maximum length of a YouTube short.
- Click and cut your video to the desired length.

Step 4: Adding Music
- With your trimmed video in the workspace, look for the “Add Audio” tab in the left-hand panel.
- You can search for specific tracks or filter by genre.
- Once you’ve found the perfect music for your Short, click on it, and VEED will automatically add it to your video.
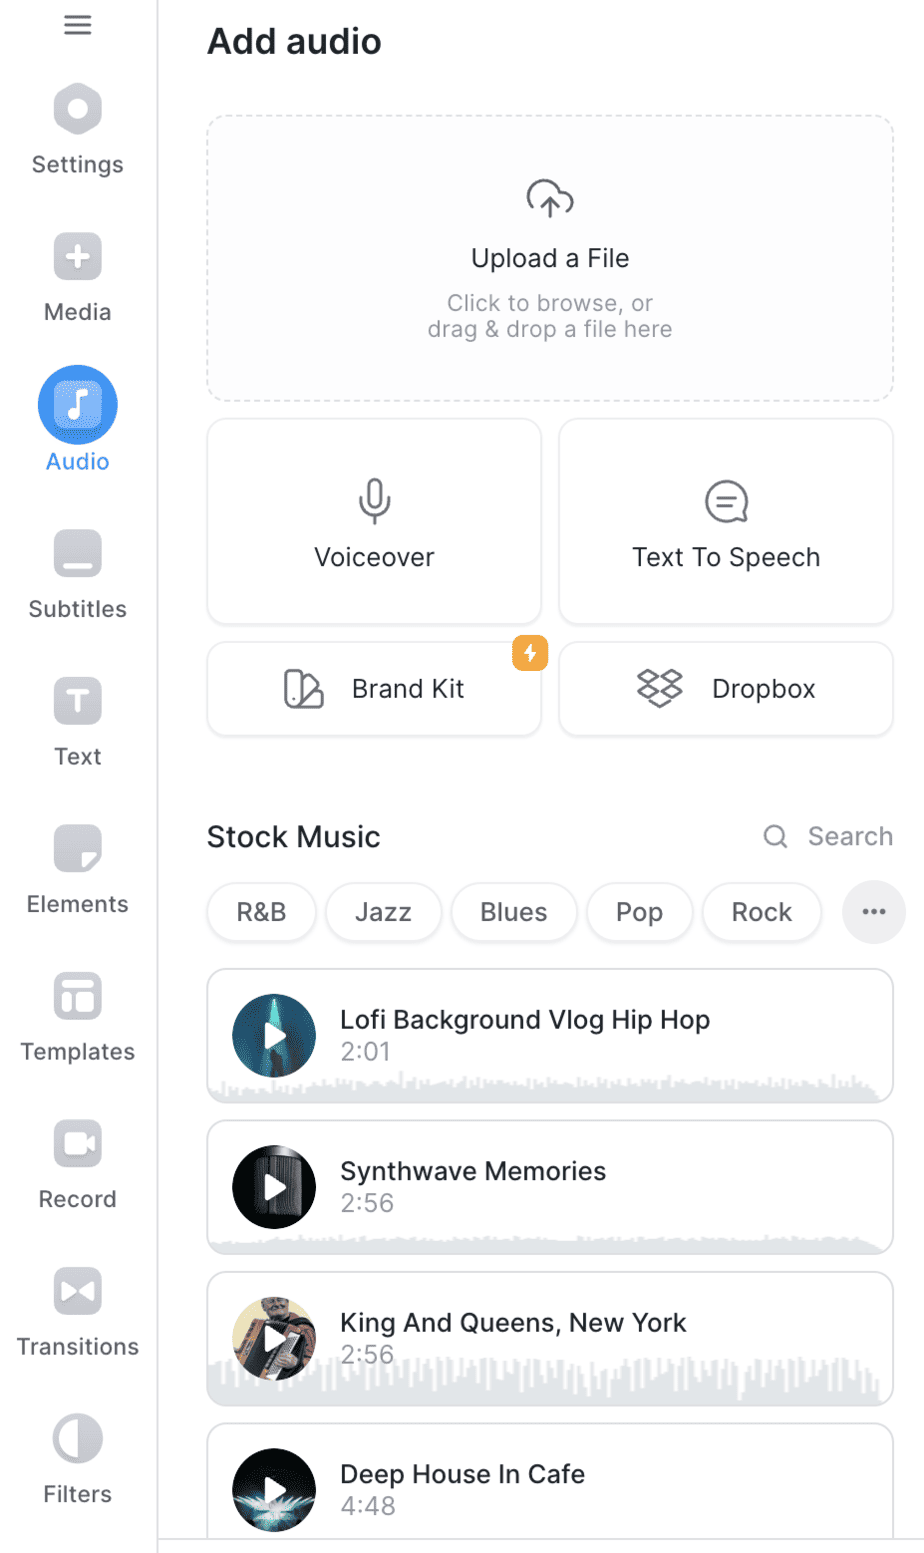
- You also have the option to use Text-to-speech or add a voiceover.
Step 5: Add Subtitles
- In your VEED workspace, select the “Text” tab in the left-hand panel.
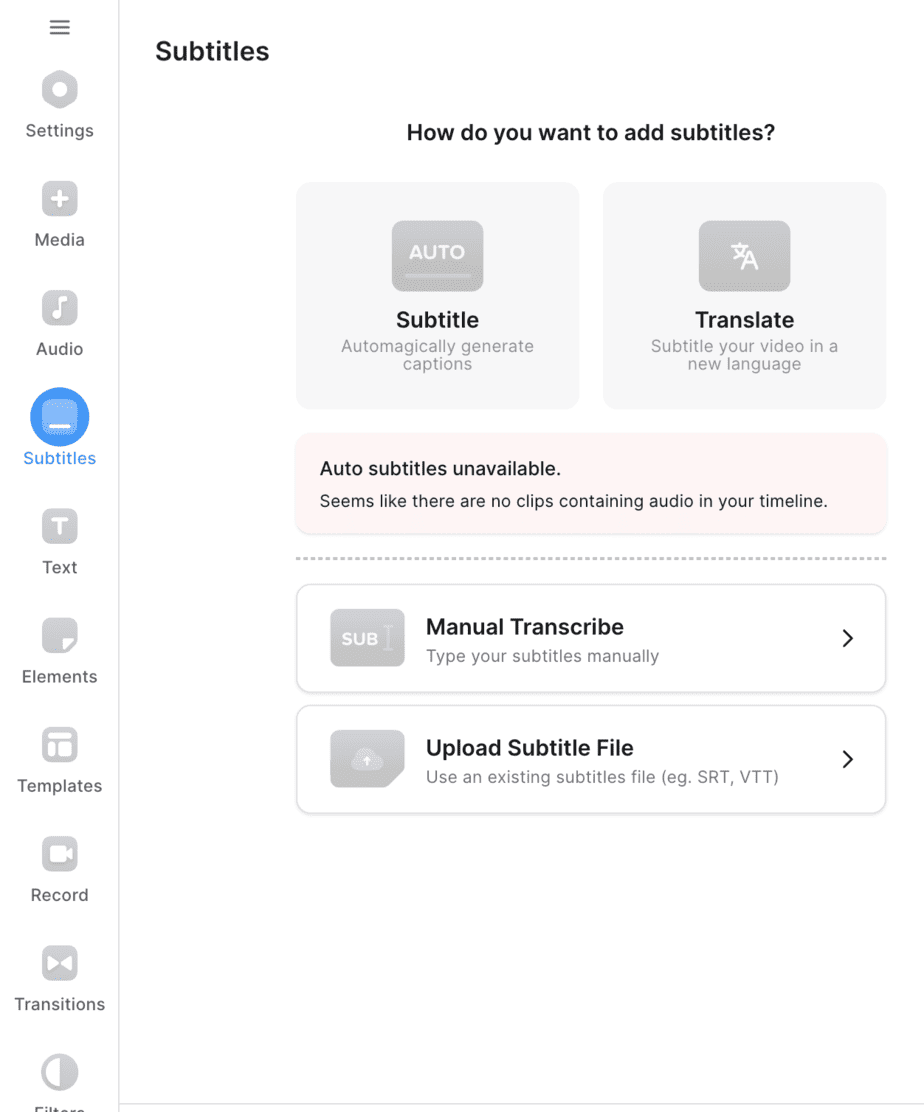
- Click the “Add Subtitle” button to create a text layer on your video.
- Click “Manual transcribe” if you wish to type or paste subtitle text manually.
- Adjust the font, size, color, and positioning of the subtitles to match your video’s style.
- VEED offers an option to automatically generate subtitles based on the audio in your video. Click “Auto Subtitle” to have VEED create subtitles for you, which you can then edit and refine as needed.
Step 6: Add Texts and Elements
Adding Texts
In your VEED workspace, navigate to the “Text” tab on the left-hand panel.
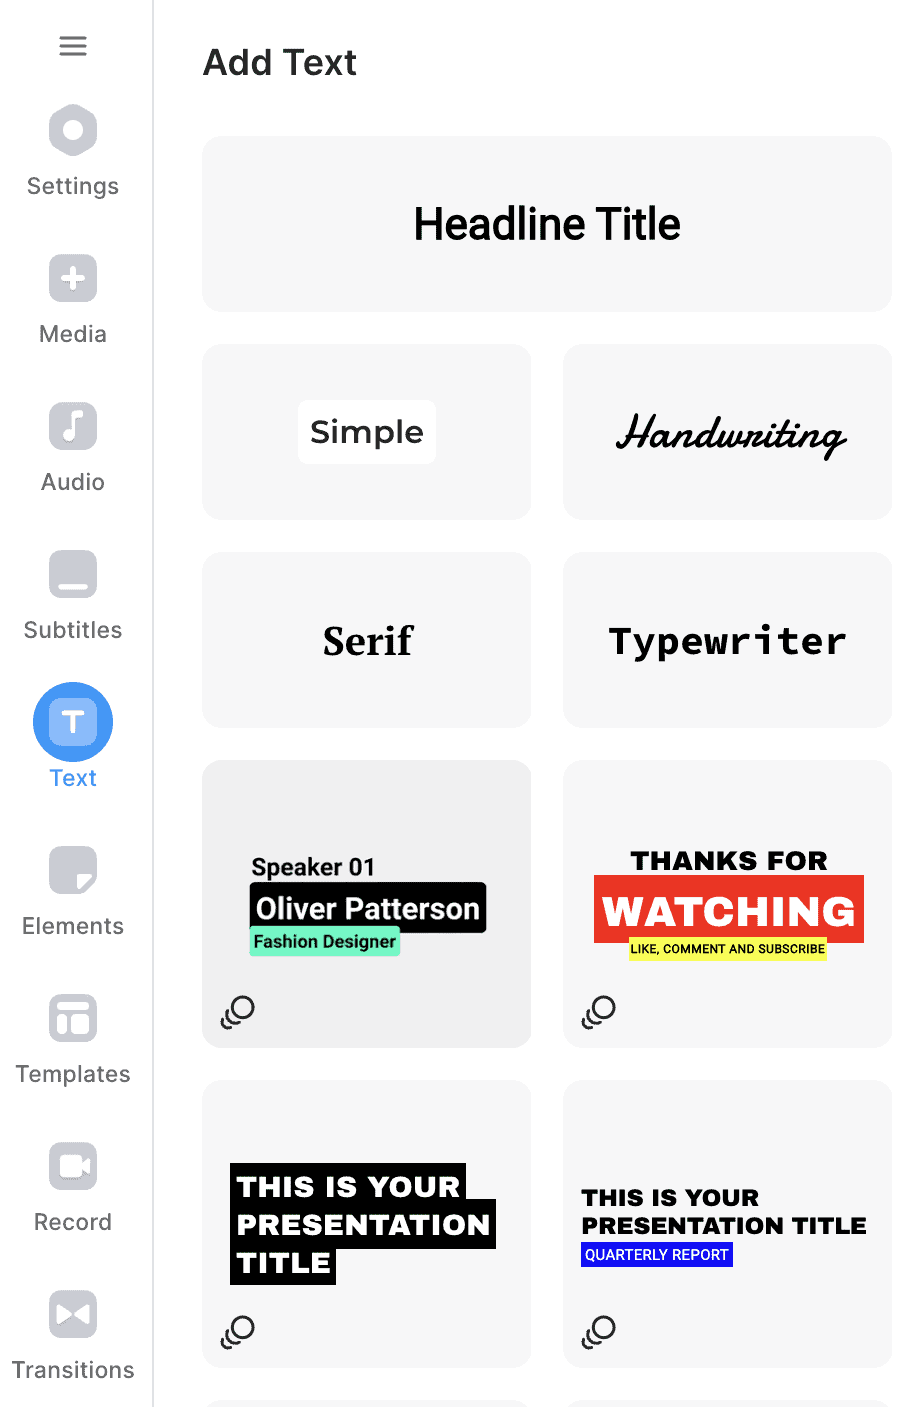
Once you’ve found the text for your Short, click on it, and VEED will automatically add it to your video.
Adding Elements
- Explore the collection of stickers and graphic elements available within VEED. You can add progress bars, emojis, and stickers.
- Select the element you want to add to your YouTube Short.
- Drag and drop the animation or element onto the timeline, positioning it where you want it to appear in your Short.
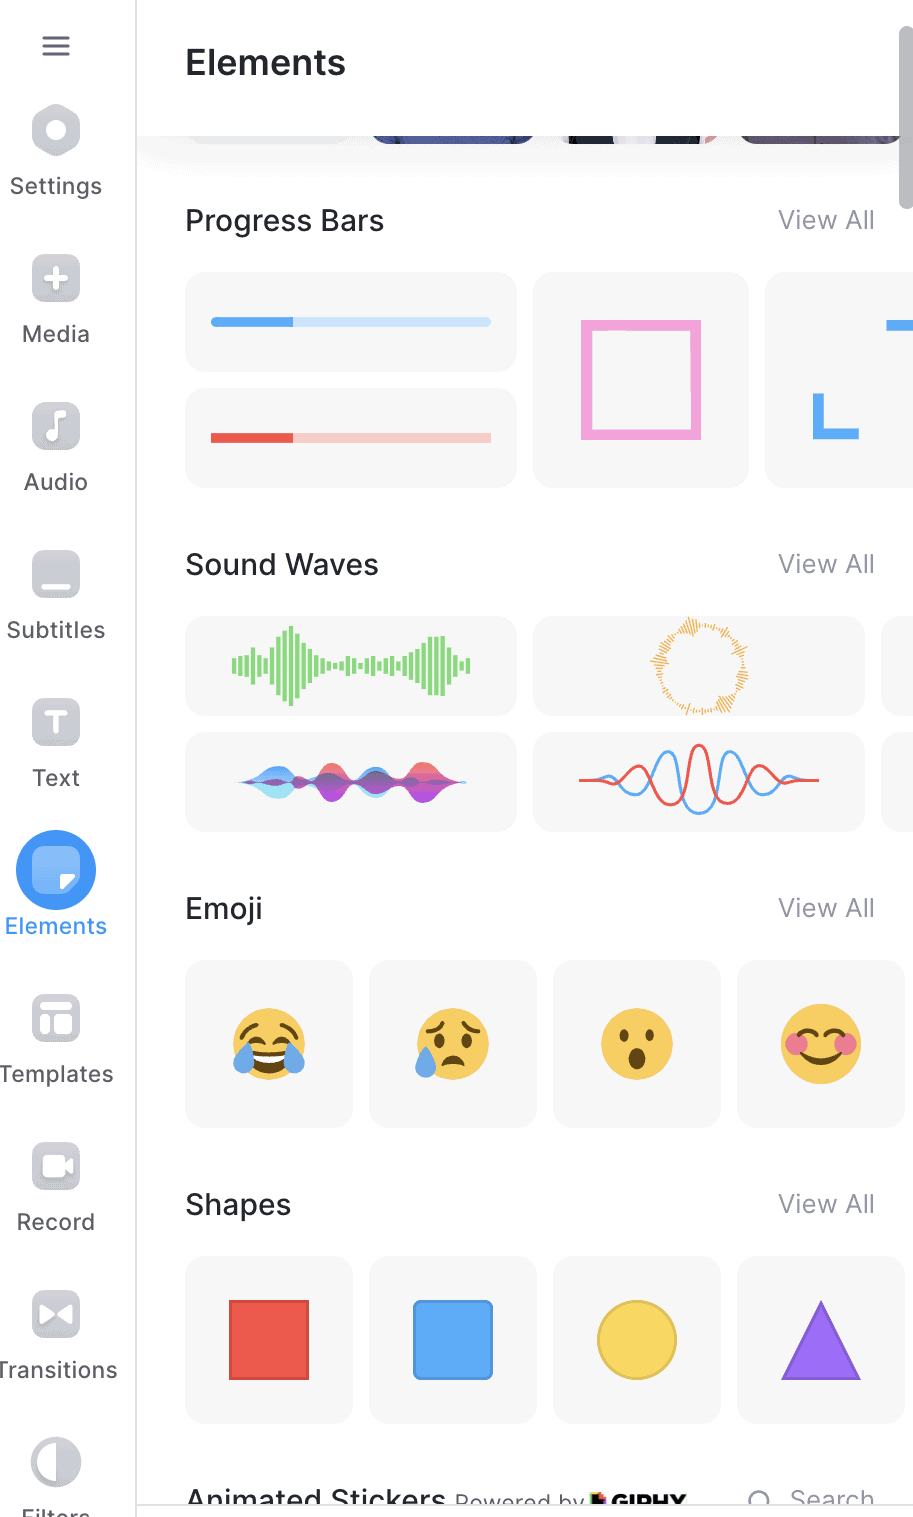
- Adjust the duration, size, and position of the animation or element to fit seamlessly into your video.
- You can layer multiple animations and elements to create visually captivating scenes or transitions.
Step 7: Add Transitions and Filters
Add Transitions
- In your VEED workspace, find the “Transitions” tab in the left-hand panel.
- Browse through the available transitions, including fades, dissolve, blur, and more.
- Select the transition you want to use for your Short.
- Drag and drop the chosen transition between two clips or scenes on the timeline where you want the transition to occur.
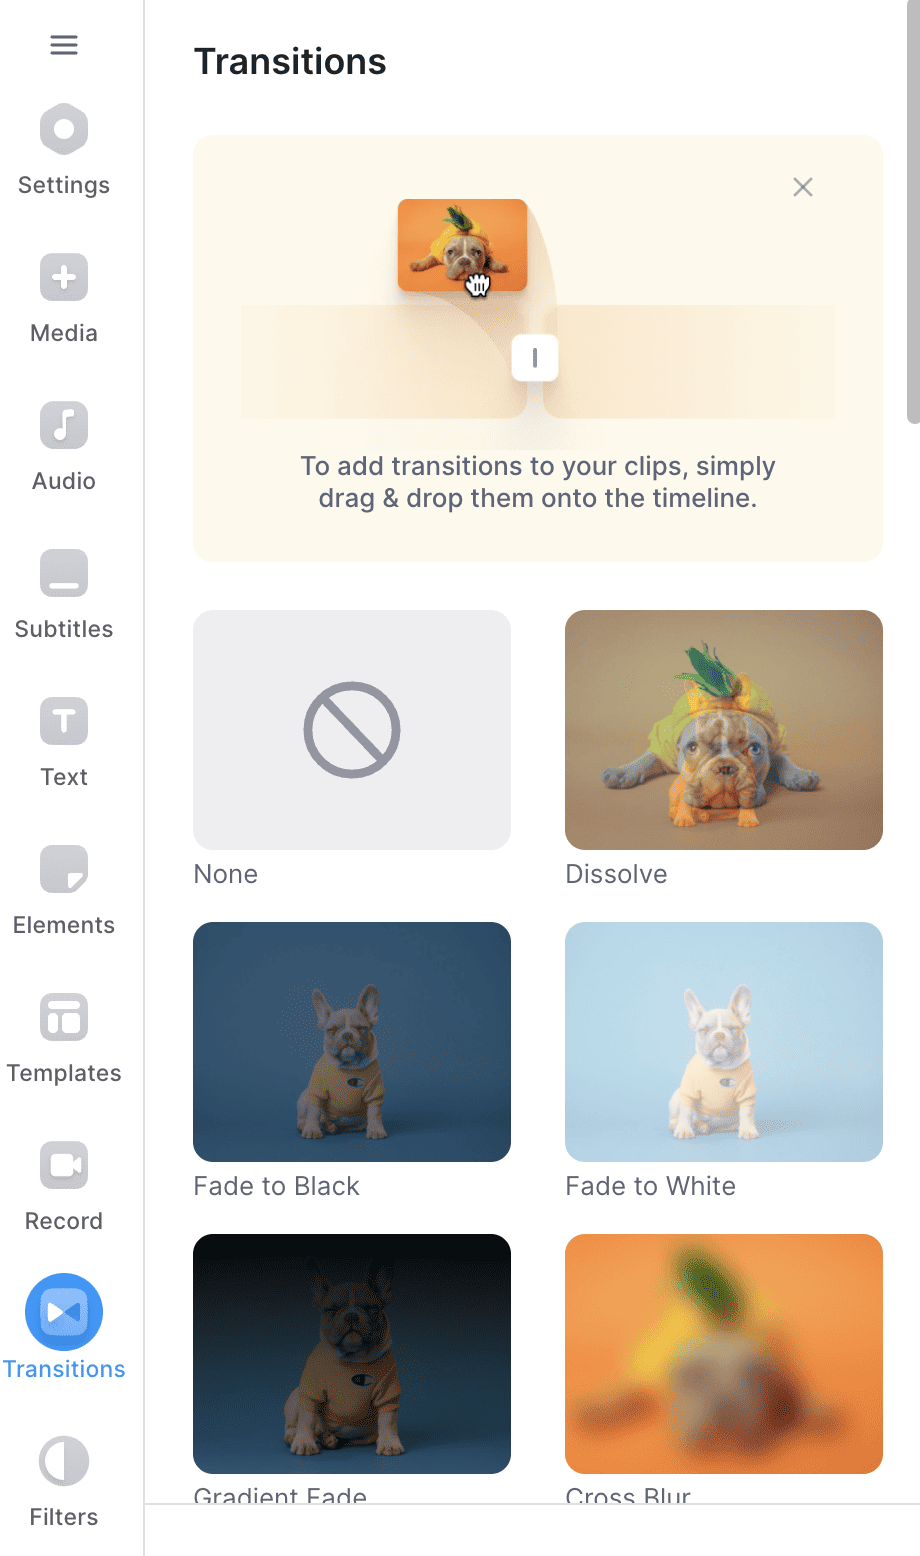
- VEED allows you to customize the duration of the transition, making it as short or as long as desired.
Add Filters
- In your VEED workspace, navigate to the “Filters” tab in the left-hand panel.
- Browse the selection of filters available within VEED. You’ll find options that can give your Short a vintage, cinematic, or modern appearance, among others.
- Select the filter that aligns with the visual style you want to achieve for your YouTube Short.
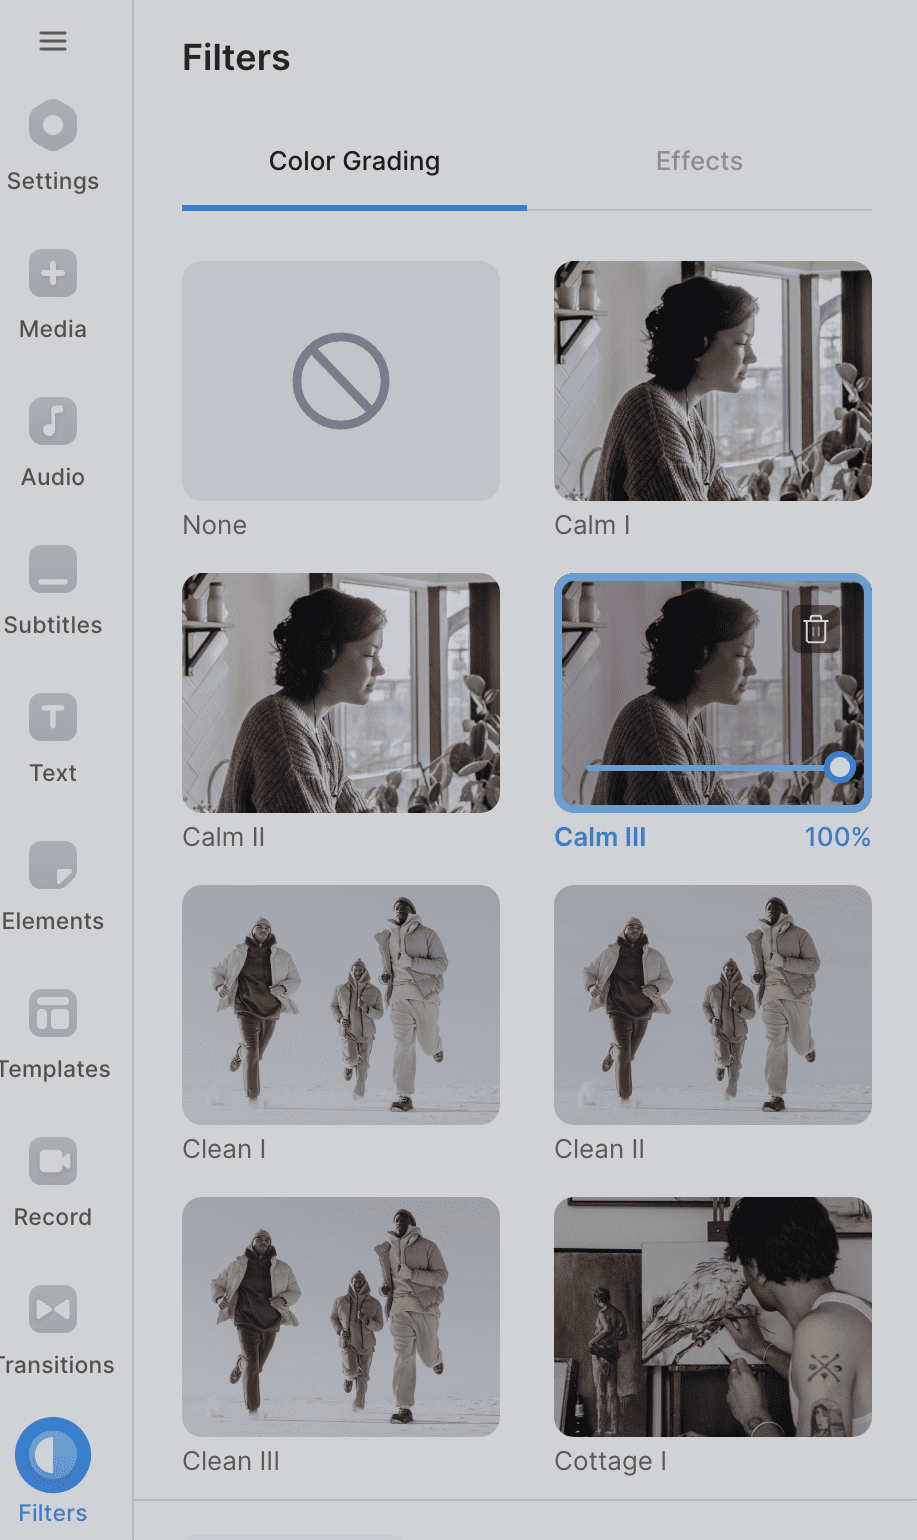
- You can also hover over the “Effects” tab to add effects on your shorts, such as Vignette, Bokeh, or Glitch.
- VEED allows you to adjust the intensity or strength of the filter, giving you control over how pronounced the effect is in your video.
Step 8: Exporting Your Video and Uploading on YouTube
Export Your Video in VEED
- In your VEED workspace, click the “Done” button on the upper right side.
- Click “Export Video” to generate the final version of your YouTube Short. Ensure your Short meets YouTube’s requirements, such as resolution and file type.
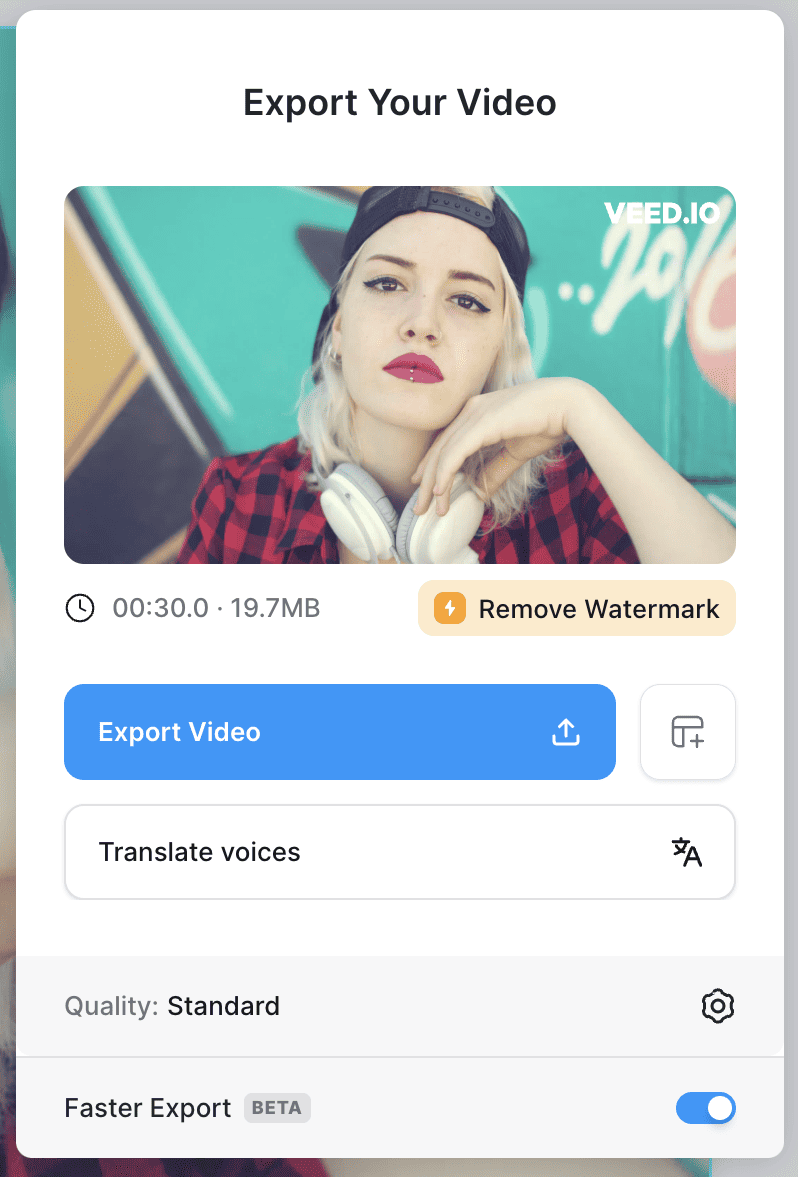
- VEED will process your Short, and when it’s ready, you can download it to your computer.
Uploading to YouTube
- Go to your YouTube channel and click the “Create” button, then select “Shorts.”
- You’ll be taken to the Shorts creation interface. Click the “Upload” button.
- Select the YouTube Short you’ve just exported from VEED on your computer.
- Add a title, description, and any relevant hashtags for your Short.
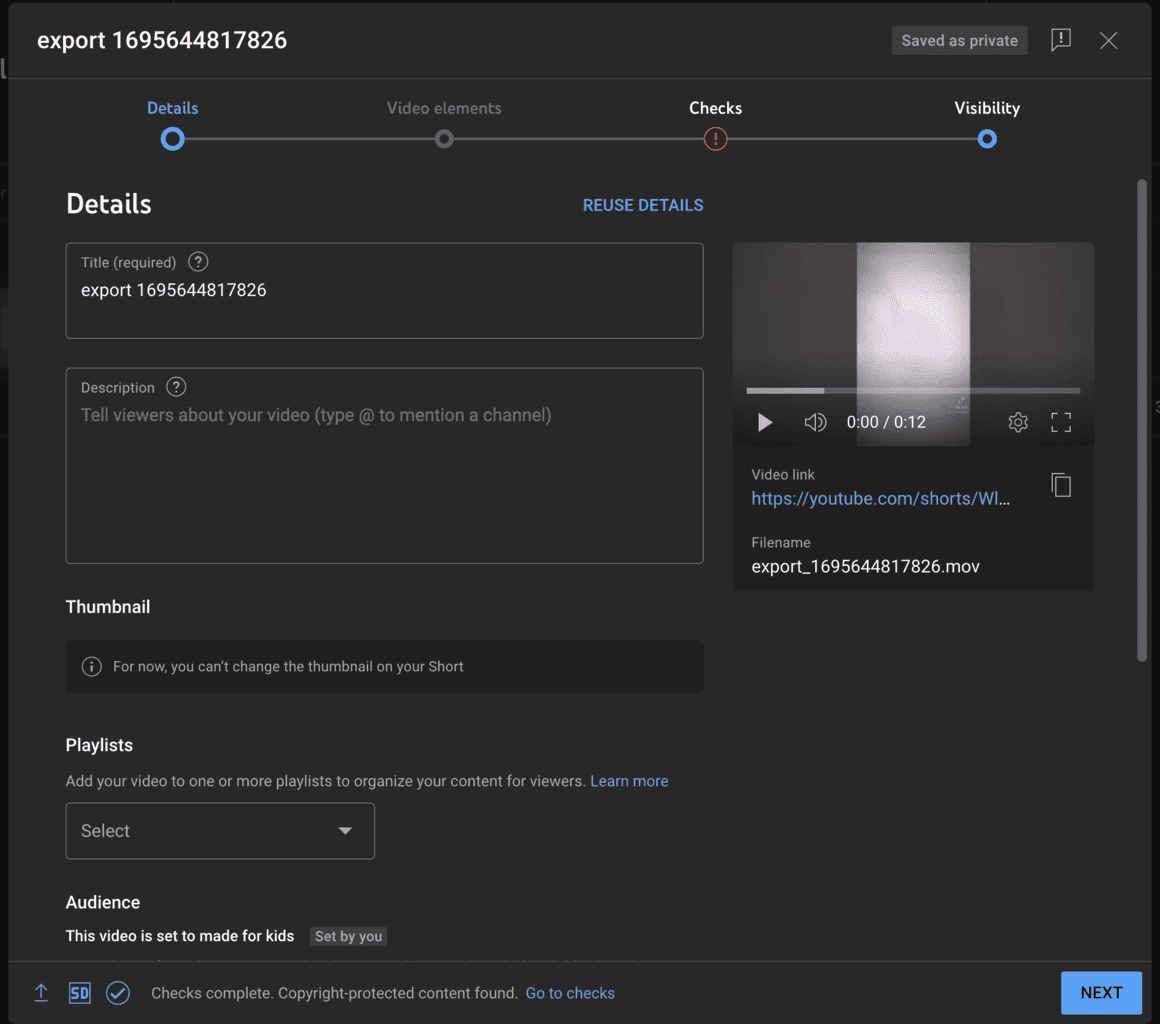
- Choose a video thumbnail that best represents your Short. You can either select from YouTube’s suggestions or upload your custom thumbnail.
- Review the video details and settings to ensure everything is in order.
- Click the “Next” button, then “Post” to publish your YouTube Short. It will be live on the Shorts platform, ready for viewers to discover.
Best Practices in Creating Engaging YouTube Shorts
Creating engaging YouTube Shorts requires a strategic approach that combines creativity with an understanding of the platform’s unique characteristics. Here are some best practices to help you produce compelling Shorts that captivate your audience:
Start with a Hook
Begin your Short with a captivating hook or a visually engaging moment within the first few seconds. Capture your viewers’ attention immediately.
Concise Storytelling
Due to the short format, focus on concise storytelling. Convey your message or story within the limited timeframe.
Trending Topics
Keep an eye on trending topics, challenges, and popular music on YouTube Shorts. Creating content related to trends can boost your visibility.
Titles and thumbnail
Craft an attention-grabbing title and thumbnail that accurately represents your Short. Make it visually appealing and relevant to the content.
Hashtags
Incorporate relevant and trending hashtags in your description to increase discoverability. However, avoid overloading your Short with too many hashtags, as it can look spammy.
Mobile Optimization
Remember that Shorts are primarily viewed on mobile devices. Using a video compressor can help you reduce file size and improve load times without sacrificing its quality, which is important for mobile users.
Consistency and Scheduling
Maintain a consistent posting schedule to keep your audience engaged. Understand your viewers’ active hours and post accordingly.
Cross-Promotion
Share your Shorts on other social media platforms to attract a broader audience. Leverage your existing online presence to promote your Shorts.
Engage with Your Audience
Actively respond to comments and engage with your viewers. Building a sense of community around your Shorts can increase their reach and virality.
Conclusion
YouTube Shorts videos are easy to create when you dealing with the editing capabilities of VEED, it provides an top-to-bottom solution for the creating engaging shorts in one place. This step-by-step guide has demonstrated how to navigate the world of Shorts, from signing up on VEED to optimizing for virality.
As you on your YouTube Shorts journey, combine creativity with strategy, stay adaptable, and always prioritize quality. With dedication, your Shorts have the potential to reach and resonate with a global audience, making your mark in the vibrant world of online video content.