How Do You Upload a Private Video on YouTube? – Are you searching this so far? Then, your search ends here.
Generally, people love to upload videos on YouTube for the world to see their creativity. However, sometimes, they want to share videos only for specified crews, colleagues, or families.
To handle this, YouTube offers another option called “Private video.” It means you could keep the videos on your own, by definition, and not for the public.
If you’re a YouTuber, then uploading private videos is an excellent approach. It helps upload many videos earlier, tune them later, and finally publish them live. Also, it’s helpful for backup purposes.
Everyone uses private videos, depending on their situation.
So, in this post, I will explain “how to upload a private video on YouTube” with a step-by-step picturization guide.
How to Upload a Private Video on YouTube
Quick Steps:
- Go to your YouTube account > click the “upload video” button.
- Click the “SELECT FILES” button and choose the video.
- Fill out the basic video details like title, description, and tags.
- Move onto the “Visibility” tab and select the Private option.
- Finally, click the Publish button.
Above are the quick basic steps to upload a private video, further discussed below with the detailed image.
Step 1: Go to YouTube
Firstly, go to YouTube.com, sign in with your account, and click the Upload Video button on the top right.

Kindly refer to the above image.
Step 2: Upload Video on YouTube
Now, click the “Select Files” button and choose the video you want to upload.
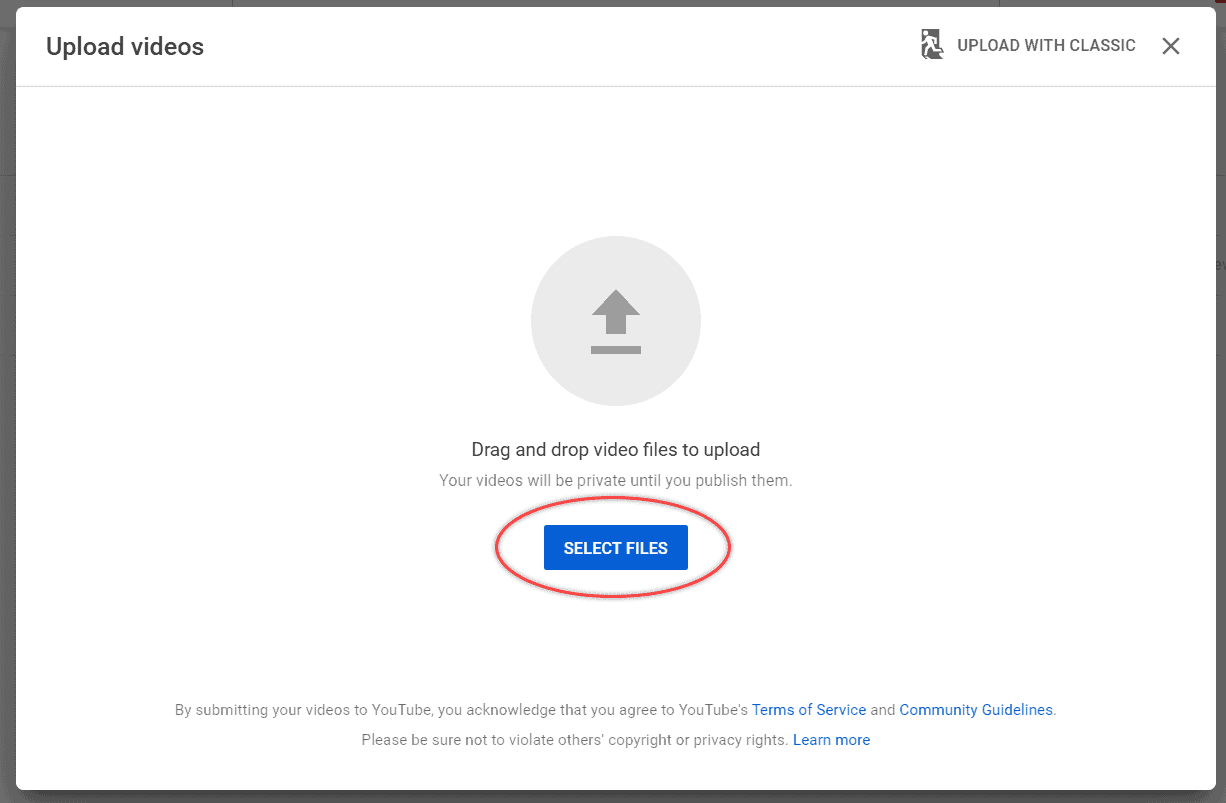
Note: Choose the file with the appropriate name instead of adding temporary names like (final.mp4, test.mp4, 1.mp4).
Step 3: Enter Basic Details
Now, fill out the essential video details like title, description, tag, custom thumbnail, made-for-kids section, etc.
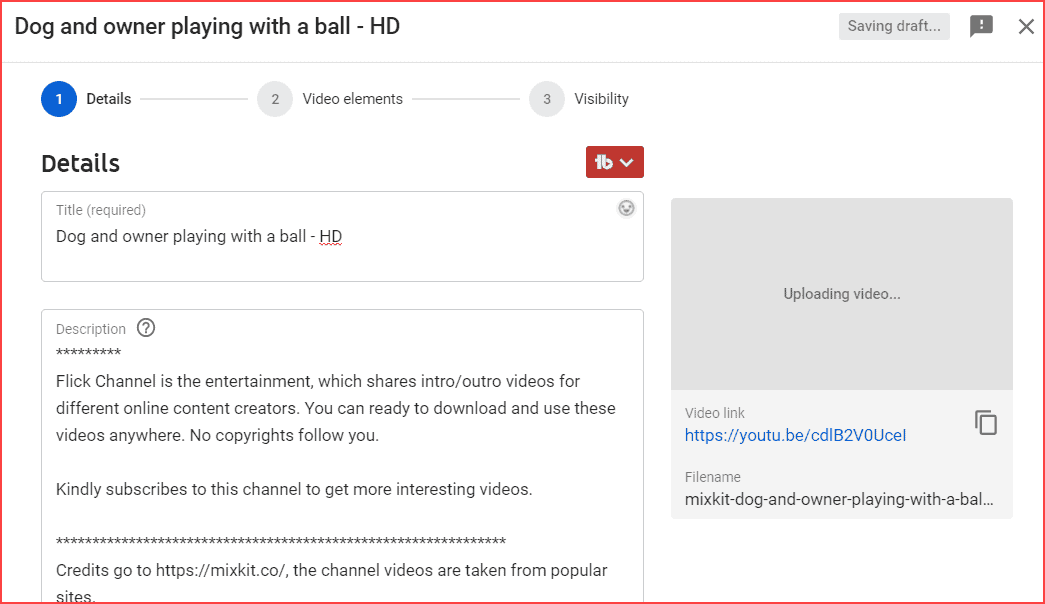
To be franked, the above-mentioned parts are the essential fields to fill up for every YouTuber to rank their videos. However, it’s not required for private videos; for good practice, keep things as they are.
Tip: To find competitors’ used keywords, use the TubeBuddy tool and get it. Then, use those keywords in the Video title, description, and tags. Read more…
Step 4: Set Private Video as Visibility
Now, navigate the Visibility tab and choose the visibility option as “Private.”
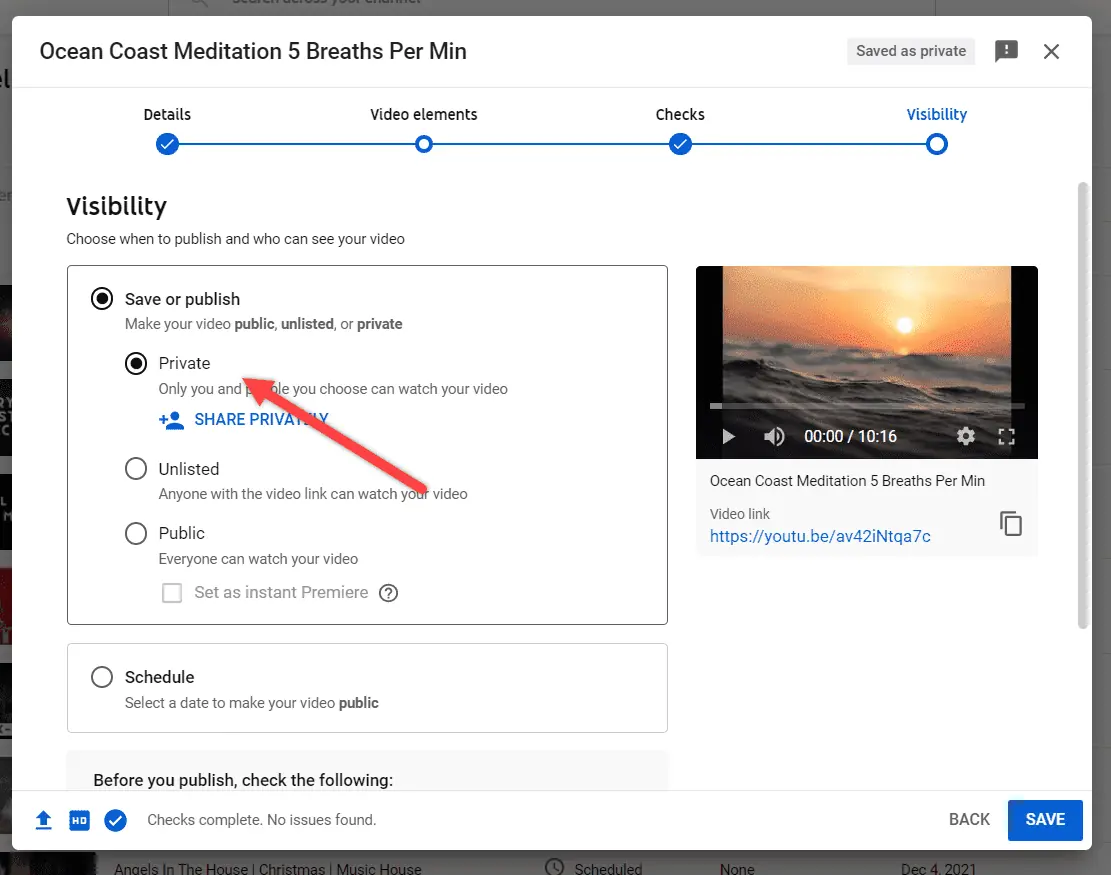
Finally, click the Save button. That’s all. You’ve uploaded the first private video.
It won’t be visible or notify your subscribers or viewers until you make that video public.
Once the private video is created, the private video link will be generated, which helps to watch the video through the channel owner’s login and shareable account members. Therefore, no one can see private videos besides the channel owners/access members.
Also, if you want to change the video visibility, then change the option to “Public” or “Schedule as Public” in the visibility option. For scheduling the video, read the below article:
Bonus Tip for Creators: For better video performance, I recommend you initially upload the video into private mode, check it thoroughly, and then publish it publicly.
Many YouTube content creators (including me) forget to add descriptions, tags, and other metadata. After publishing the video, they fix their errors. Still, it’s a bad plan to release the video on YouTube with mistakes.
If you’re a content creator and need to handle this situation to upload videos properly, then read further.
With the help of maintaining the checklist option, creators can handle the video meta details more precisely. If you want to know more about it, read the chapter below.
Upload Video with Checklists
I failed to fill the tags and description area when I initially uploaded videos on YouTube. Sometimes description. Sometimes, I failed to add the end screen. And it goes on…
This literally makes me upset and tired. To overcome this, I found the option of Maintaining the Upload Checklist provided by the TubeBuddy tool.
What it will do is once you upload the video, it will pop out the missing details on the YouTube interface itself (nowhere else we need to go). Therefore, the problems can be quickly sorted out, and changes can be made immediately.
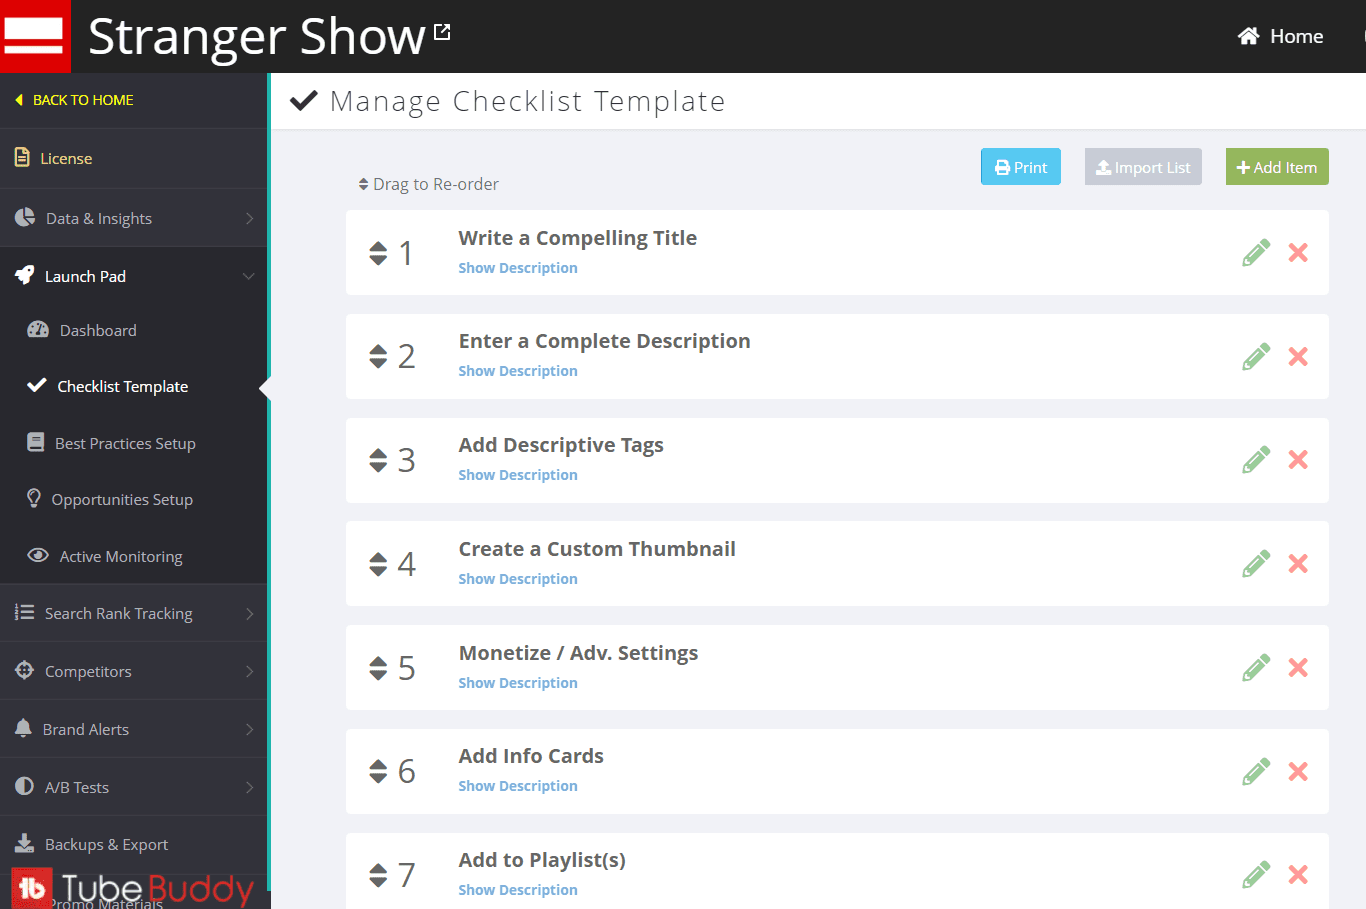
In the meantime, you can maintain and operate the checklist based on your specifications on this tool. Check out the above image.
It’s easy to use. FREE! No need to pay anything. If you want to try it out, click here, and install the TubeBuddy browser extension.
Also Read,
- How to add a video title that gets more views on YouTube
- How to add a video description that gets more views on YouTube
Take your time to create a quality video, optimize it, and publish it. The first impression is the best impression to attract your audience.
How Do I Give Access to a Private Video?
The question is, how do I give someone access to see my private YouTube video?
For detailed info, read this article on how to share a private YouTube video. However, here I will explain it shortly.
Firstly, open the private video that you want to share privately. And then, choose the Share Privately option under Private visibility. Refer to the below image.
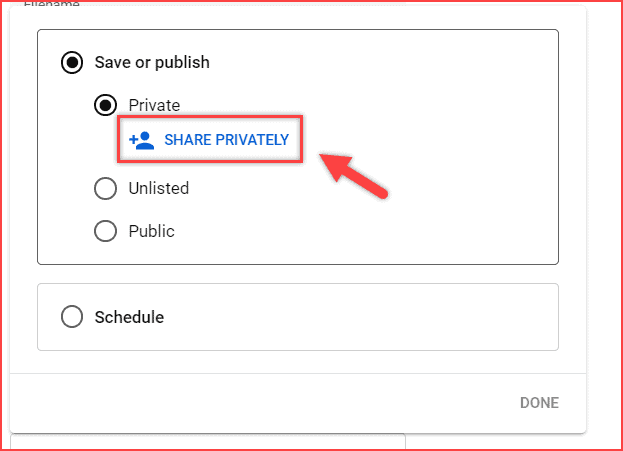
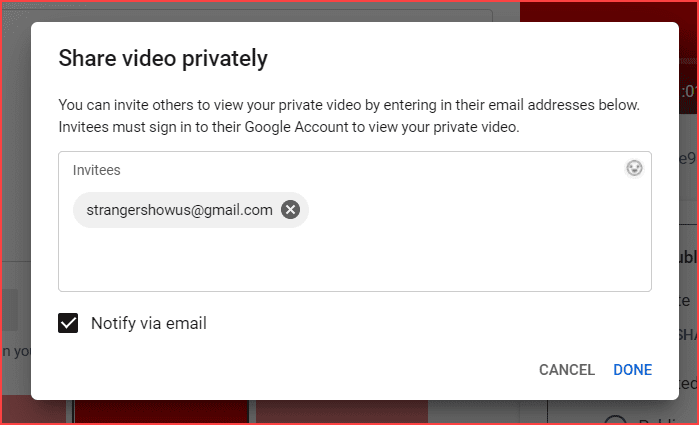
Once you click the SHARE PRIVATELY option, enter the Email ID of the respective recipient. That’s all. You’ve given someone access to see the private video.
If you want to know more about YouTube video feature mode settings, check out the table of video privacy settings below.
| Feature | Private | Public | Unlisted |
|---|---|---|---|
| Can Share URL | No | Yes | Yes |
| Can be added to a channel section | No | Yes | Yes |
| Can show up in search, related videos, and recommendations | No | Yes | No |
| Posted on your channel | No | Yes | No |
| Shows in Subscriber feed | No | Yes | No |
| Can be commented on | No | Yes | Yes |
| Can show up in a public playlist | No | Yes | Yes |
FAQ’s
Private: It refers to only the channel owner; the accessible members can see the video. The user must have a YouTube account to view the private video (if they have shareable links).
Unlisted: It means the video won’t appear in the suggestion video lists or channels. But anyone can view it even though they don’t have a YouTube account (if they have a shareable link).
100% secure. Only accessible members can view the video. It won’t show up in any video suggestions on YouTube.
No. Only public videos are watchable by subscribers.
Conclusion
As a result, I hope you understand how to upload a private video on YouTube. Let me know if you have any questions or doubts in the comment section. I usually reply to all my comments. Also, share this post on Twitter.

Also Read:
Sharing is caring!
this is not working. i only see Get Sharable link option. There is No such an option called “Share Privately” and cant assign email addresses.,
Hey Mujeeb,
Get into the private video, not on the My videos page… There you’ll find the “Share privately” menu option on the right side. Still, you can’t find means, let me know.
Good luck!
sorry.. i cant find it in private video details page too. the option to change visibility is there. but not share with emails
Hi Mujeeb,
Can you share the screenshot of it through my Instagram account?
Can a private video be shared as part of a program via Hopin?
Sorry, it’s not possible.
If I click on Share Private Video it is not working. Does this feature been removed ?
Not really Raghu, You can able to share private videos. Follow my steps,
1. Go to YouTube Studio
2. Click the “videos” tab on the left sidebar.
3. Your videos will be shown. Now hover the video, you’ll be seen a menu icon. Click that.
4. Finally, choose the Get Shareable link.
You can able to share that link.
If you wanna more information, kindly read this post: How to share private video on YouTube.